

Quickstart
Create a knowledge base from an English research paper, ask a question, and check the answer against its source. This tutorial uses Scikit-learn: Machine Learning in Python, a six-page paper publicly available from the Journal of Machine Learning Research (JMLR).
You do not need to understand machine learning or run the code in the paper. You will ask about one specific fact that you can verify in the original document.
Before you begin
Sign in to MOI and enter a workspace where you can import files and create knowledge bases.
Use the language control in the top navigation to select English.
Download the sample paper from JMLR and save it as
scikit-learn-machine-learning-in-python.pdf.Import the PDF into a Catalog volume in your workspace before adding it to the knowledge base. Use Import Tasks under Data Connection for the local file import. See Data Loading for configuration details. Confirm that the PDF appears in Catalog before continuing.
The screenshots use the following names. If you already imported the PDF elsewhere, use its actual Catalog location throughout.
Resource |
Name or location |
|---|---|
Catalog |
|
Database |
|
Volume |
|
File |
|
Knowledge base |
|
This tutorial uses a paper published in 2011. Its software versions and figures describe that paper, rather than the current scikit-learn release.
1. Create a knowledge base
Select Data in the top navigation and confirm that you are in the workspace containing the PDF.
Under Resource Center in the left navigation, select Knowledge Base.
Click Create Knowledge Base.
Enter
moi_first_knowledgein Knowledge Base Name. You can leave Remark empty and keep Advanced options unchanged.Click Finish.
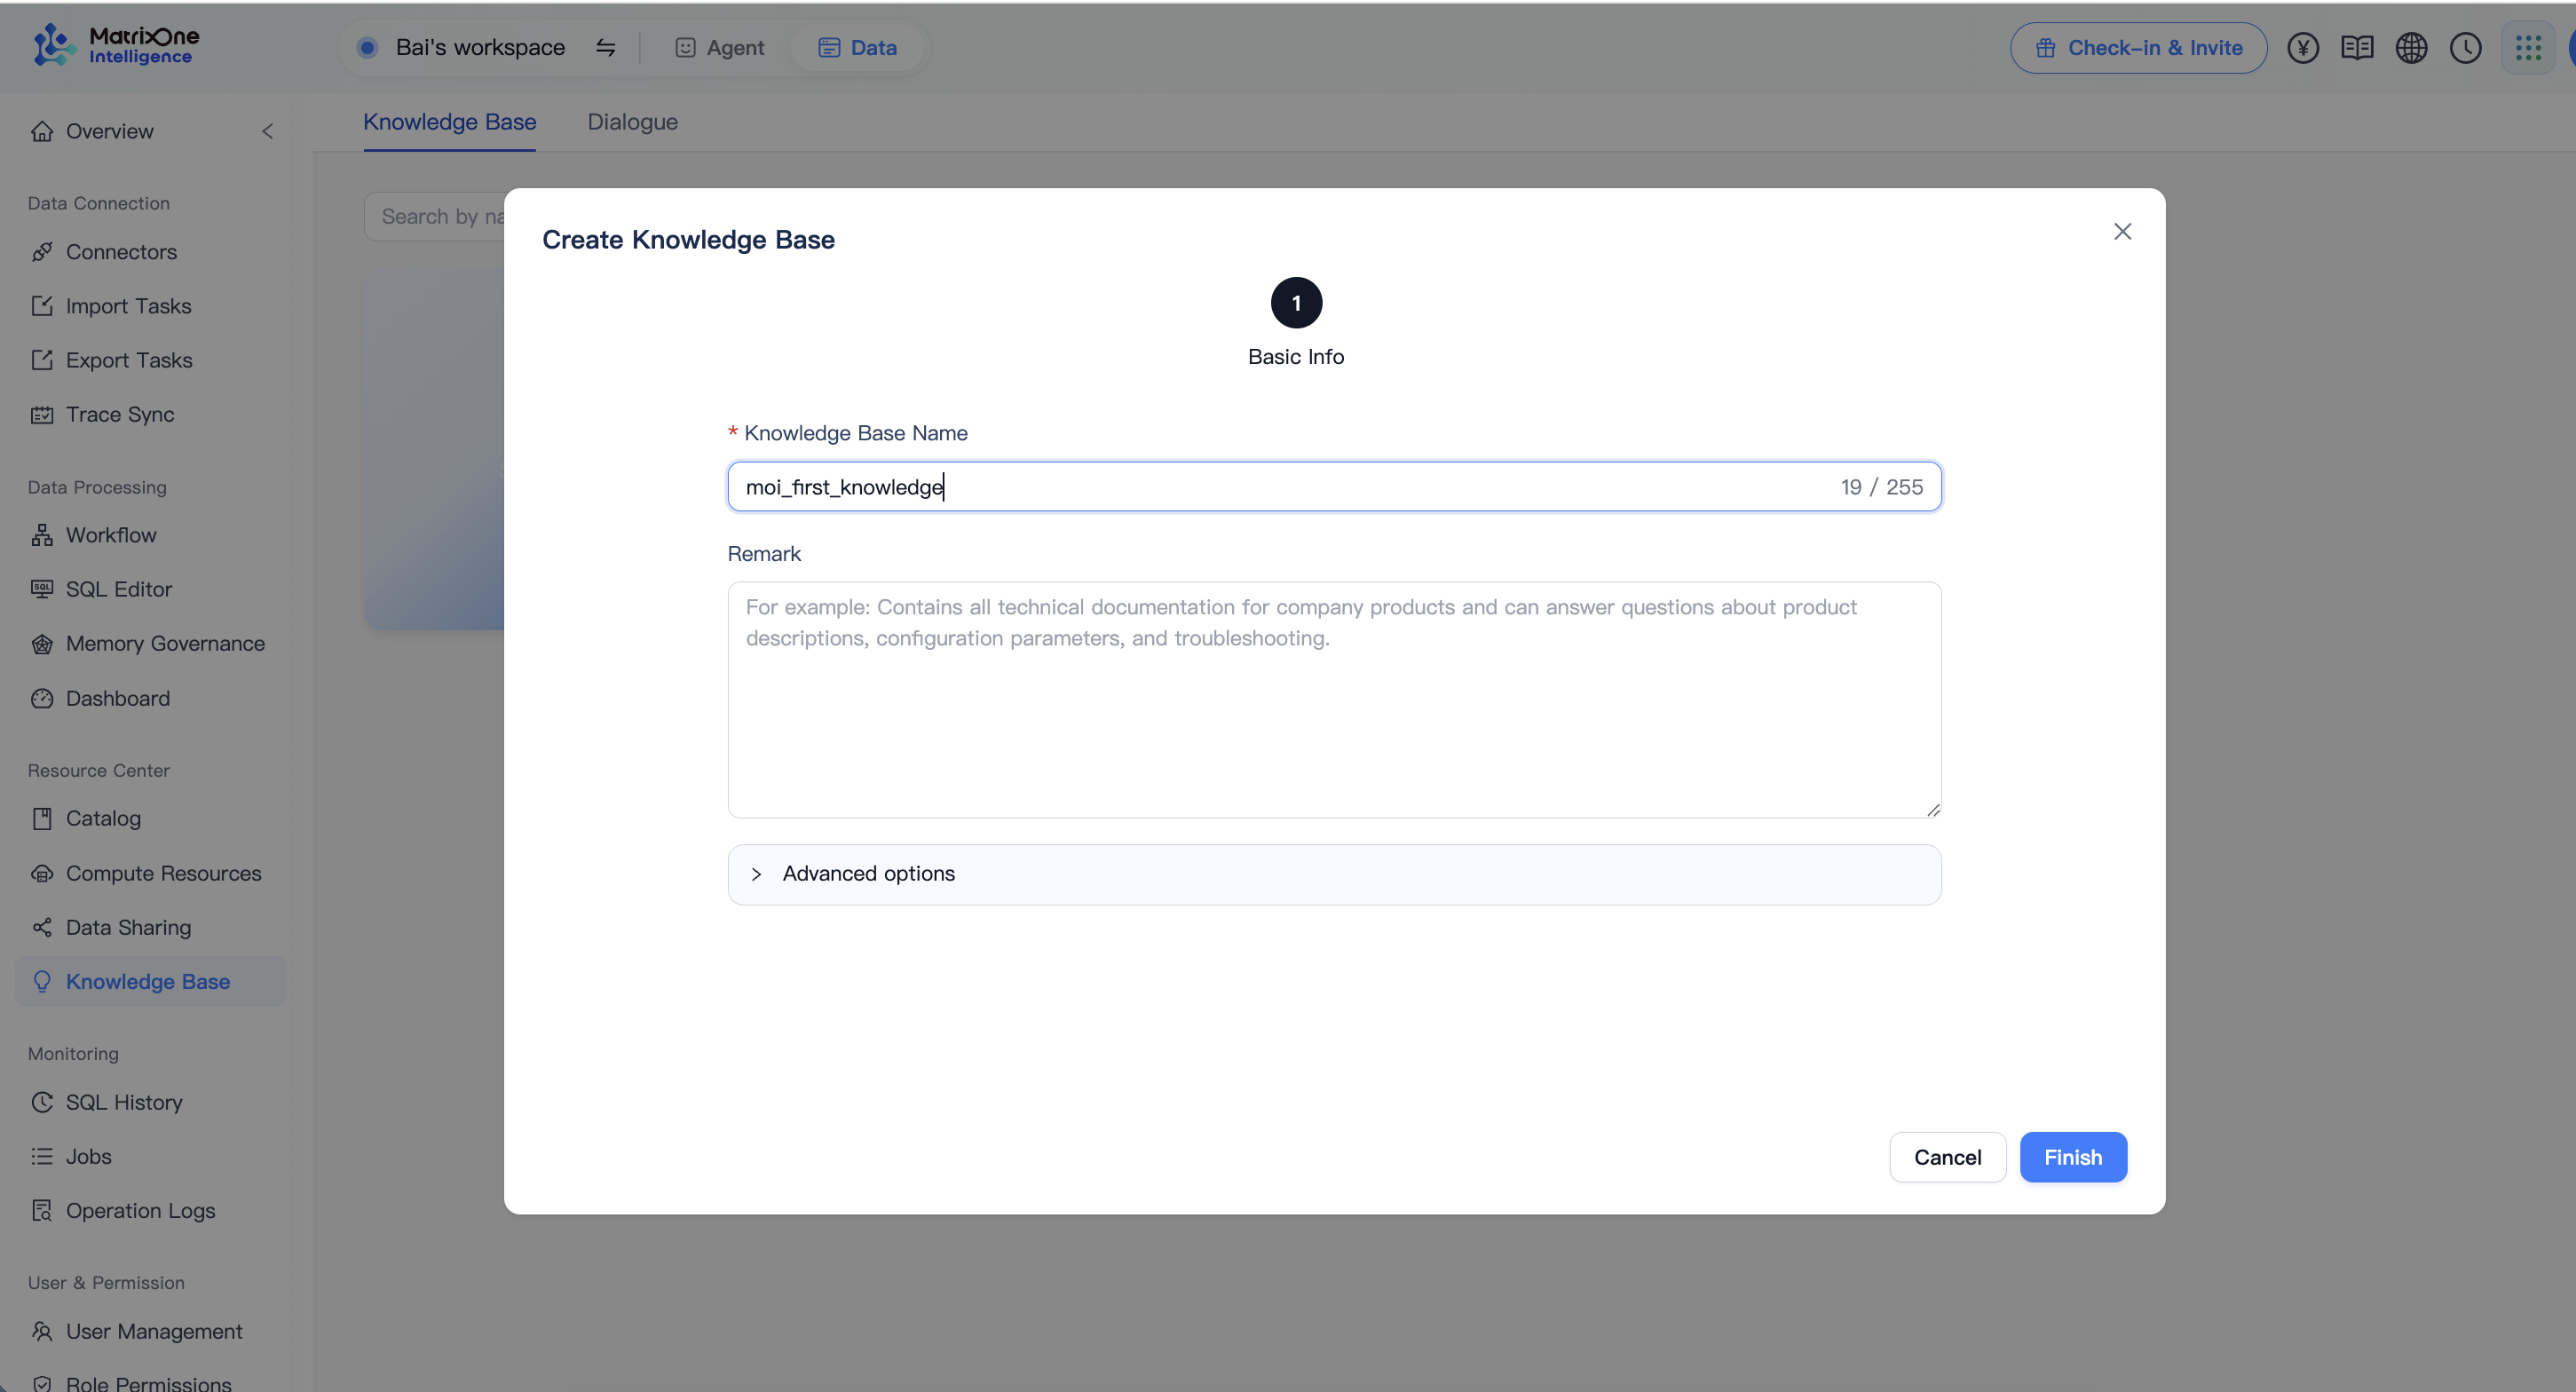
Completion check: The knowledge base has been created and is named moi_first_knowledge. Next, add the PDF as its data source.
2. Add the PDF from Catalog
Open
moi_first_knowledgeand click Add Data. If the Select Data window is already open, continue there.In Select Data, browse to the Catalog, database, and volume containing your PDF. For the location used here, select:
the_first_tutorial / pdf / scikit_learn_machine_learning_in_python
Select
scikit-learn-machine-learning-in-python.pdf. Confirm that the selection contains one file and no tables.Click Append and wait for the file to appear on the Data Source tab.
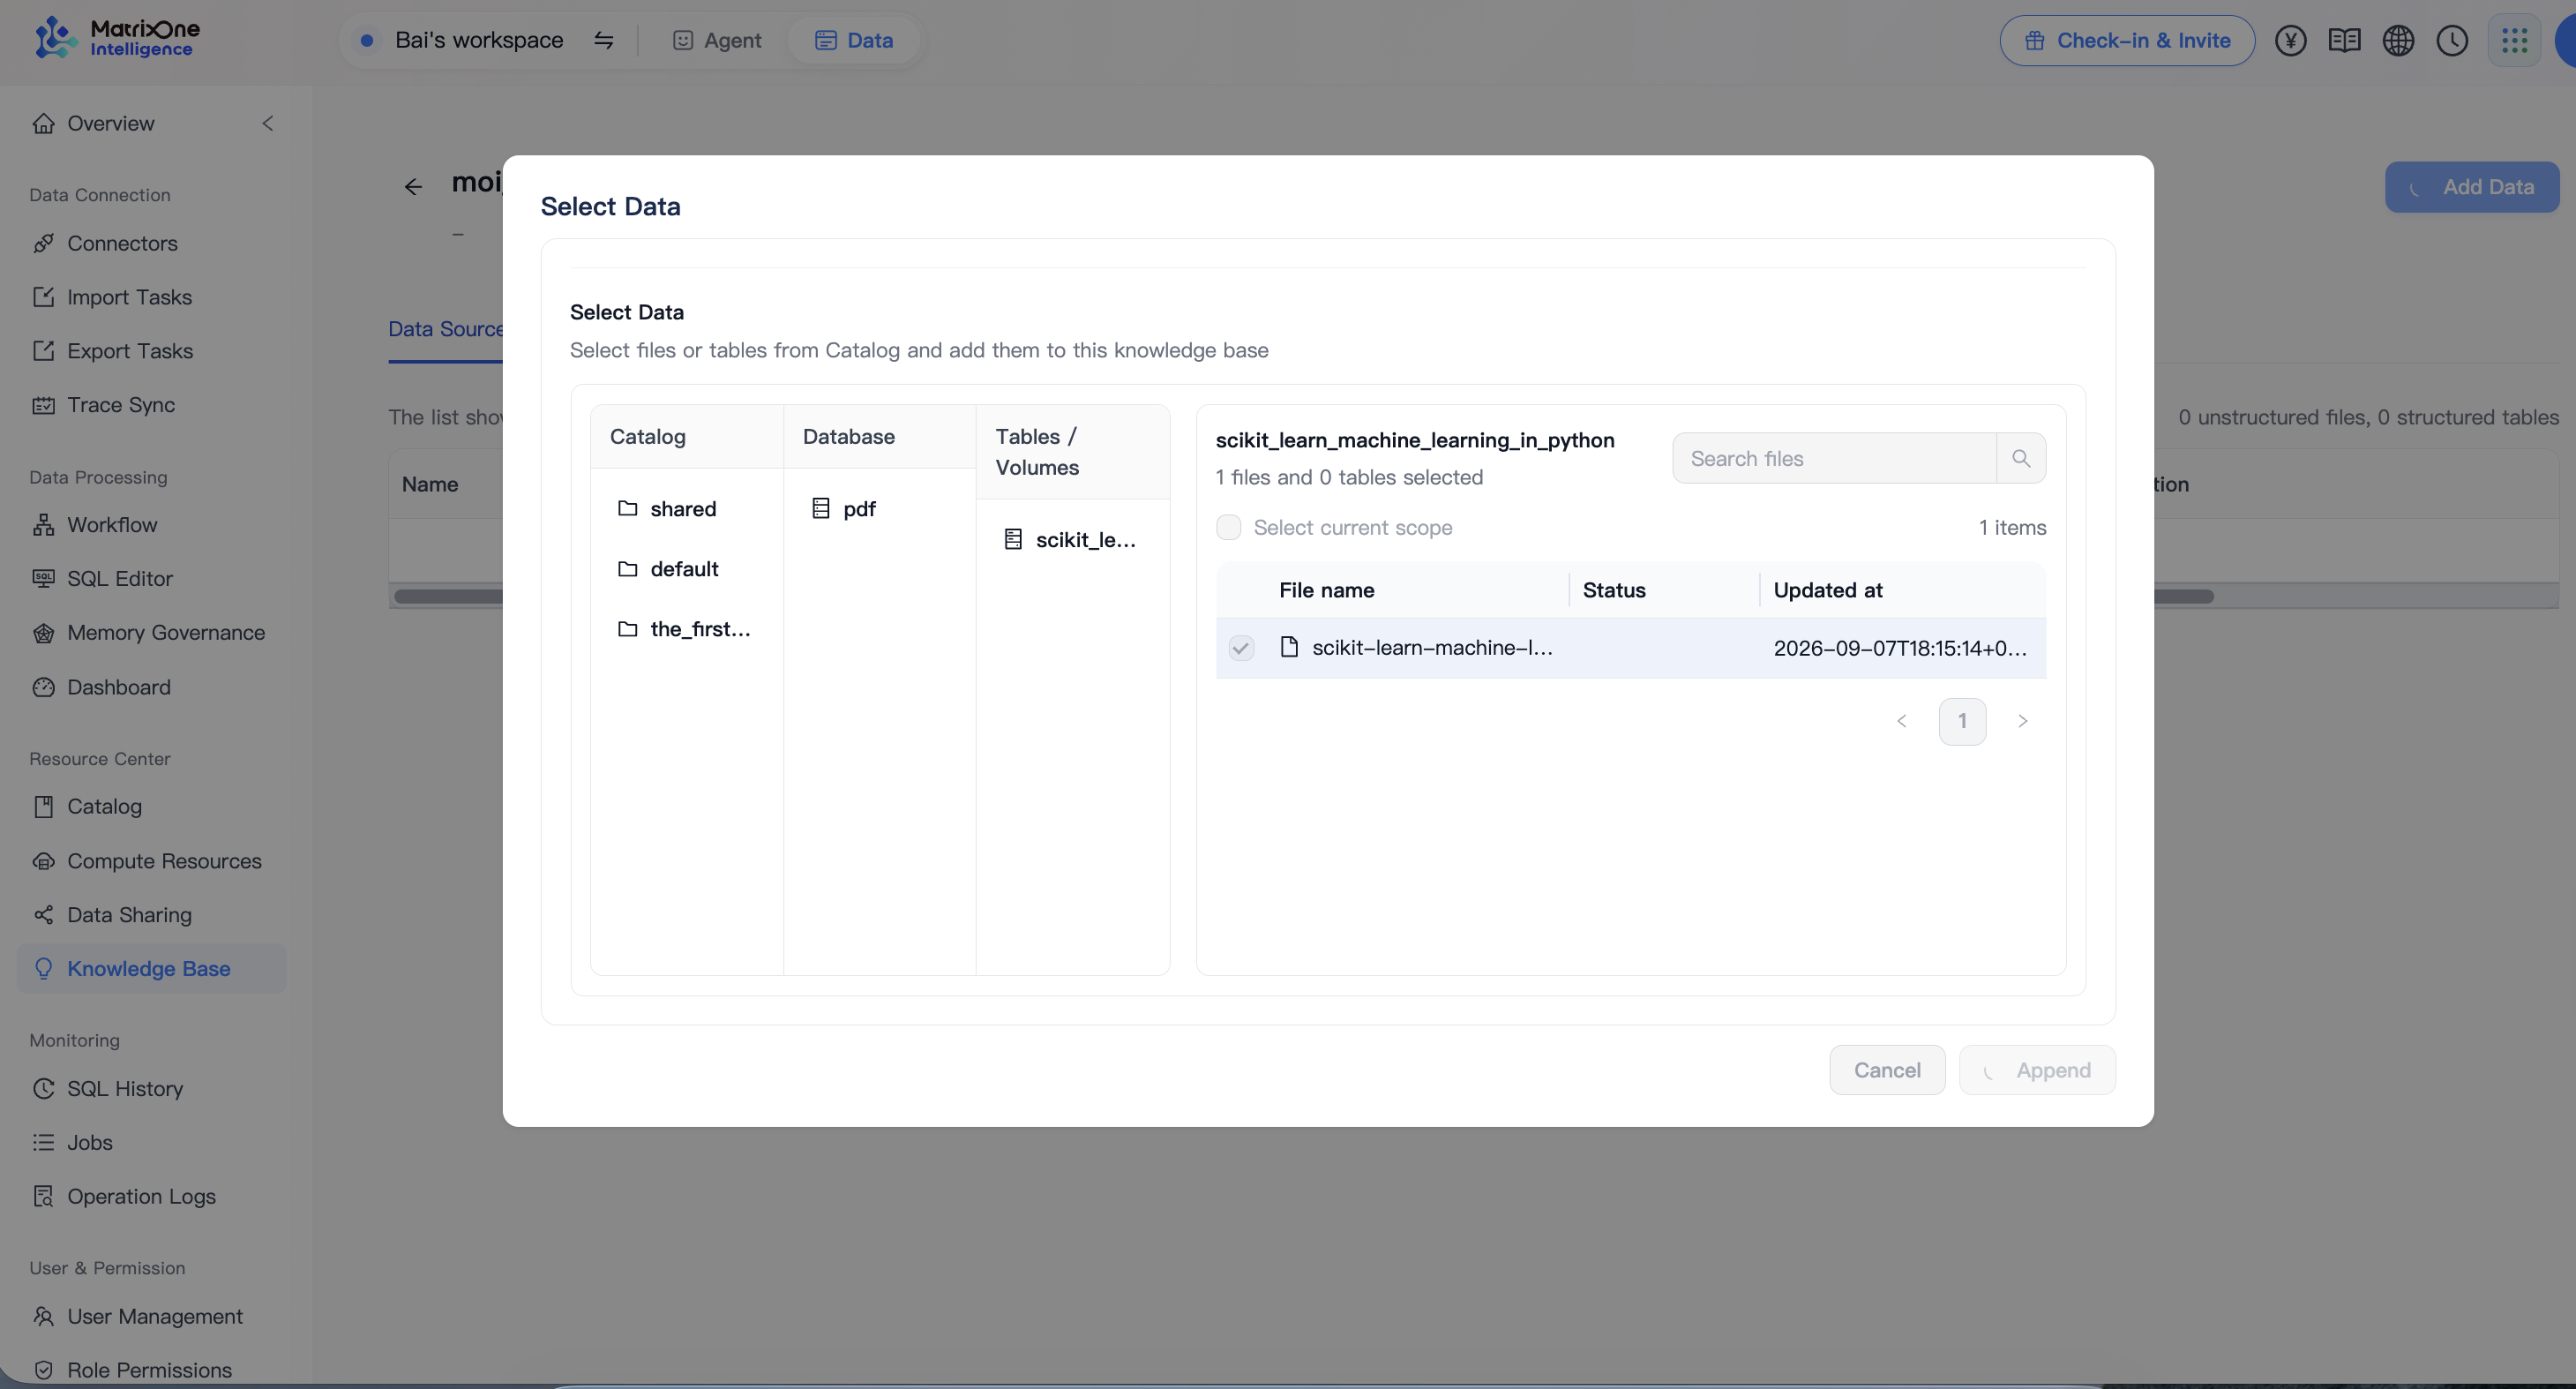
The knowledge base uses the PDF already stored in Catalog. You do not need to upload a second copy.
Completion check: The Data Source tab lists the PDF in moi_first_knowledge.
3. Wait for processing to complete
On the Data Source tab, find the PDF and check Processing Status.
Wait until its status becomes Completed.
Confirm that the knowledge base contains one unstructured file and that its Catalog path points to your sample PDF.
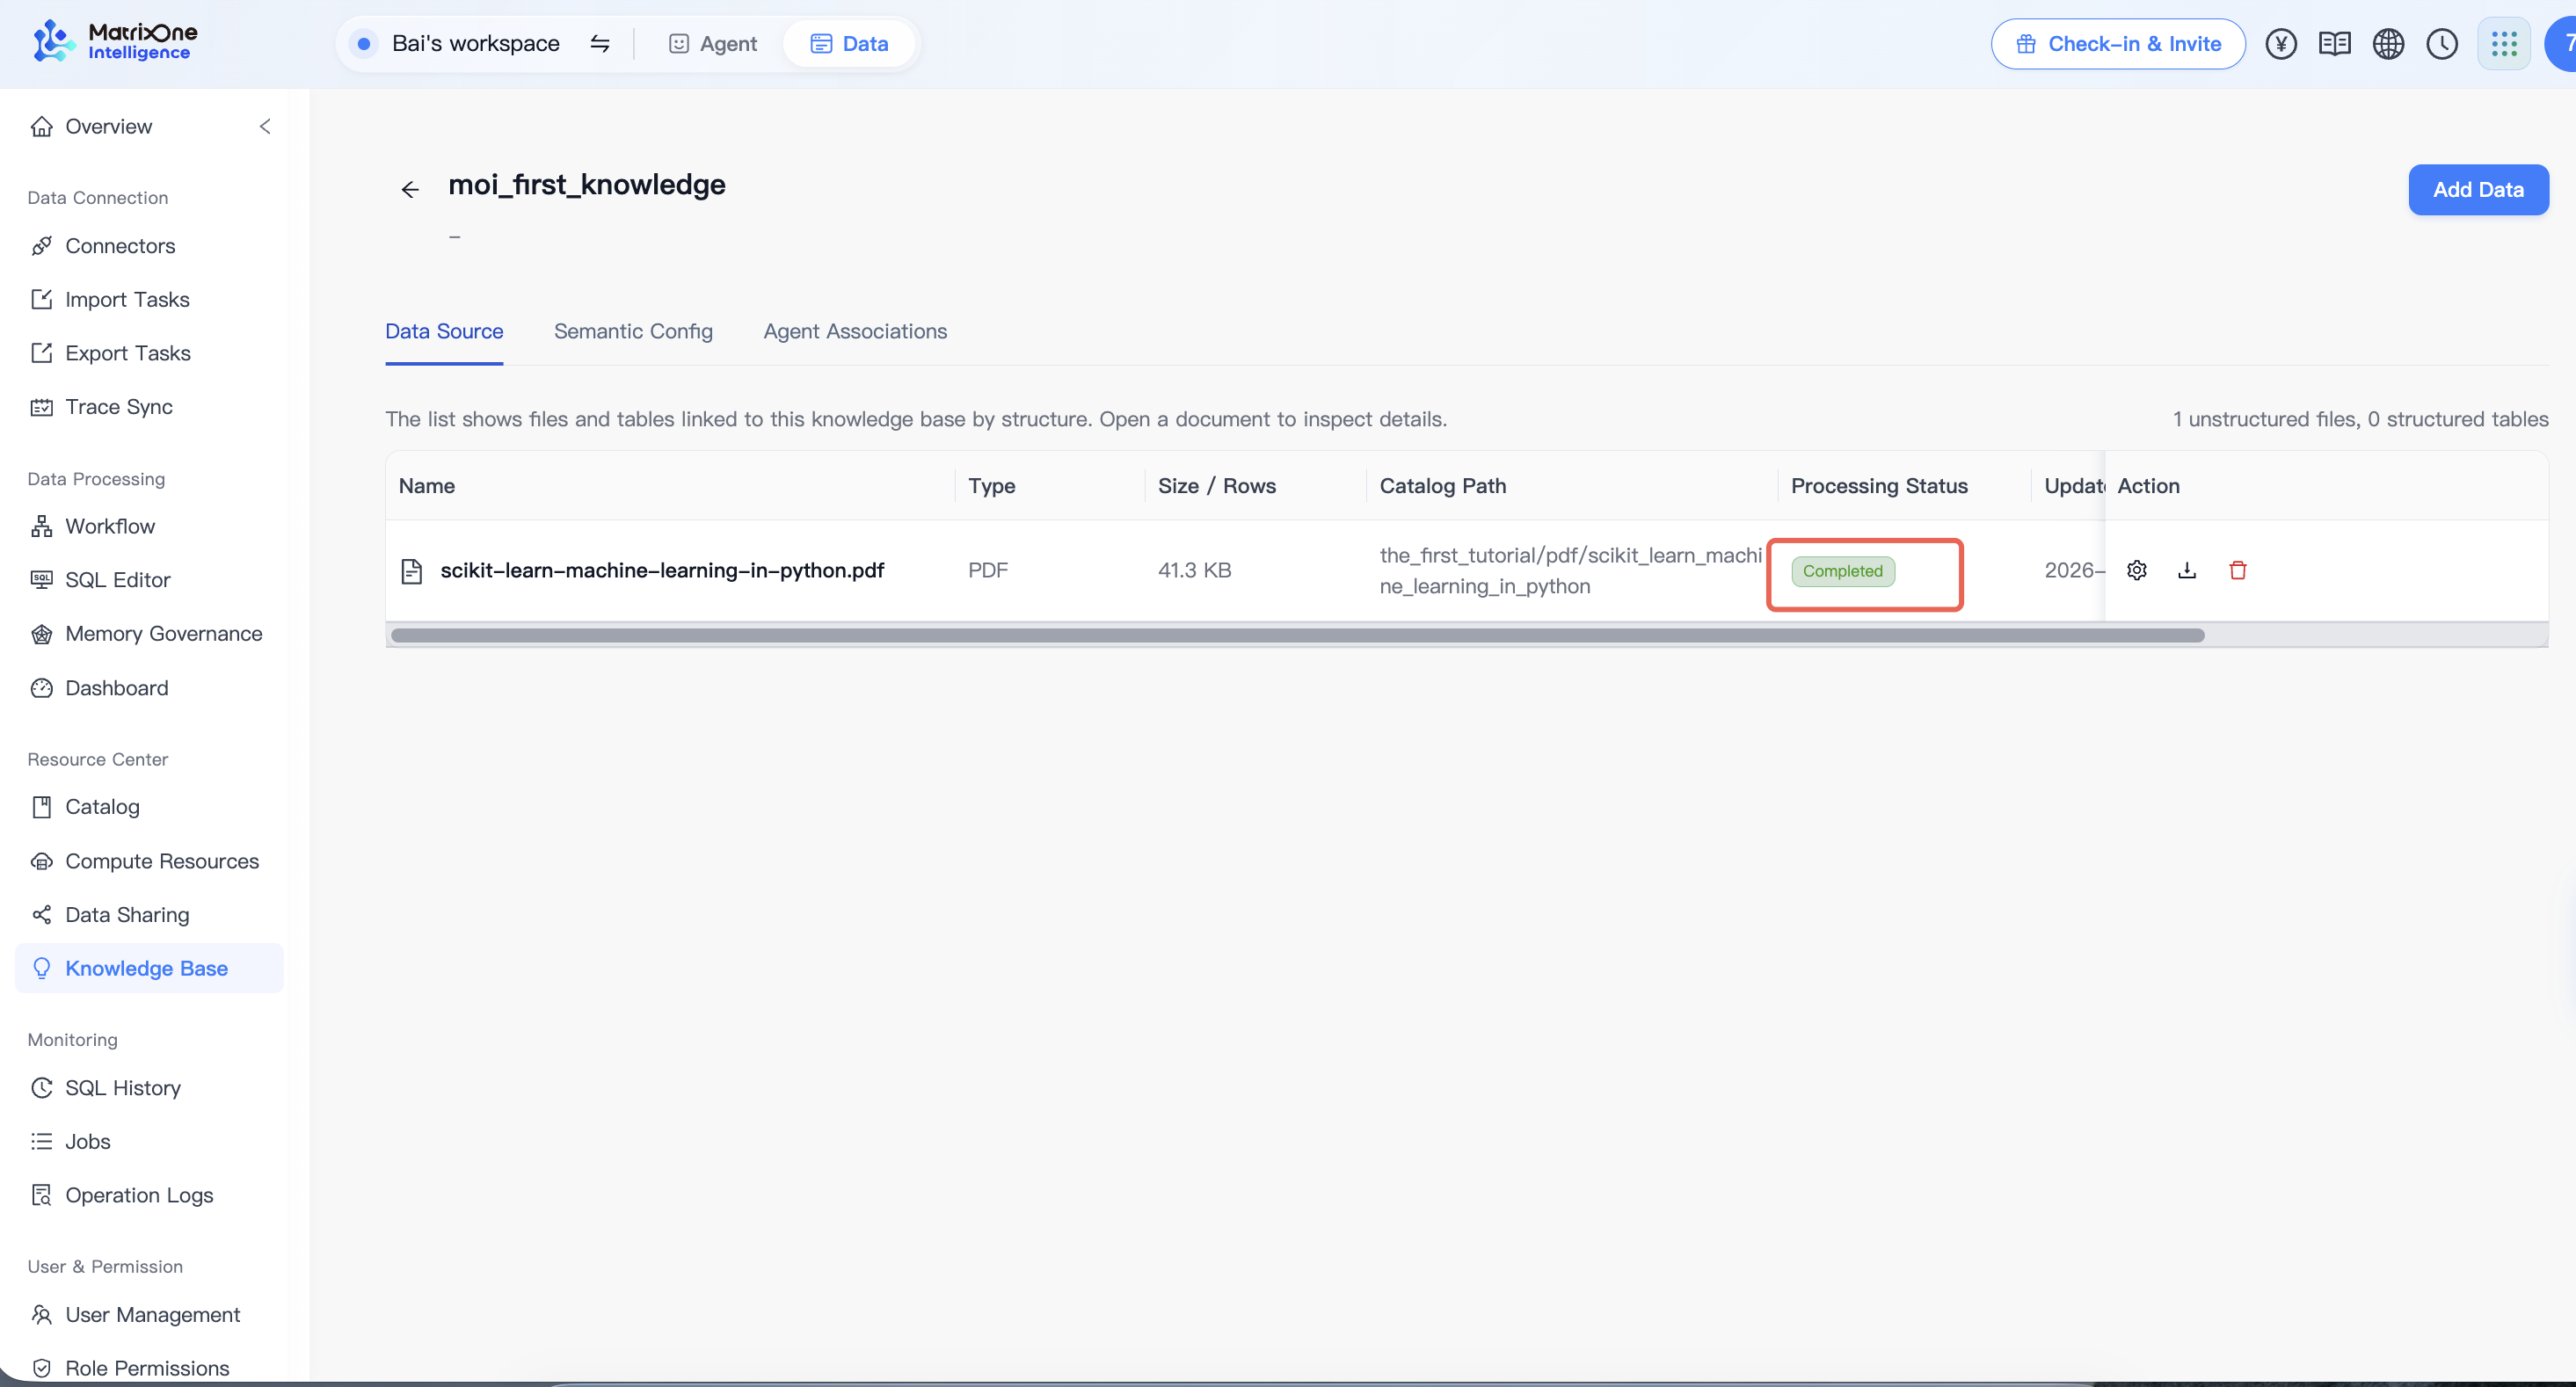
Completion check: The PDF shows Completed. If processing fails, resolve the error before starting the conversation.
4. Ask a question about the paper
Return to the Knowledge Base list.
On the
moi_first_knowledgecard, click Chat.
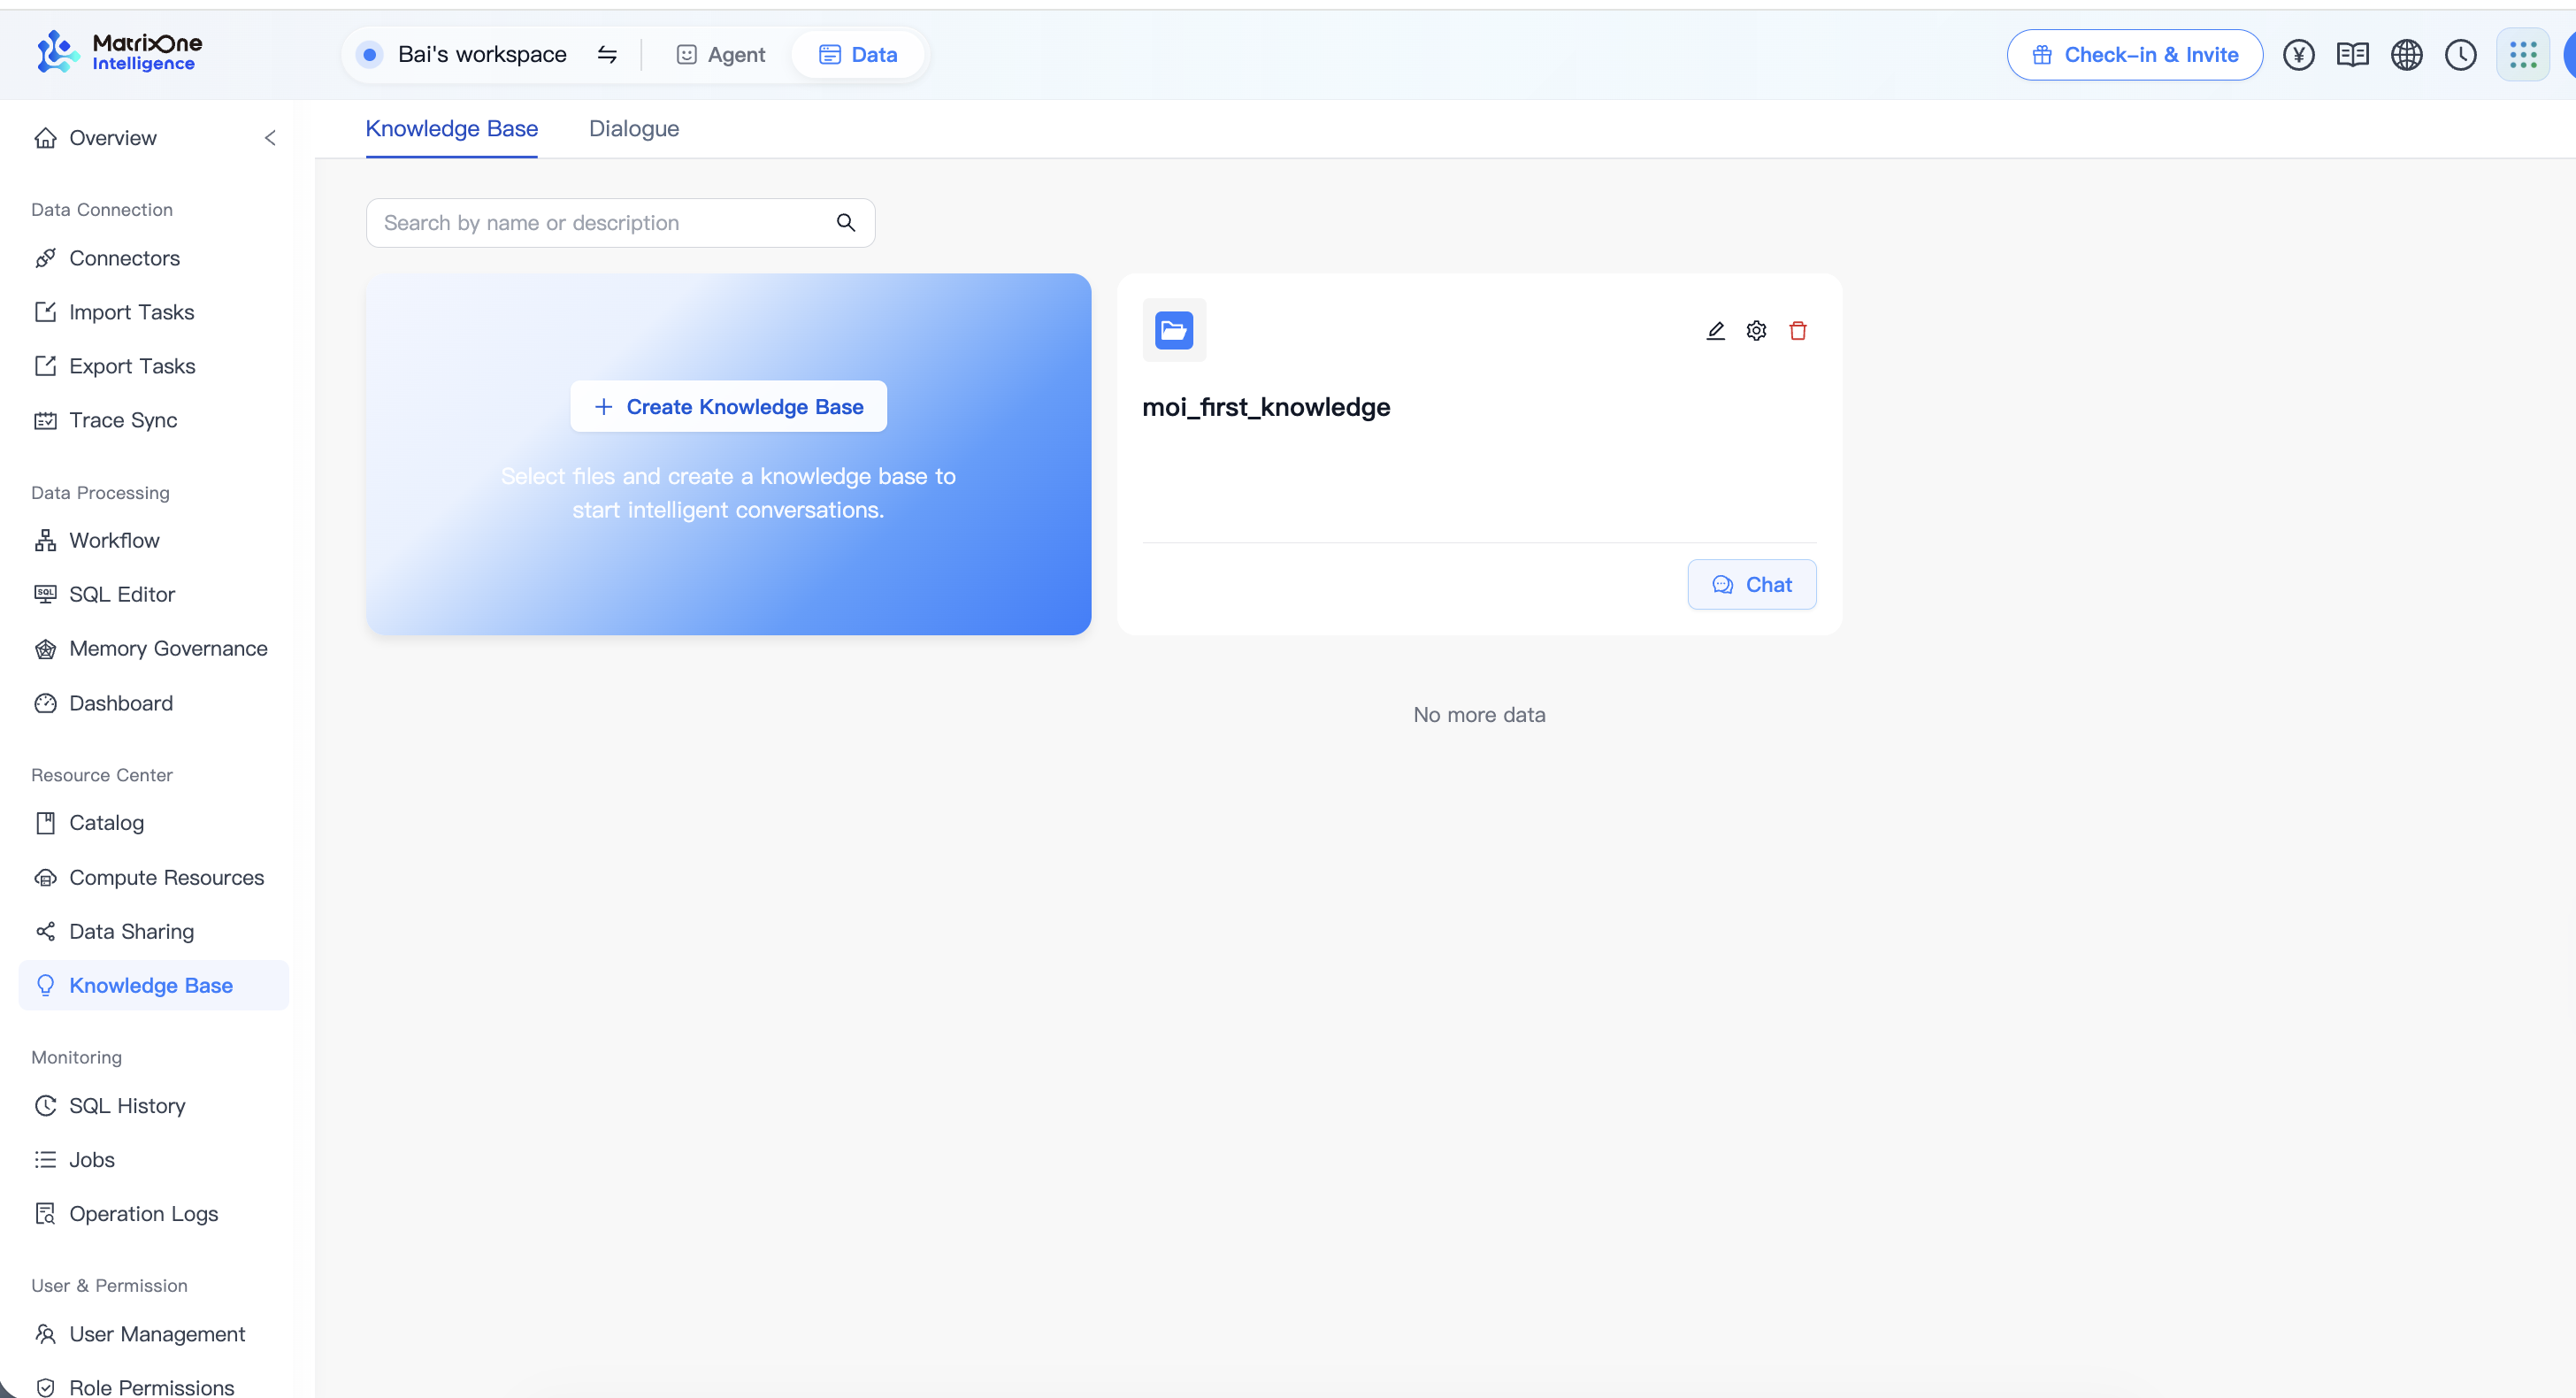
On the Dialogue tab, start a New Session if needed.
Confirm that
moi_first_knowledgeappears in the conversation’s knowledge selection. If it is missing, use Select Knowledge to select it.Use an available chat model in your workspace. The model name may differ from the screenshots.
Paste the following question and press Enter:
According to Section 2 of the paper "Scikit-learn: Machine Learning in Python", what unit-test coverage was reported for release 0.8, and which two static analysis tools were used?

Answer in English using only the knowledge base, and cite the supporting passage.
Wait for the answer to finish.
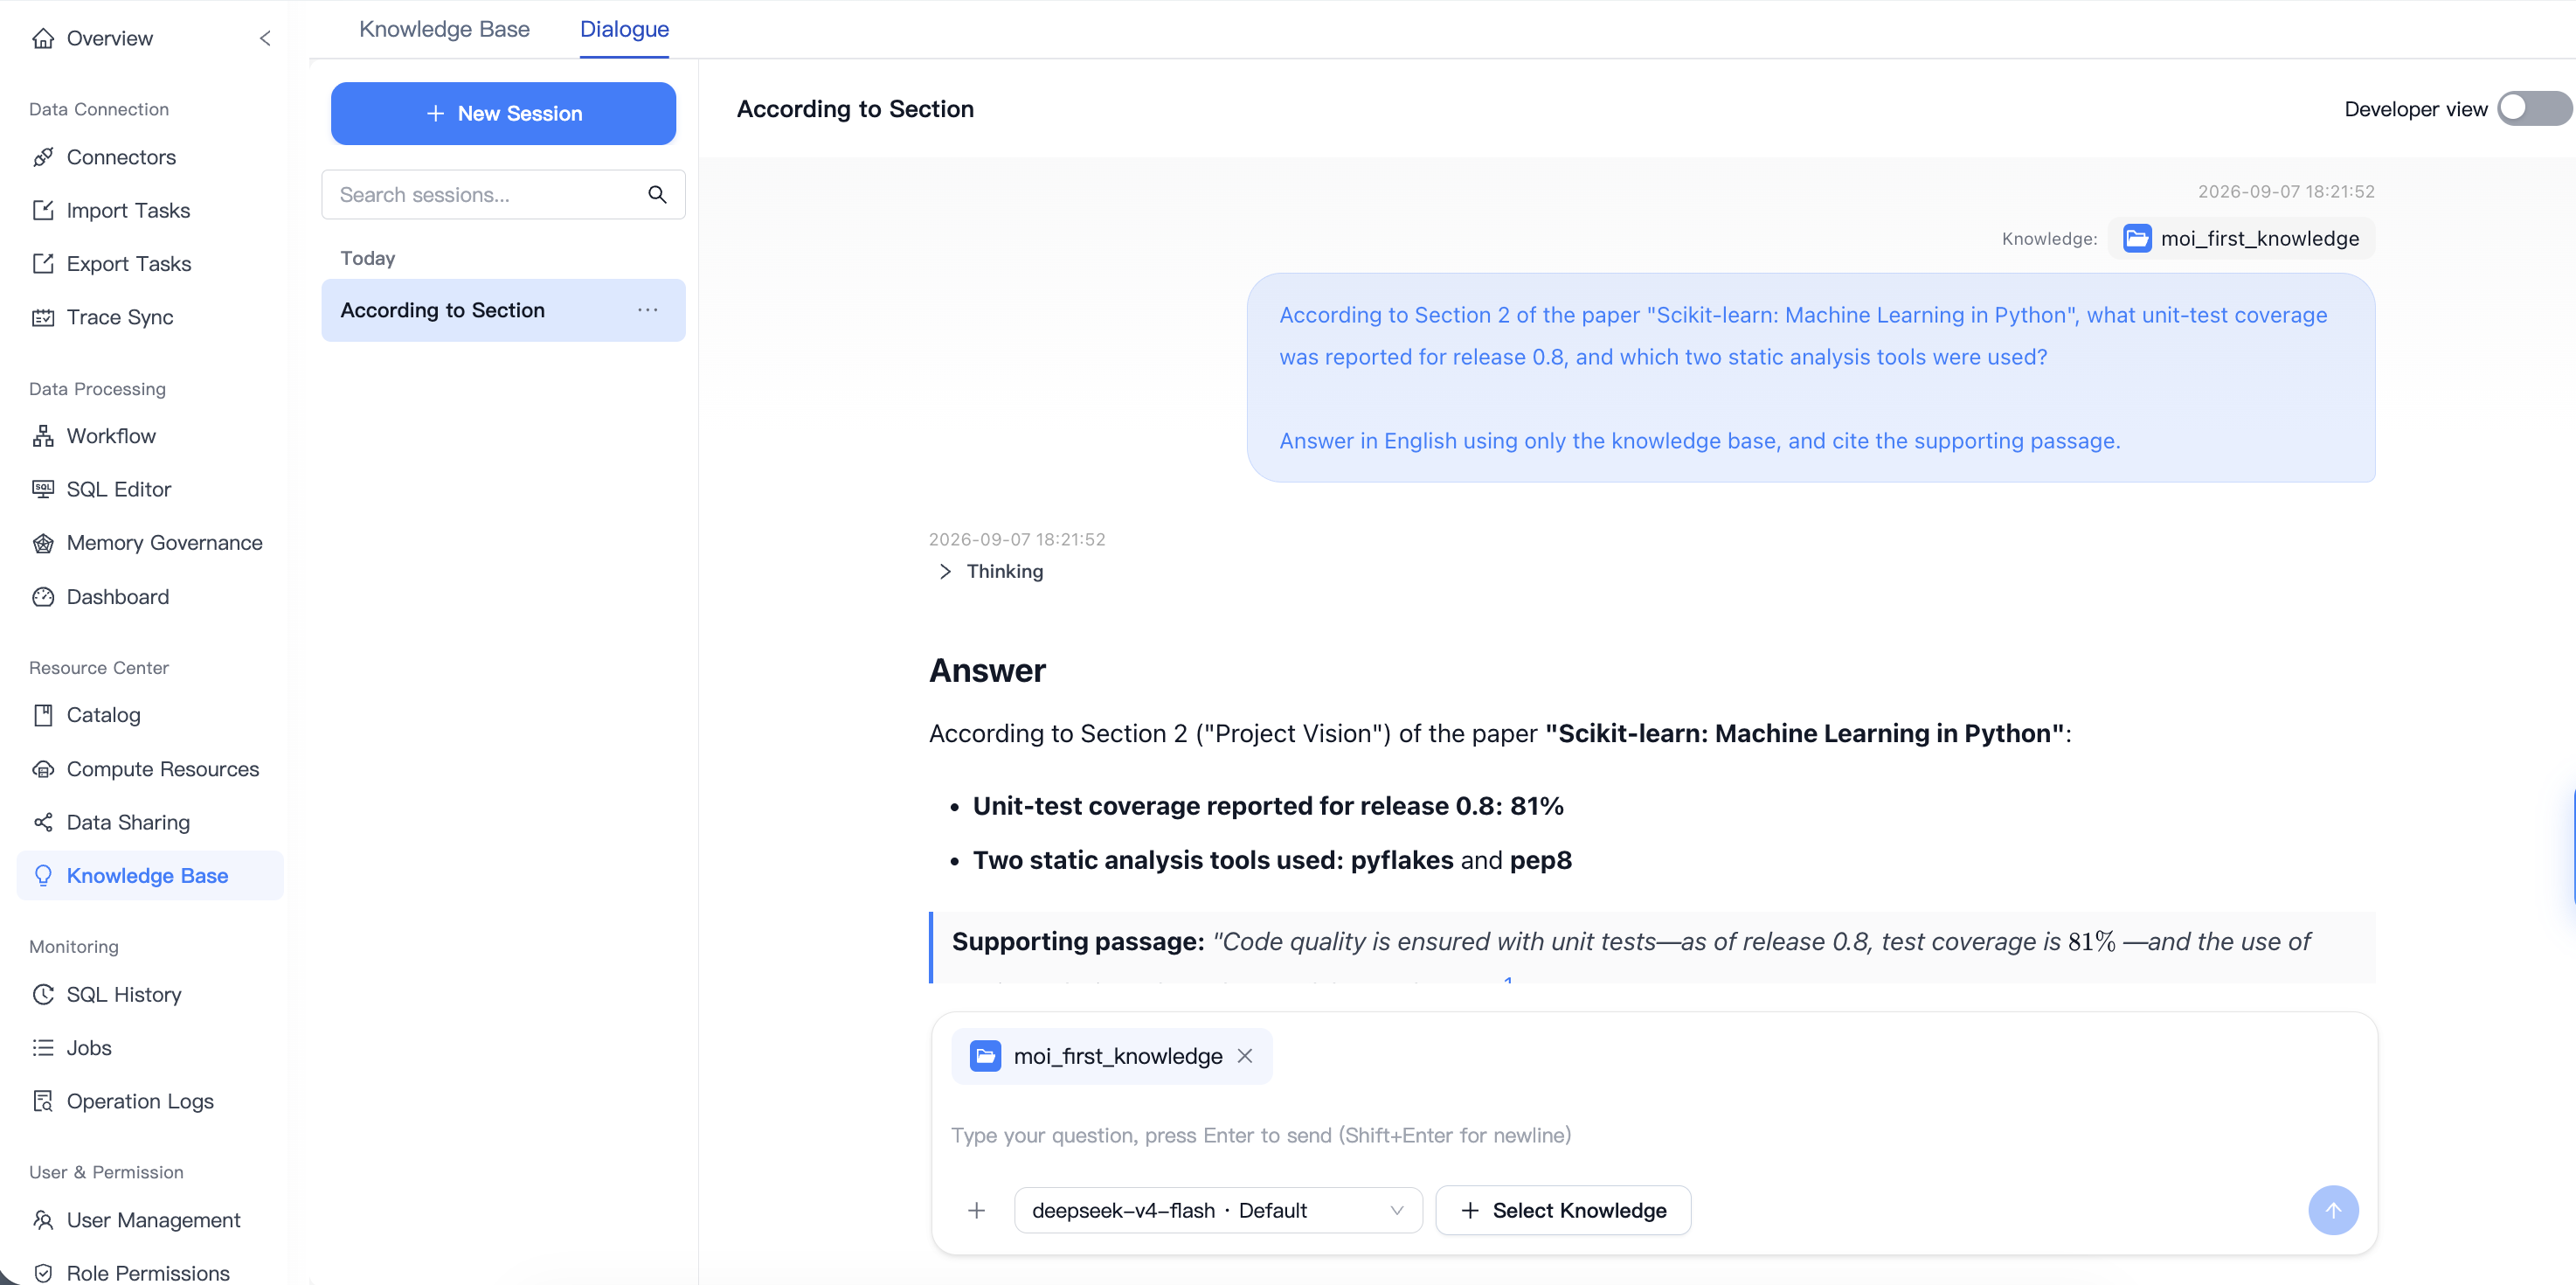
Completion check: The answer reports 81% test coverage for release 0.8 and identifies pyflakes and pep8. The wording may vary, but these facts should match the paper.
5. Verify the source
A correct-looking answer is only the first check. Use the reference to compare it with the original paper.
Scroll to References below the answer.
Find the reference to
scikit-learn-machine-learning-in-python.pdf. For this question, the supporting passage is on Page 3.
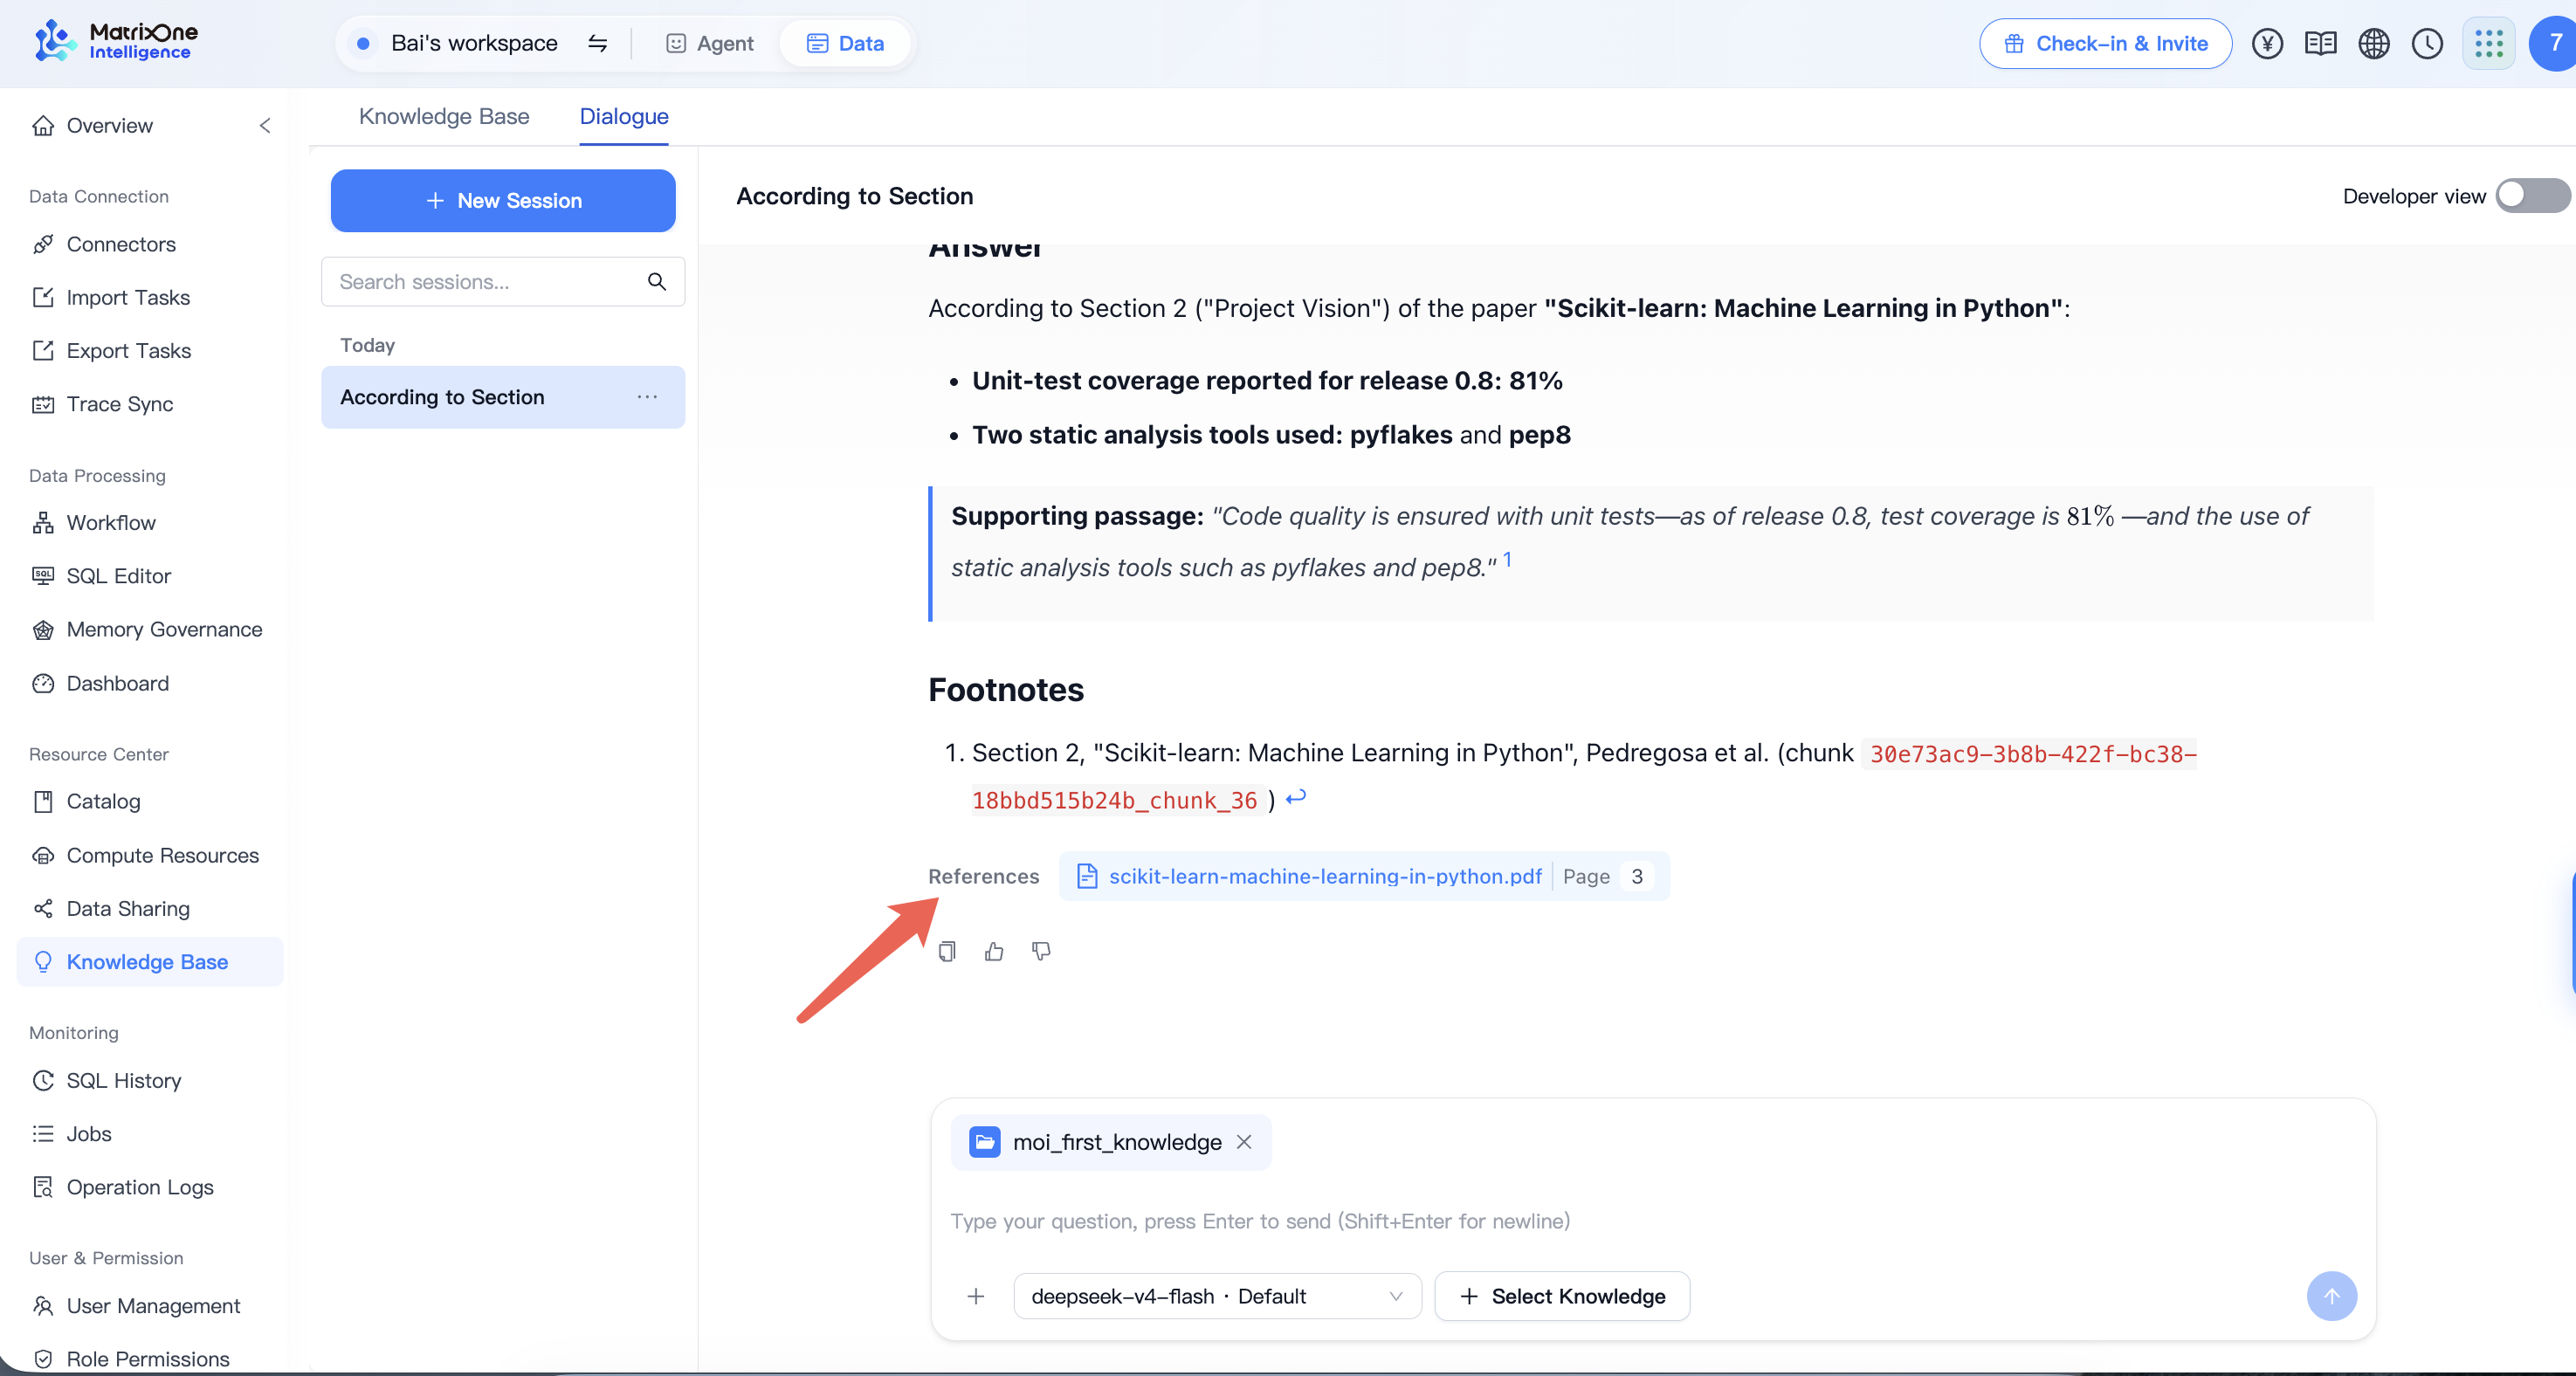
Click the PDF reference to open the source. Locate Section 2, Project Vision, and the paragraph beginning Code quality. The PDF page number is 3; the printed page number is 2827.
Check that this paragraph supports all three details: 81%, pyflakes, and pep8.
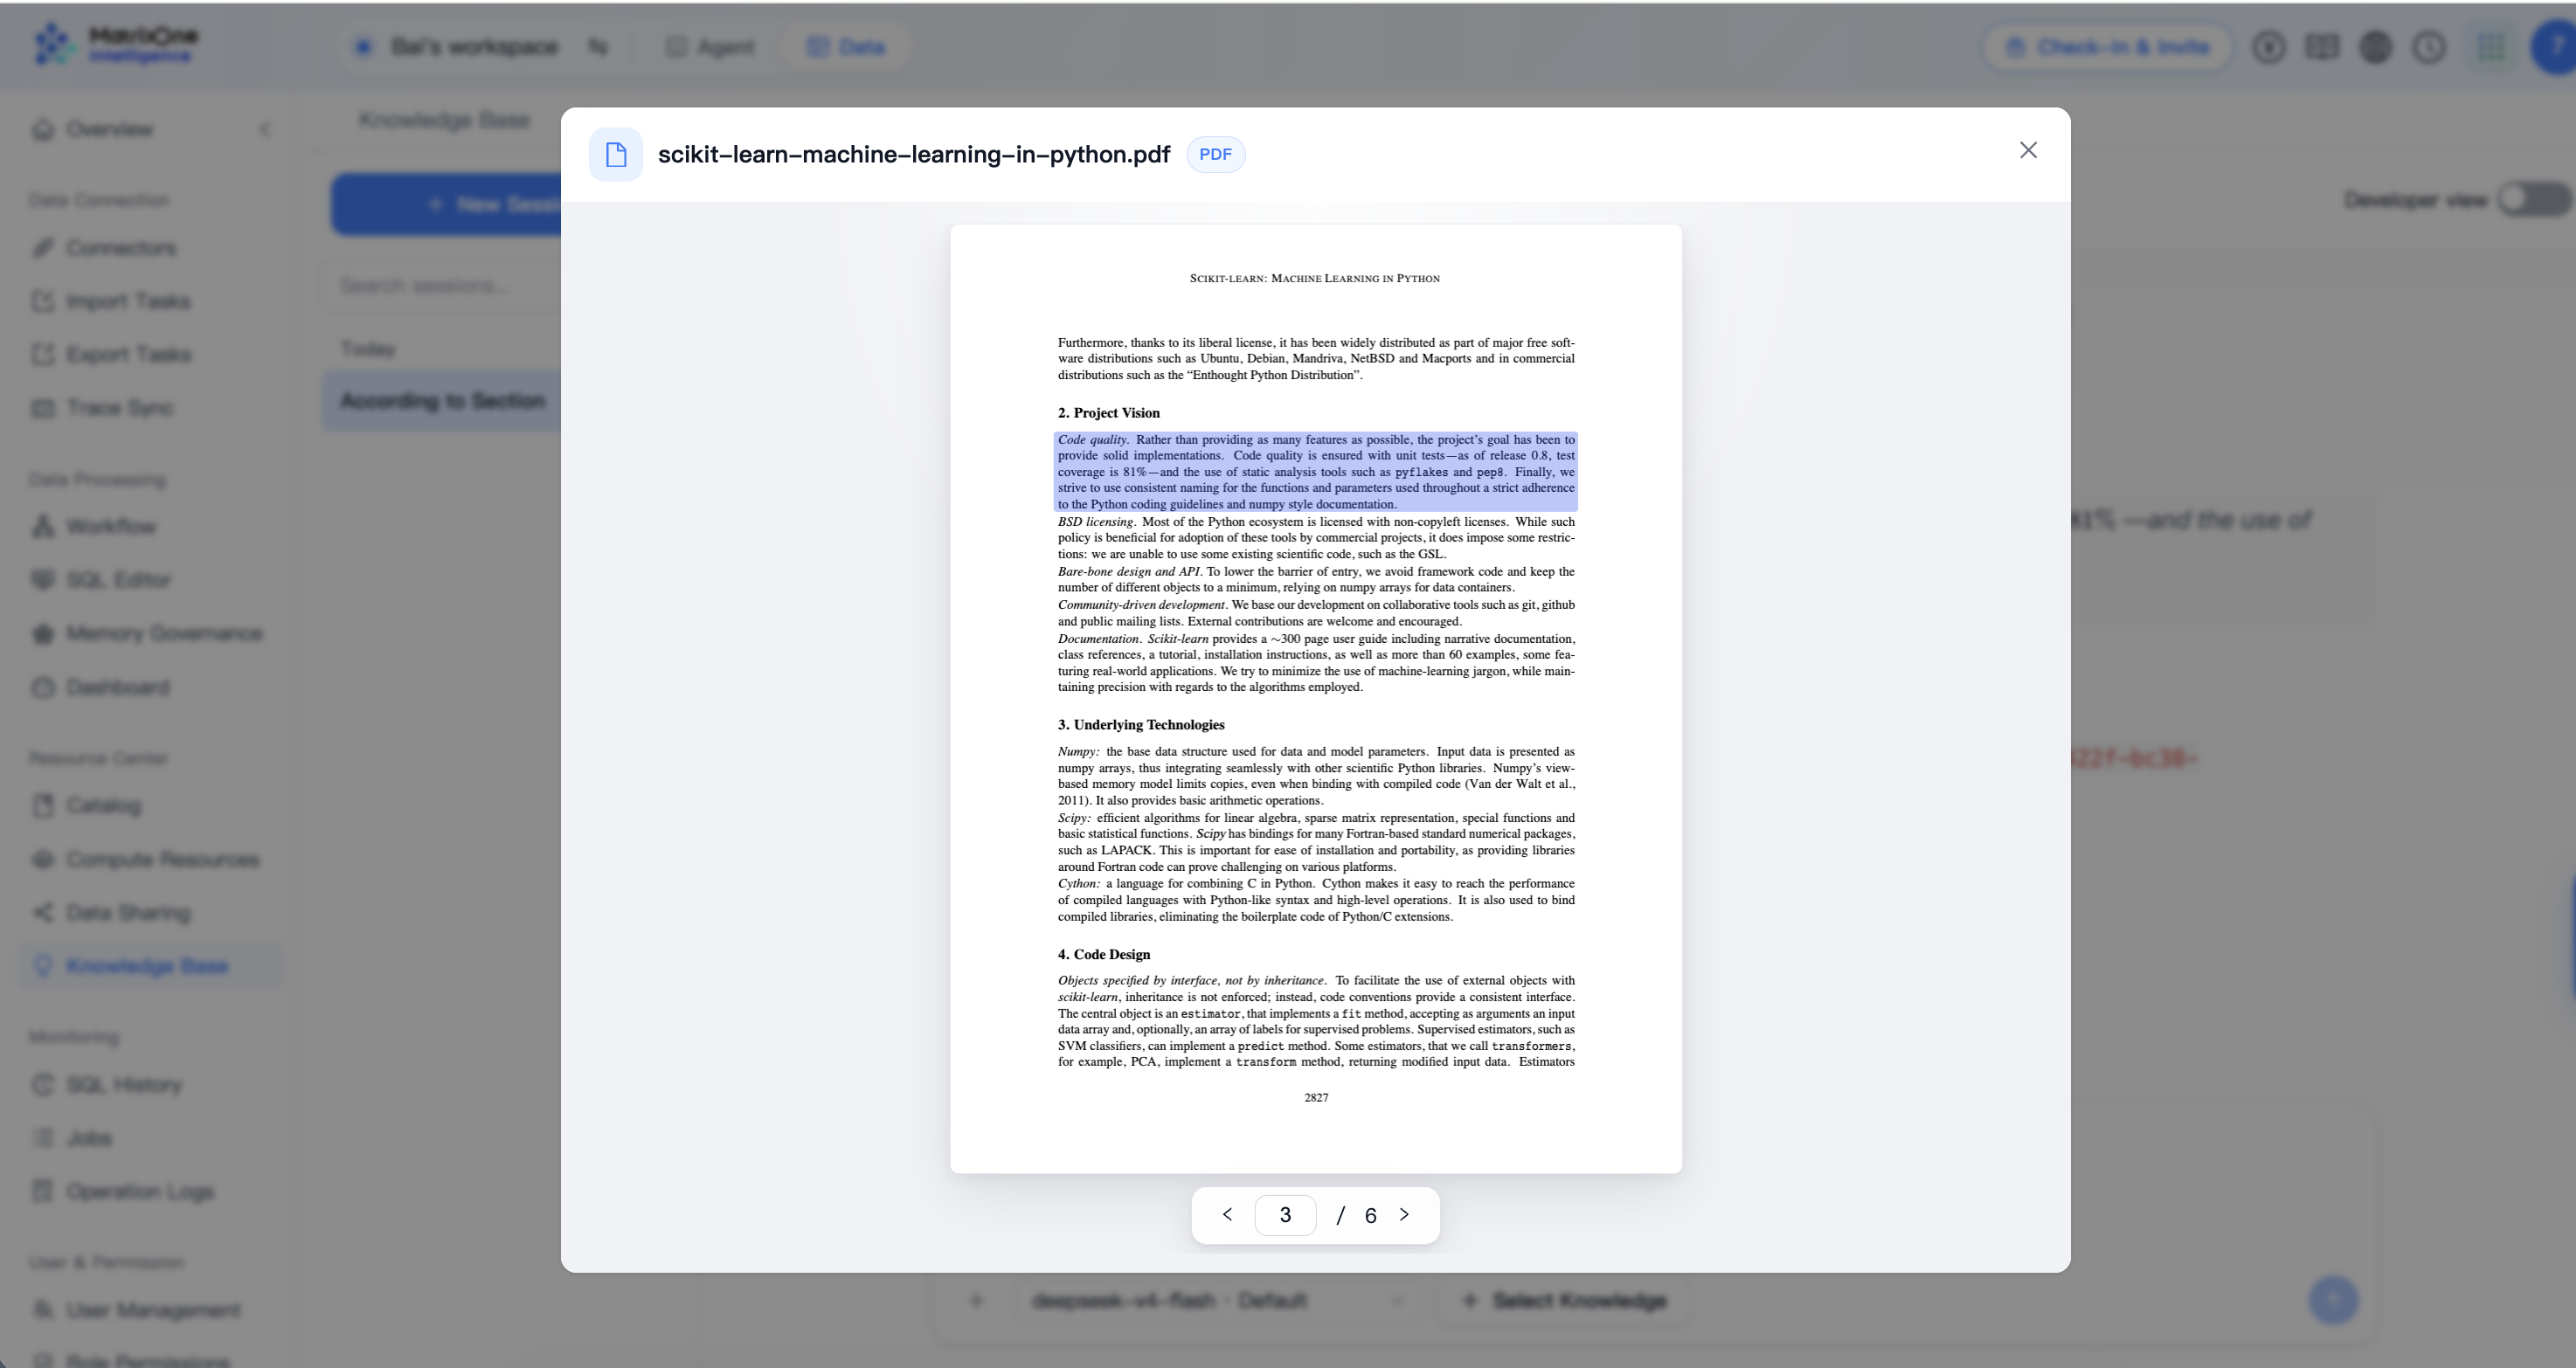
Completion check: You can open the source from the answer and locate the passage supporting its claims. A visible reference label alone does not complete this check.
Tutorial complete
You have created a knowledge base from an English PDF, waited for processing to complete, asked a question, and checked the answer against the original source.
You can now ask another question about the same paper and use its references to verify the answer.
Sample source
Fabian Pedregosa et al., Scikit-learn: Machine Learning in Python, Journal of Machine Learning Research, 12(85):2825–2830, 2011. Publication page.