

Quickstart: GenAI Workspace
This guide walks you through creating and using a GenAI Workspace.
Step 1: Create a MatrixOne Intelligence account
1. Sign up for MatrixOne Intelligence
Go to the MatrixOne Intelligence sign-up page.
Fill in your details and click Sign Up.
Note: The email you use during sign-up automatically becomes your MatrixOne Intelligence account.
2. Activate your account
After you click sign up, we send an activation email to the address you provided. Follow the link in that email to activate your account.
3. Log in to MatrixOne Intelligence
Once activated, you are redirected to the login page. The first time you log in, you land on the GenAI Workspace and MatrixOne instance picker. Pick a GenAI Workspace to enter the management console. On subsequent logins the system remembers your last choice; switch instances any time from the workspace management UI.
Step 2: Enter the workspace
On first login, the system automatically creates a workspace named after your account — no extra password needed. You can create more workspaces later as needed; see GenAI Workspace for details.
1. Load data
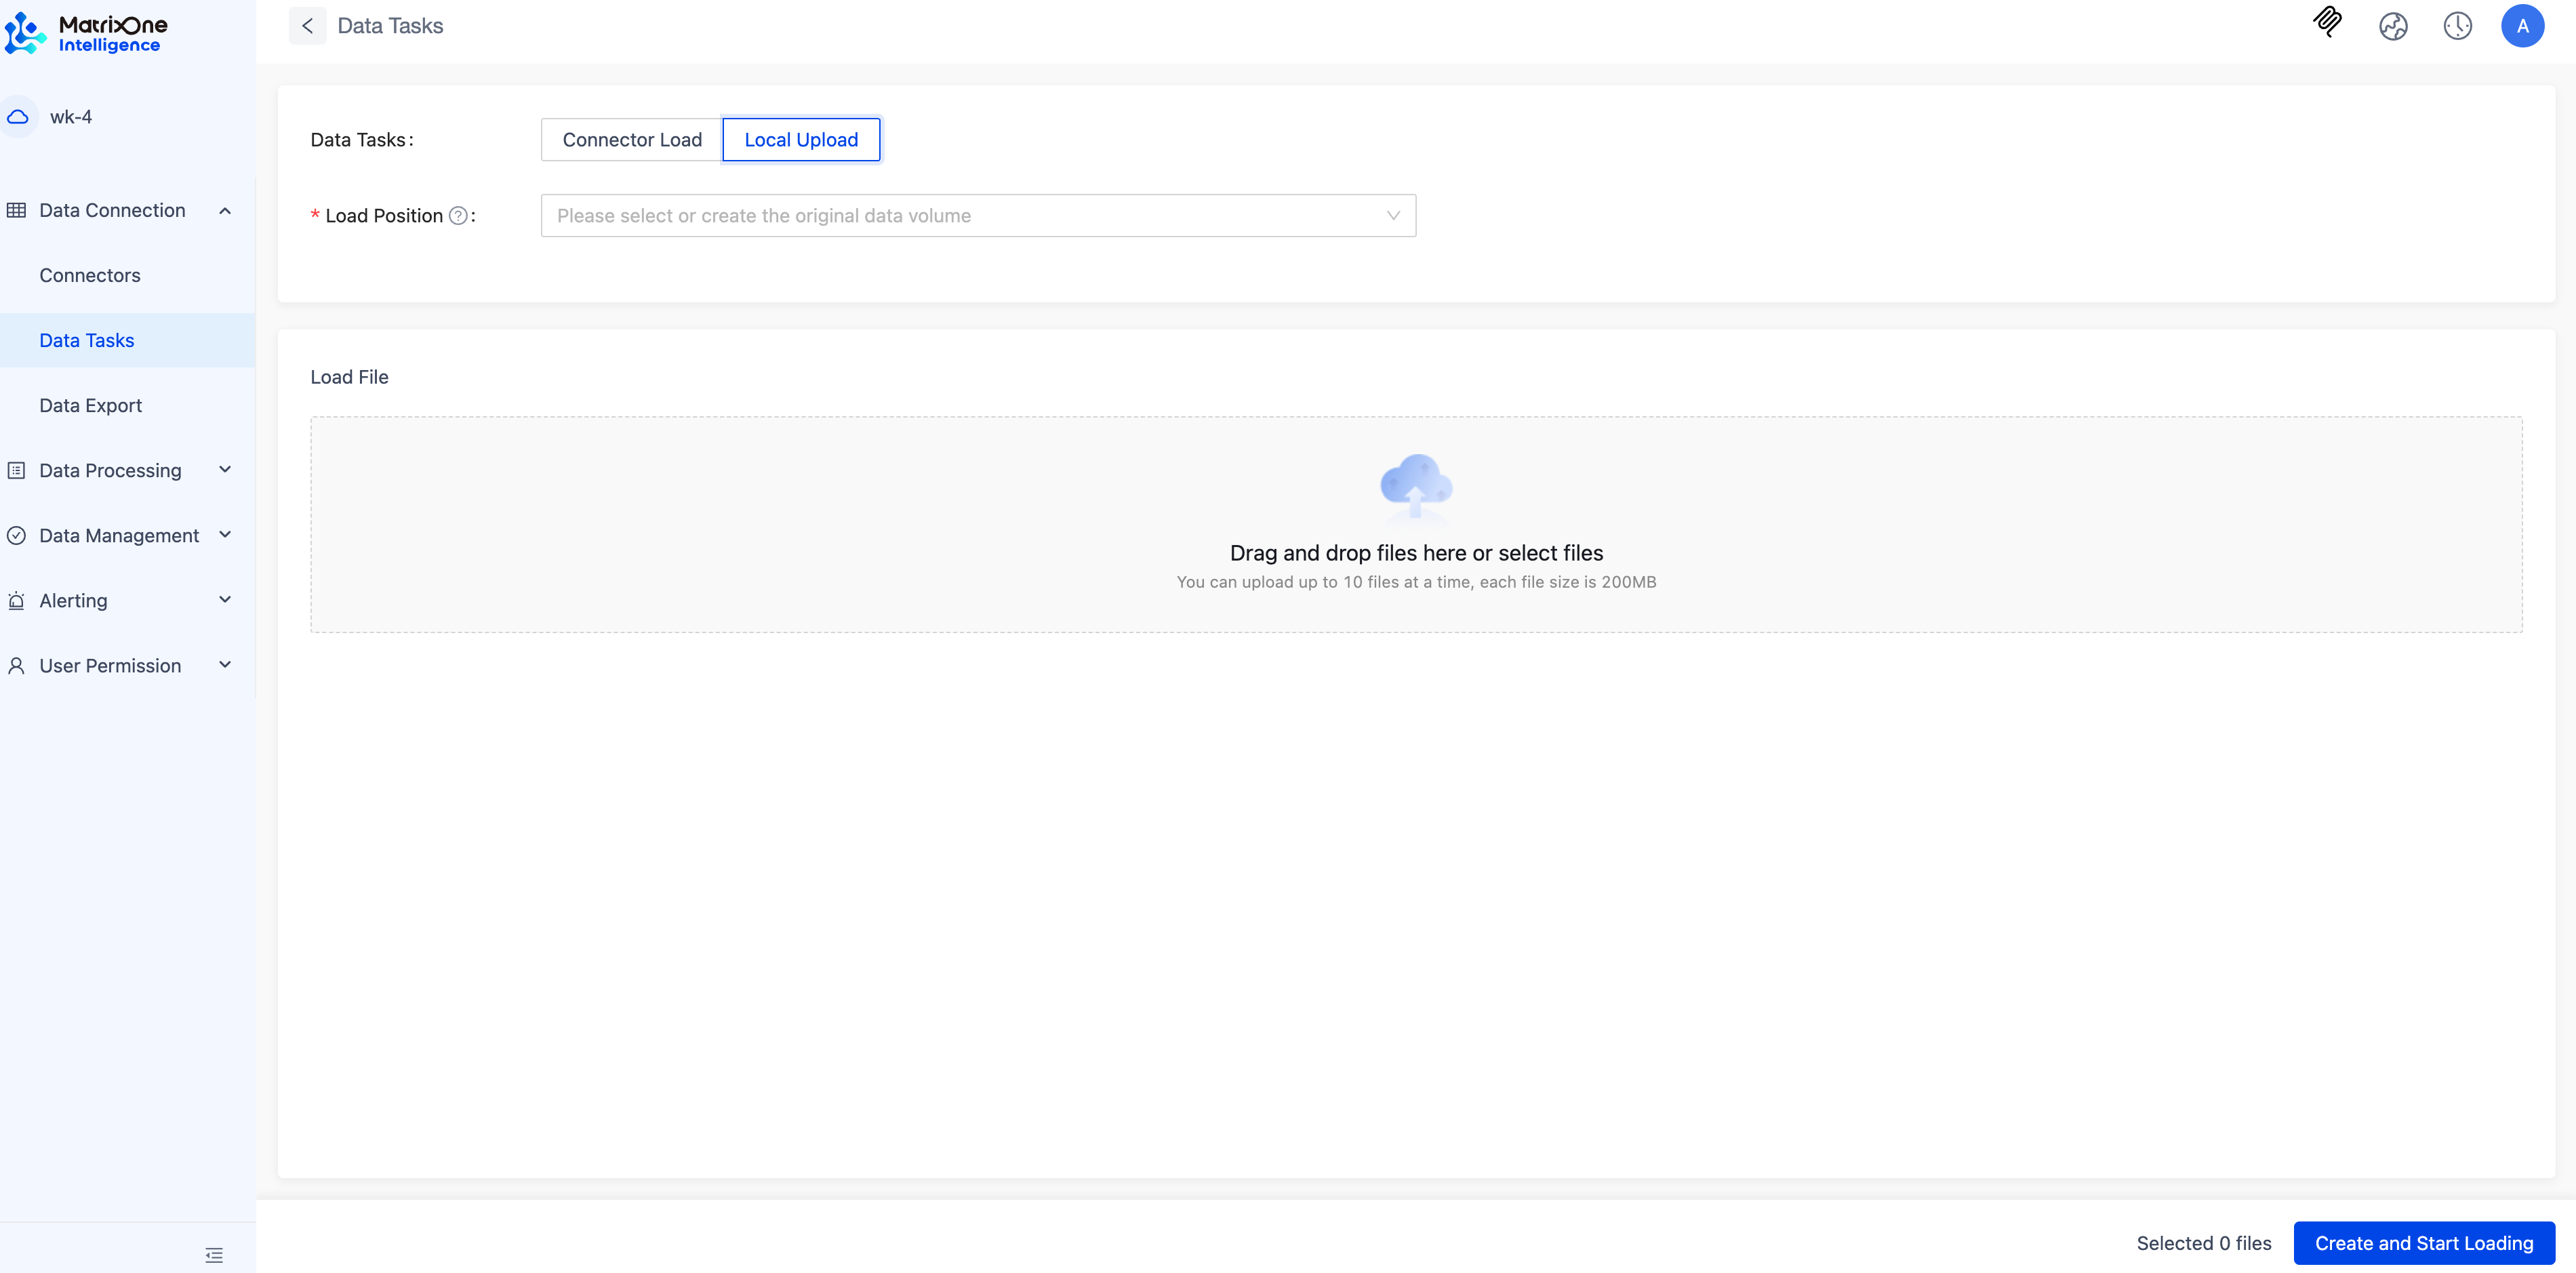
From the side menu, choose Data Connect and open the Data Loading page.
In the top-right corner of that page, click Load Data.
Select Upload from local and fill in:
Target location: create a test volume from the dropdown
Upload a PDF file
Pick the file to load
Watch the loading list until the status becomes Completed.
To learn how to create a connector that pulls data from OSS, S3, and other sources, see GenAI Workspace.
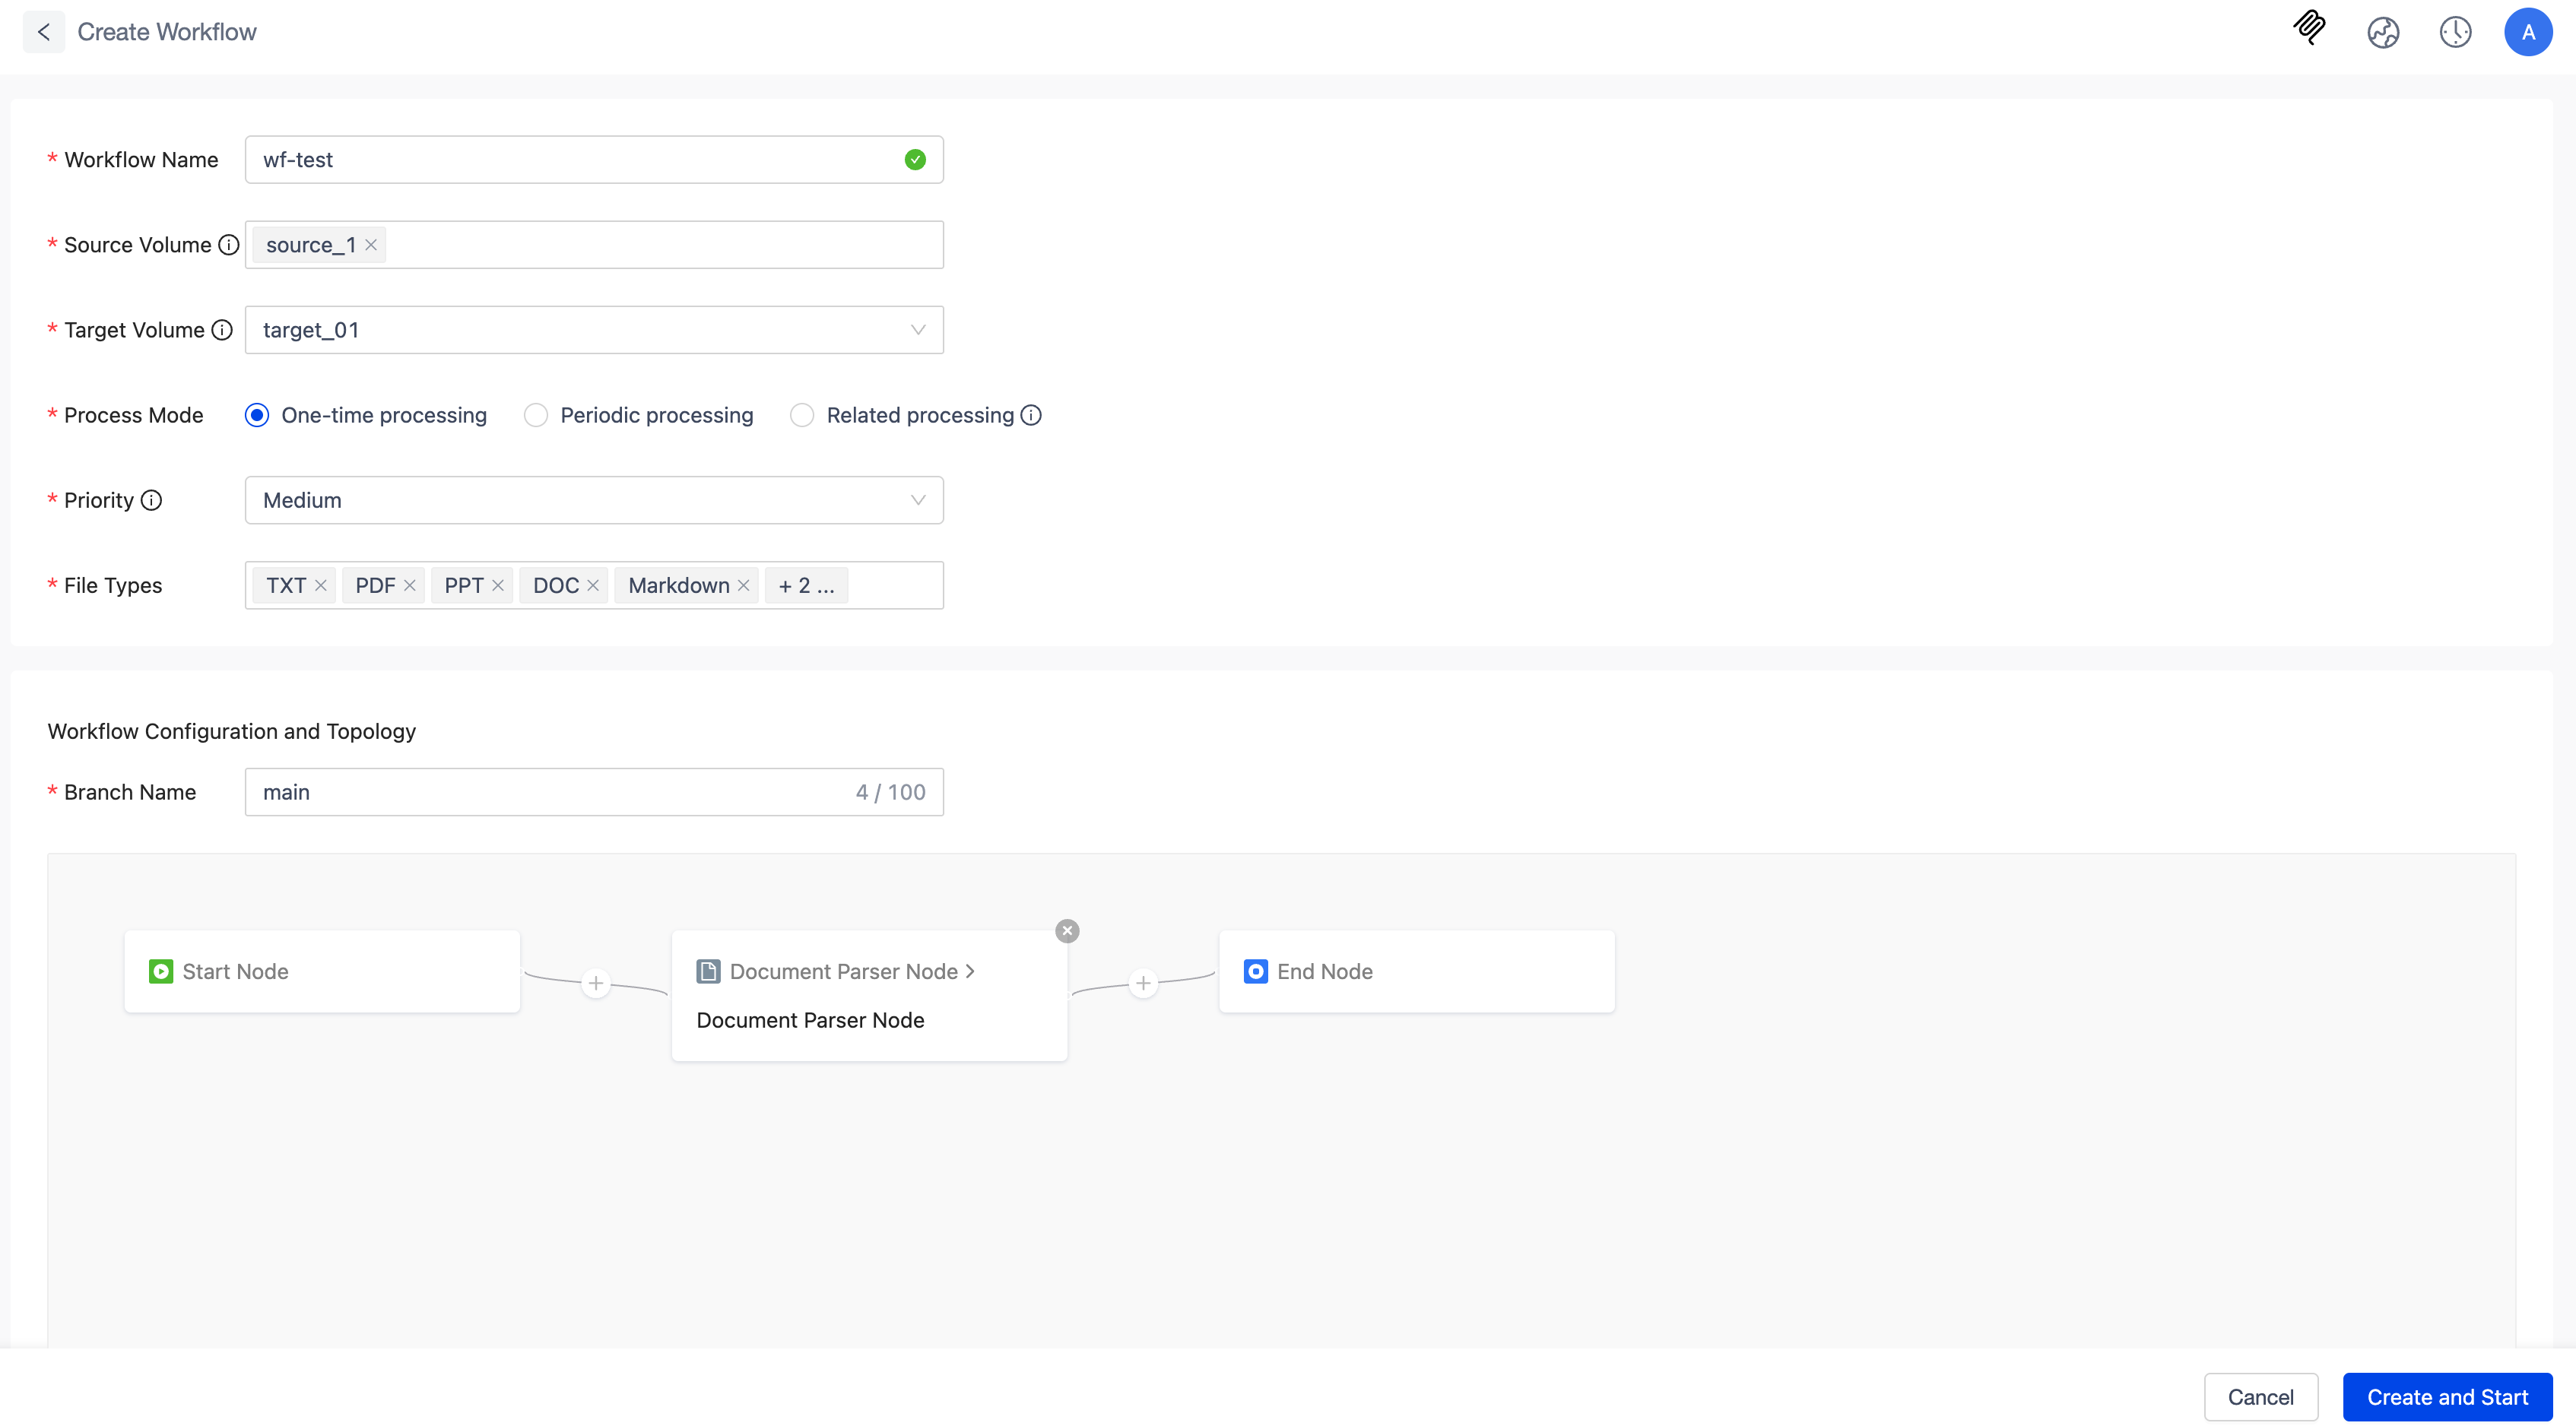
2. Create a workflow
The platform ships with several built-in workflow templates plus sample data, so you can build a workflow in a few clicks:
Choose Data Processing from the side menu and open the Workflow Templates page.
On the Multimodal Document RAG Data Prep card, click Use Template to enter the workflow creation page.
Under Target location, create a new data volume to store the results.
Click Create and Run in the bottom-right to create the workflow.
Go back to the workflow list and wait for the status to become Completed.
3. Inspect the parsing results
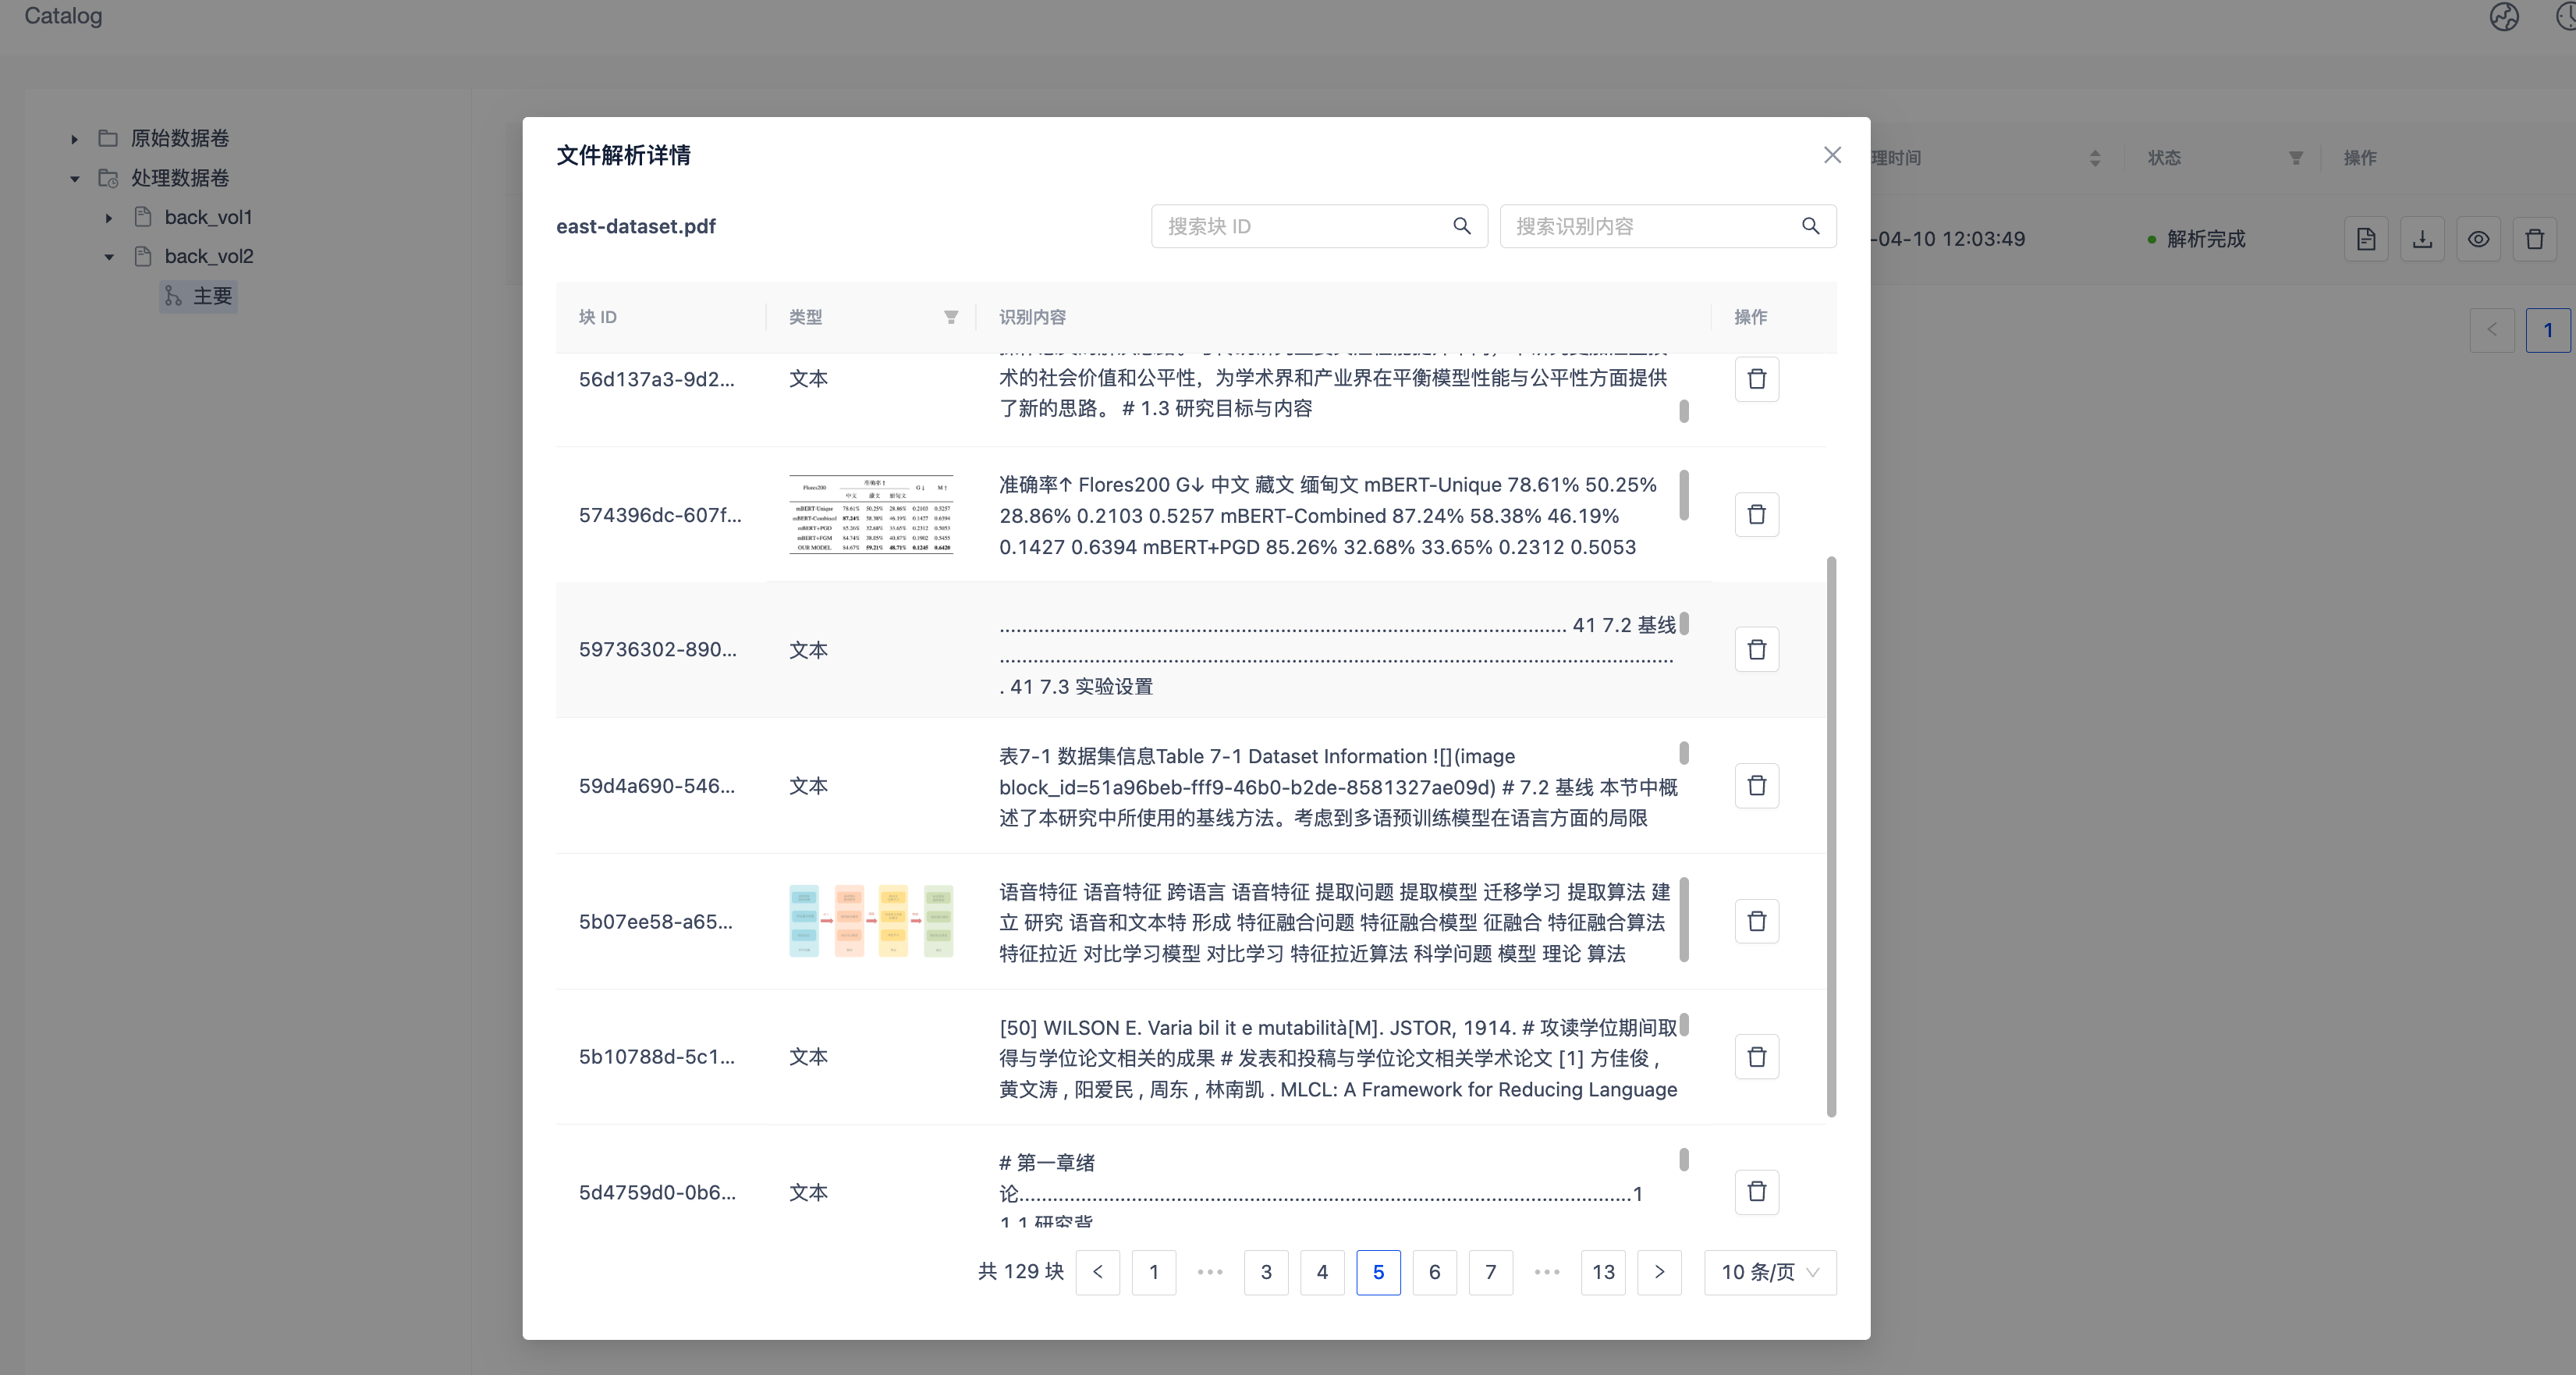
From the side menu, choose Data Management and open the Data Center page.
Under processing volumes, find the target volume you created in the previous step.
Click the preview button on the right to inspect the parsing results.
4. Download the parsed data
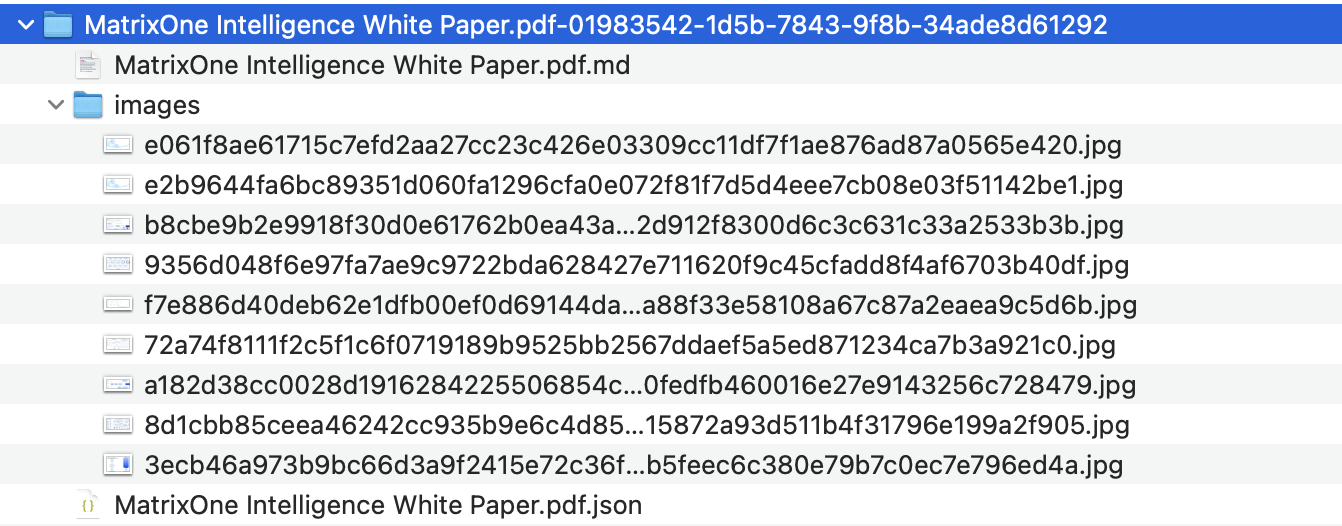
Click the download button on the right to get a folder containing both the textual parsing results and the image assets. The folder includes:
A JSON file with the full text-parsing content, including basic file info, segment types, page numbers, and original metadata of the embedded images.
An images folder with the image assets extracted from the document.
A tables folder with the table assets extracted from the document.
A
full.mdfile with the complete Markdown content.
Congratulations — you’ve created a GenAI Workspace and run a document end-to-end! For more on GenAI Workspaces, see the GenAI Workspace section.
For additional help, browse our docs or reach out to the support team.