

Complete your first workspace check with MOI-CLI
MOI-CLI is MOI’s command-line tool. It uses the Product API to manage AI Studio workspace resources from a terminal and can return results as JSON.
MOI-CLI lets you turn resource queries and status checks into repeatable commands. It is useful for local troubleshooting, batch operations, or integrating MOI operations into shell scripts and CI, where resource IDs and returned results need to be preserved for review and follow-up.
Use MOI-CLI in scenarios such as:
confirming the service endpoint, account, and workspace when connecting to a workspace for the first time;
quickly checking the current identity, workspace, and member information from a terminal;
reading JSON results in a script or CI job to perform connection or permission checks;
performing routine workspace checks in an environment without a browser.
This tutorial uses the scenario of a new member connecting to a workspace for the first time. You will follow each step from connecting to the service and selecting a workspace to confirming the current identity. The entire flow is read-only: it does not create, run, modify, or delete resources.
What you will complete
Verify that
moi-cliis installed and runs correctly;Configure the Product API endpoint and personal access token;
List workspaces available to the current identity and save a target workspace;
Confirm the current identity and workspace member information.
Before you start
Install
moi-cliand confirm thatmoi-cli -versionruns. See Download MOI-CLI.Create a personal access token. See Access credentials.
Make sure the personal access token has read access to at least one AI Studio workspace.
Use a secure local terminal. Do not put the token in scripts, repositories, or shared terminal history.
Steps
1. Verify that the CLI is available
Run the version and help commands to confirm that the terminal can find moi-cli:
moi-cli -version
moi-cli --help
The output below indicates that the CLI started successfully: the terminal shows the version, Product API description, global options, and available commands.
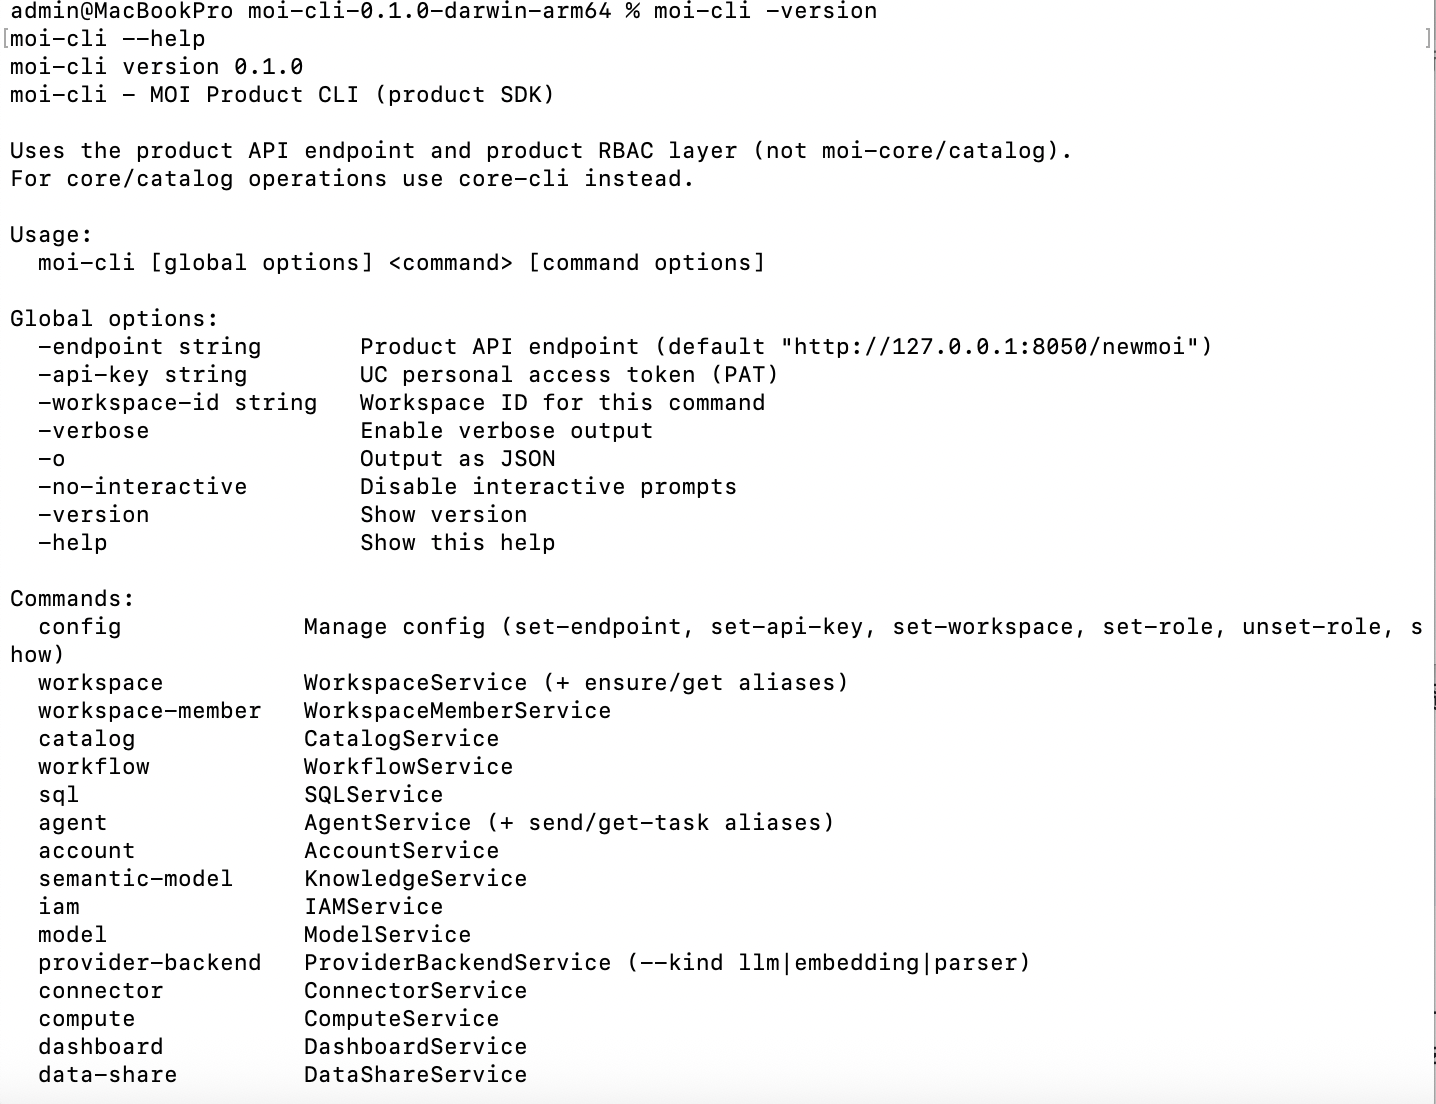
If the version and help text are displayed, continue to configure the connection. If the terminal reports that the command cannot be found, complete the installation steps in Download MOI-CLI.
2. Configure the service endpoint and personal access token
Configure the CLI with the Product API endpoint and personal access token:
moi-cli config set-endpoint "https://api.moi.matrixorigin.cn/v5"
moi-cli config set-api-key "<personal-access-token>"
Pass the token as its raw value; do not add a Bearer prefix. After configuring the values, inspect the saved configuration:
moi-cli config show
The output below shows that the endpoint has been saved, the personal access token is masked, and no workspace ID has been set yet. The next step selects a target workspace from the list of accessible workspaces.
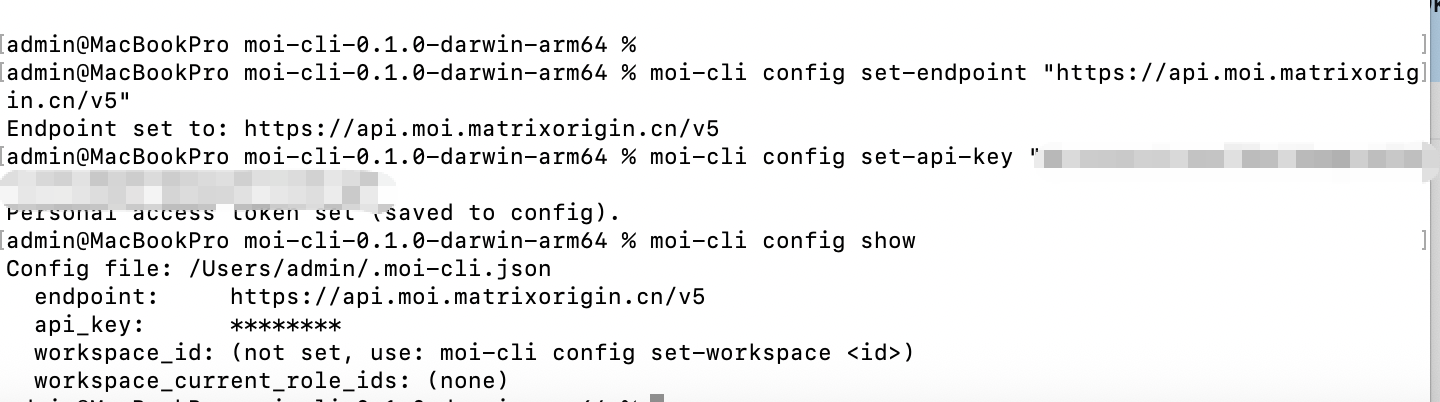
The endpoint should be https://api.moi.matrixorigin.cn/v5, and api_key should be masked. If the token is not masked, stop and check the terminal and CLI version before continuing so that the credential is not exposed on screen or in logs.
3. Find and select a workspace
List the workspaces that the current identity can access:
moi-cli -o workspace list
Find the workspace you want to check and verify its name and ID. Save the ID in a variable and write it to the CLI configuration:
export WORKSPACE_ID='<target-workspace-id>'
moi-cli config set-workspace "$WORKSPACE_ID"
Inspect the configuration again to confirm that the workspace ID was saved:
moi-cli config show
The output below shows that the workspace ID has been saved and the personal access token remains masked:

If the workspace list is empty, the token cannot access any workspace. Check the account associated with the token and workspace membership instead of entering an arbitrary workspace ID.
4. Confirm the current identity
After configuring the workspace, confirm the identity used by the CLI:
moi-cli -o workspace-member current-principal
The user, role, and status fields help confirm the current identity and its status. In the example below, the current user is Super Administrator, the role is SuperAdmin, and the user status is enabled:
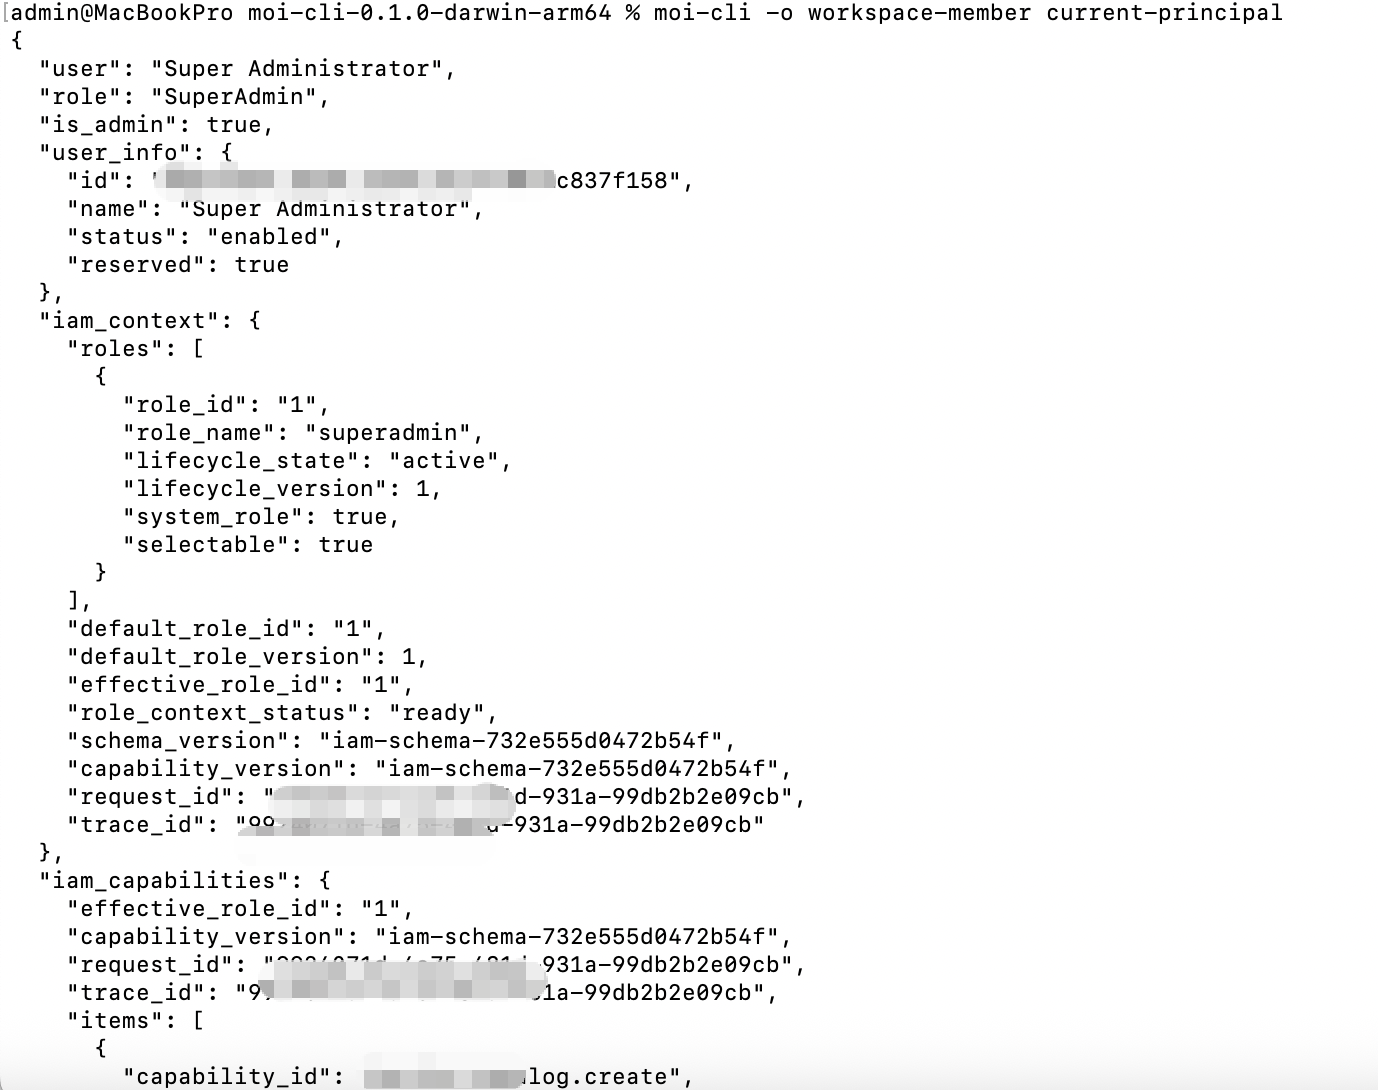
Check that the returned user or principal is the one you expect. If the identity is incorrect, return to step 2 and check the personal access token before running any other command.
5. View workspace members
After confirming the identity, read the member list for the current workspace:
moi-cli -o workspace-member members
The total field shows the number of members, and user_list contains each member’s status and roles. In the example below, the workspace has one member with status enabled and role superadmin:
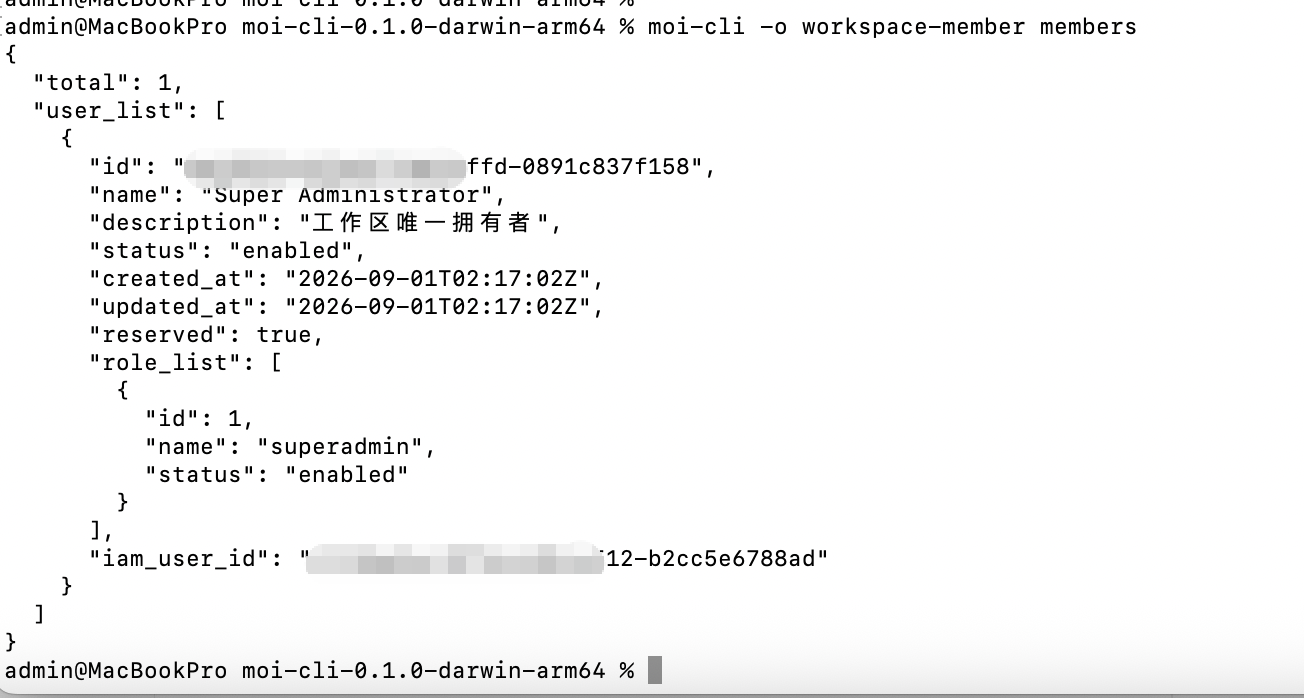
Check that the target account appears in the member list and note its current role or status. An empty list or a permission error does not necessarily mean that the workspace does not exist; it may mean that the current identity cannot read member information.
Tutorial complete
You have completed your first MOI-CLI workspace check: you verified the CLI version and service connection, selected a target workspace, and confirmed the current identity and member information. You can use the same approach to check other workspace resources. To process JSON in a script or CI job, see Scripting and CI automation; to explore more resource commands, see Common tasks.