

Install Astra and explore MOI from your terminal
Astra is an open-source AI agent from MatrixOrigin that runs in your terminal: you describe what you want in natural language, and it calls tools to get it done step by step. In this tutorial, Astra reaches MOI through moi-cli, MOI’s command-line tool. For example, if you type “List all MOI workspaces I can access”, Astra runs the matching moi-cli command and summarizes the result for you.
Technically, Astra is an Agent Runtime: it runs the agent loop and contains no model of its own. The model it uses is provided by MOI, so you do not need a model API key. You also do not need to learn moi-cli commands first; sign in once with your MOI account and you can start. Before Astra runs a command on your computer, it asks for your approval by default.
The five steps below take you through installation, sign-in, a first conversation, and two read-only queries. The whole walkthrough only reads information; it does not create, modify, or delete any resources.
These illustrations were made from screenshots of one real validation run and redacted. Click an image to open it at full size in a new tab. Version numbers and query results may differ from yours.
Before you begin
A macOS or Linux computer that can reach MOI;
An MOI account with access to at least one workspace;
A working directory for the Astra session. For a first try, use a dedicated project directory rather than trusting your entire home directory.
1. Install the client
Run this in a terminal on your computer:
curl -fsSL https://get.matrixorigin.cn/astra | sh
The confirmation is Astra and moi-cli are installed.:
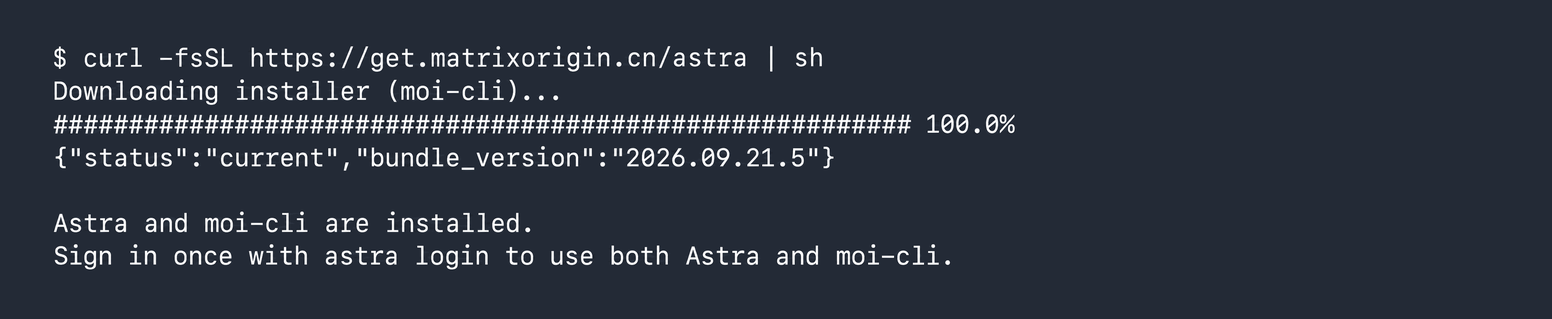
If the terminal cannot find astra afterward, open a new terminal or follow the PATH instructions printed by the installer; do not rerun the installer.
2. Sign in to MOI and Astra
In the same terminal, run:
astra login
A browser page opens. If needed, sign in to your MOI account first. When the browser says You are signed in to Astra, return to the terminal and select a workspace. Logged in in the terminal is the completion signal.
See the browser success page
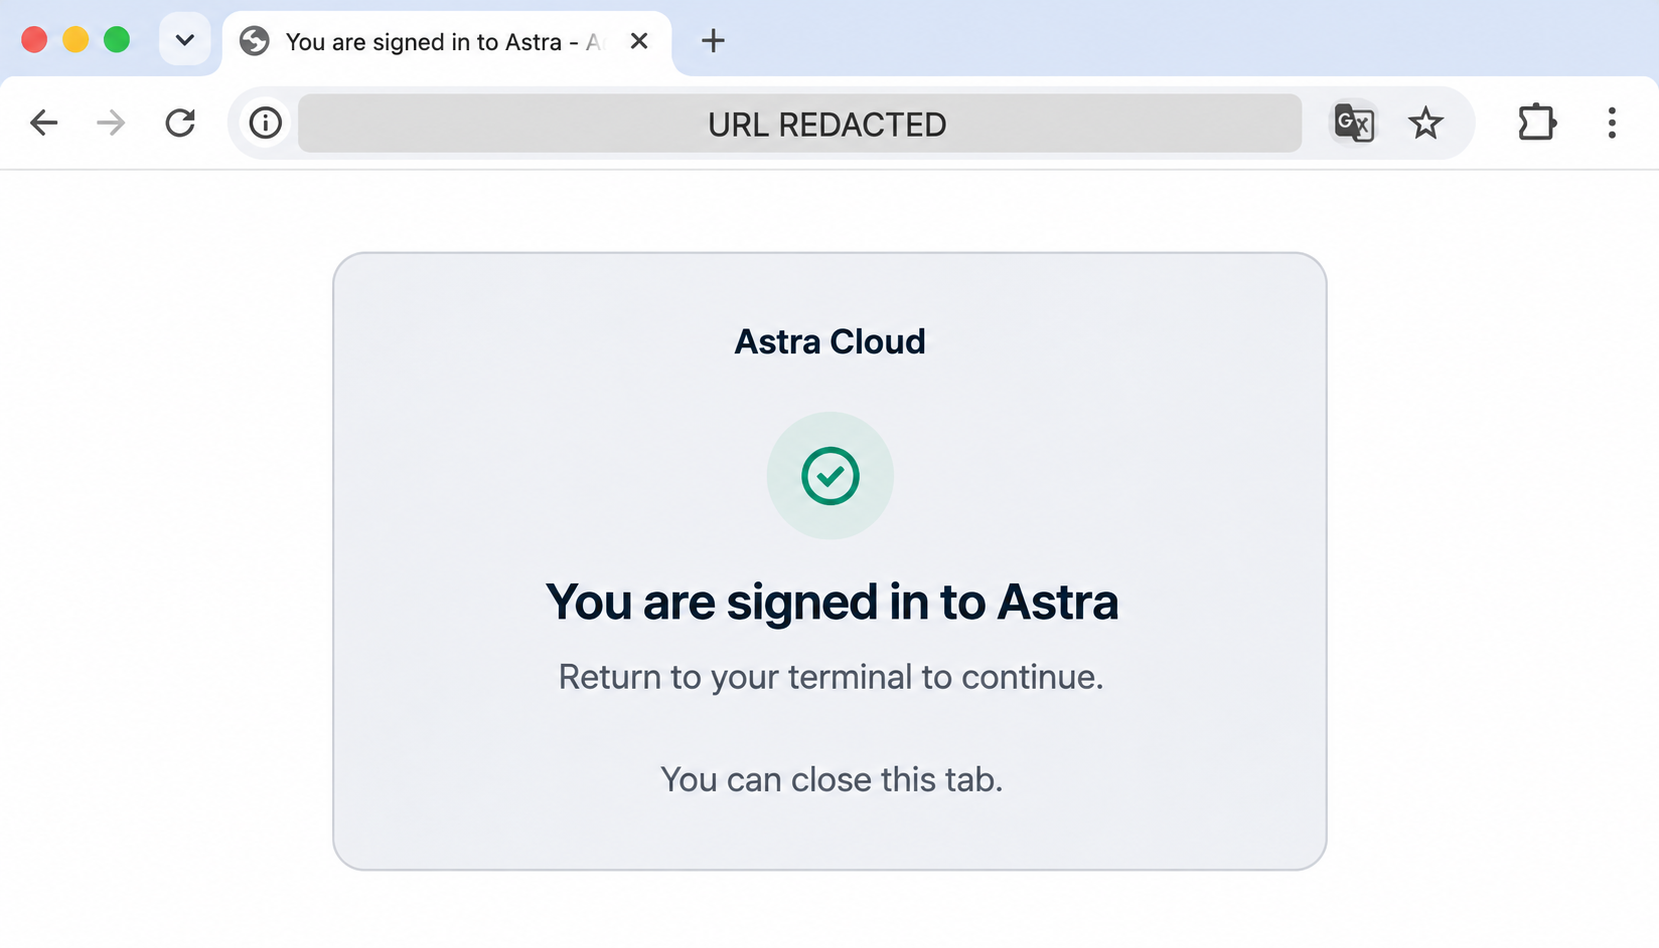
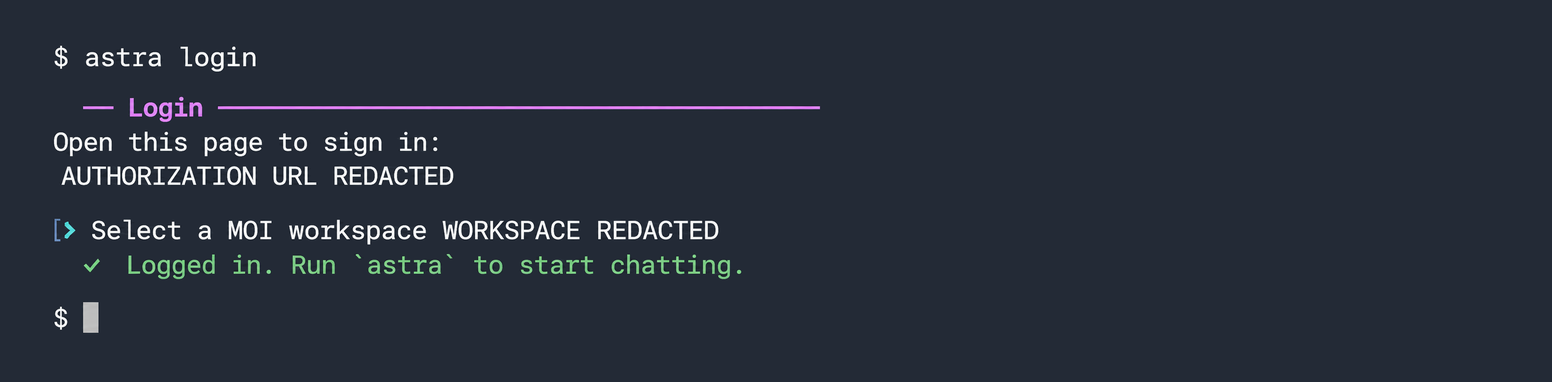
The browser may show success while workspace selection is still open in the terminal. Do not share the browser callback URL or terminal authorization URL; they contain parameters for this sign-in attempt.
3. Start a conversation
From the directory where you want to work, run:
astra
If Astra asks whether to trust the current directory, decide whether you want its saved workspace rules enabled. The highlighted option below is from this run, not a recommendation to trust your directory.
See the directory trust prompt
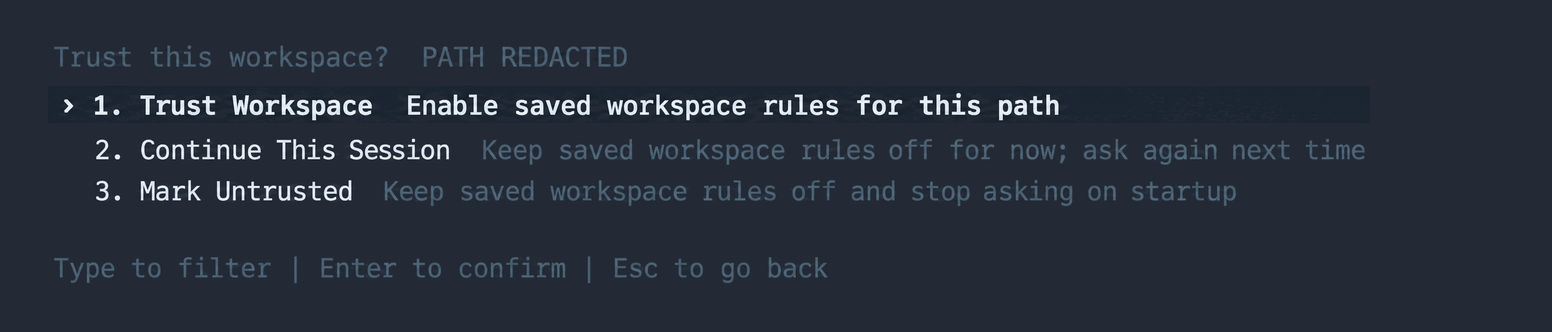
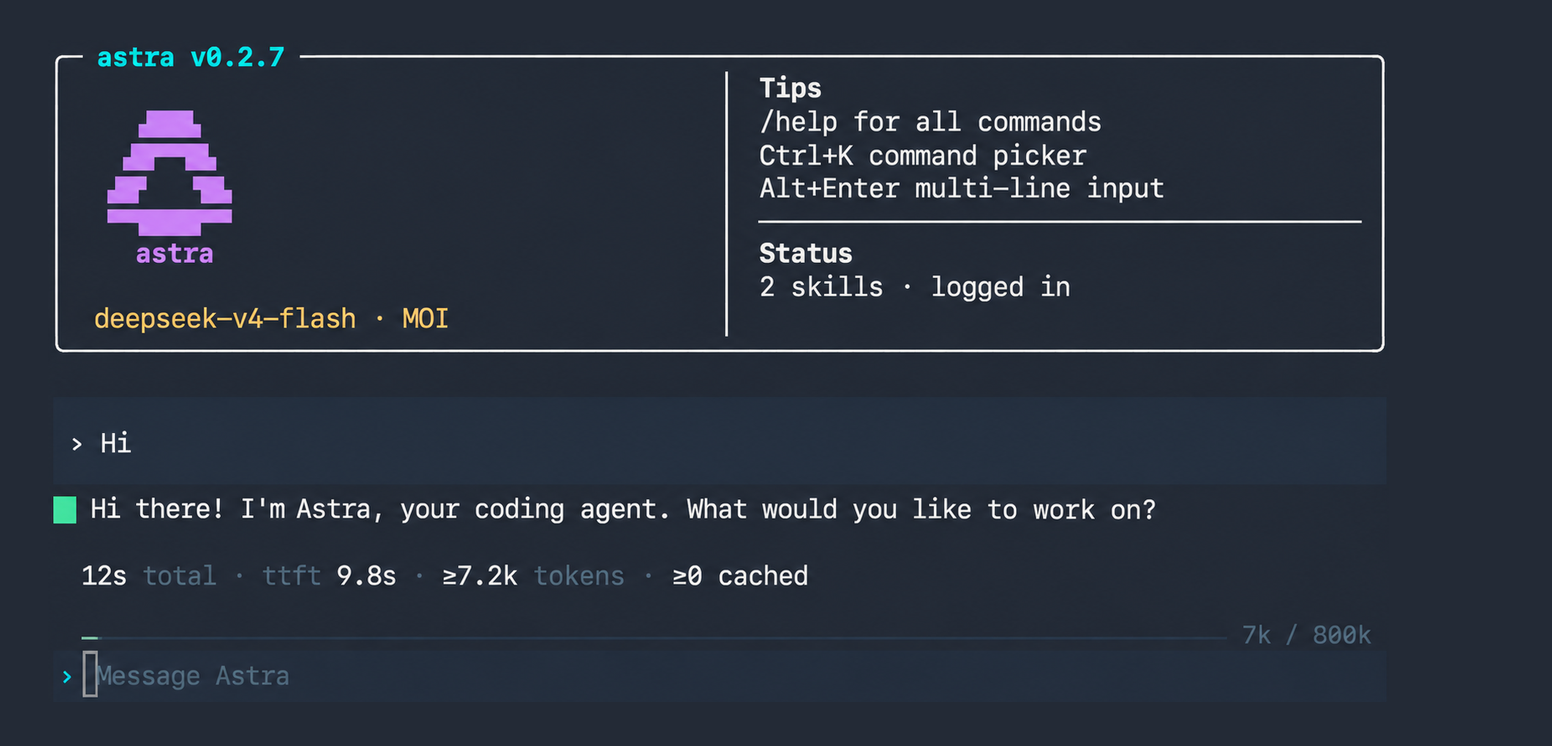
After entering the conversation, send Hi. A reply confirms that ordinary chat is working:
4. Read MOI data
In the same Astra conversation, enter:
List all MOI workspaces I can access.
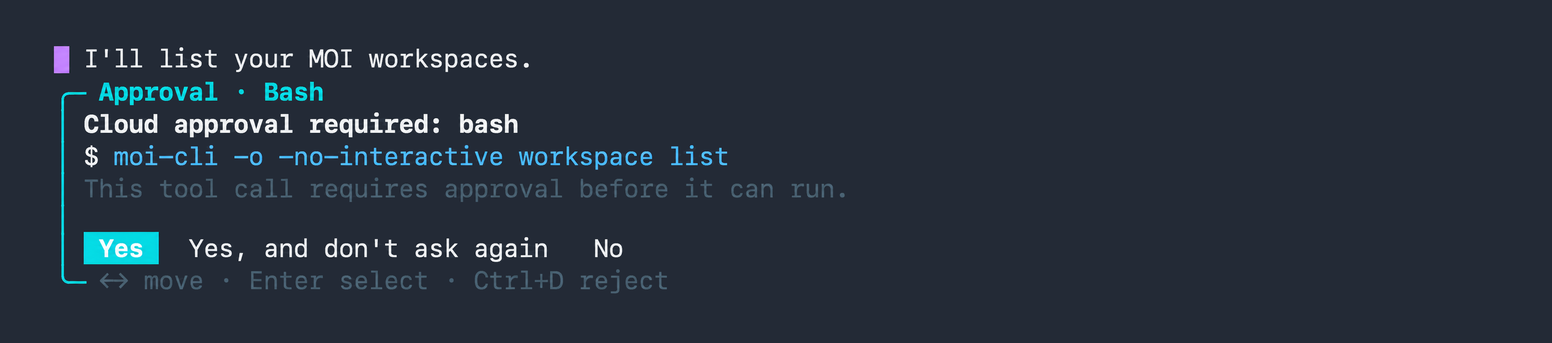
On the first MOI tool call, Astra may ask you to approve moi-cli ... workspace list. Verify that it is a workspace-list query, then select Yes to run it once.
See the first command approval prompt
You should then see the workspaces you can access:
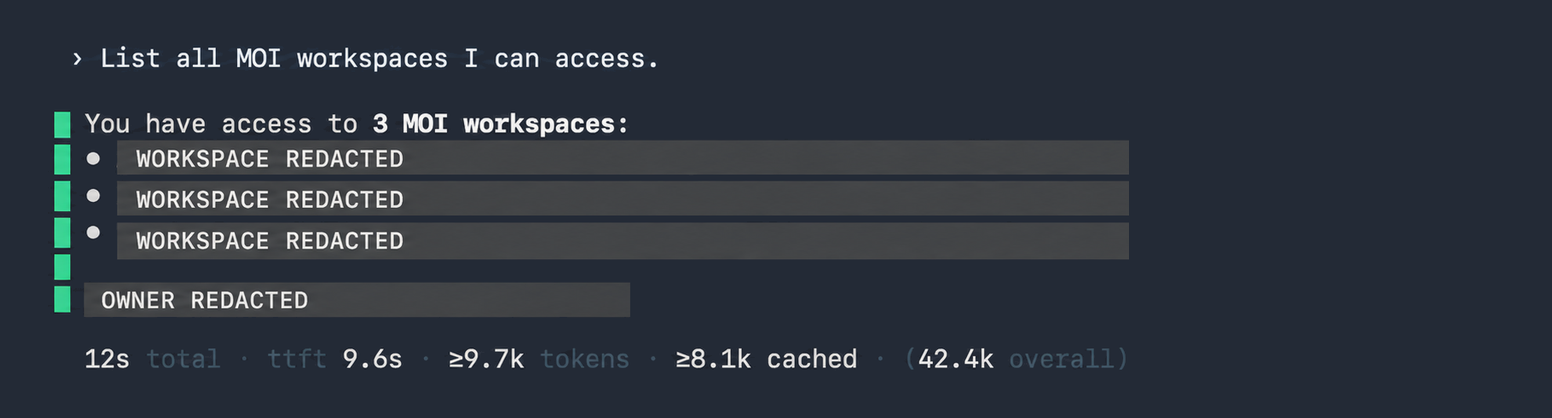
The number and names depend on your account. Names, IDs, and owner details in the illustration are redacted.
5. List databases in the selected workspace
Continue in the same conversation. The prompt used in this walkthrough was:
List the databases in my currently selected MOI workspace. Do not change any data.
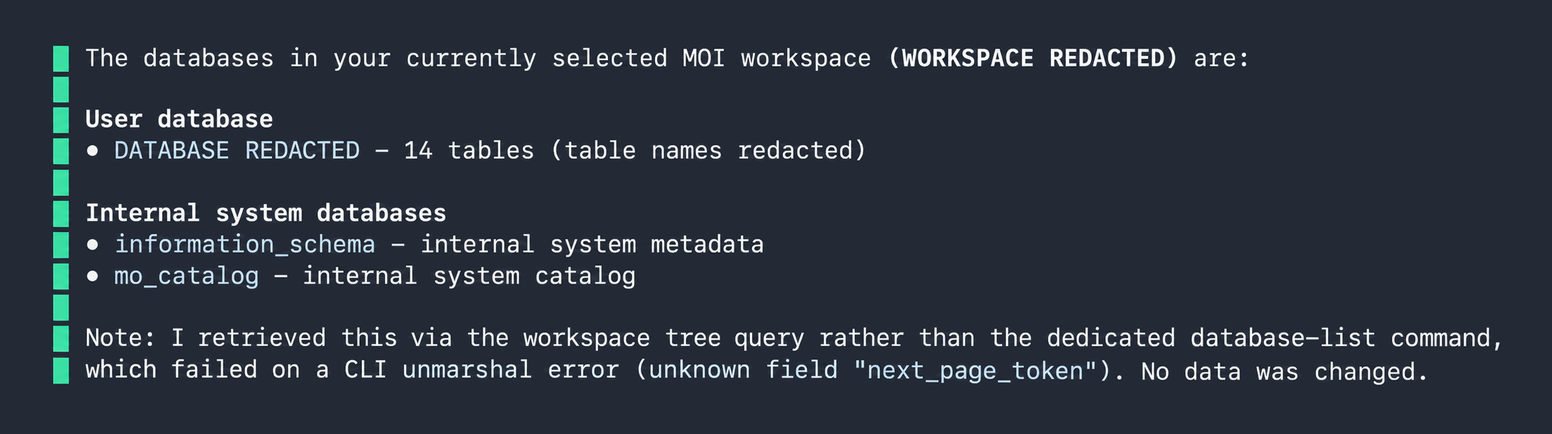
Astra returns the databases and table names in your selected workspace. This validation run found one user database and two internal system databases without changing data:
Known issue
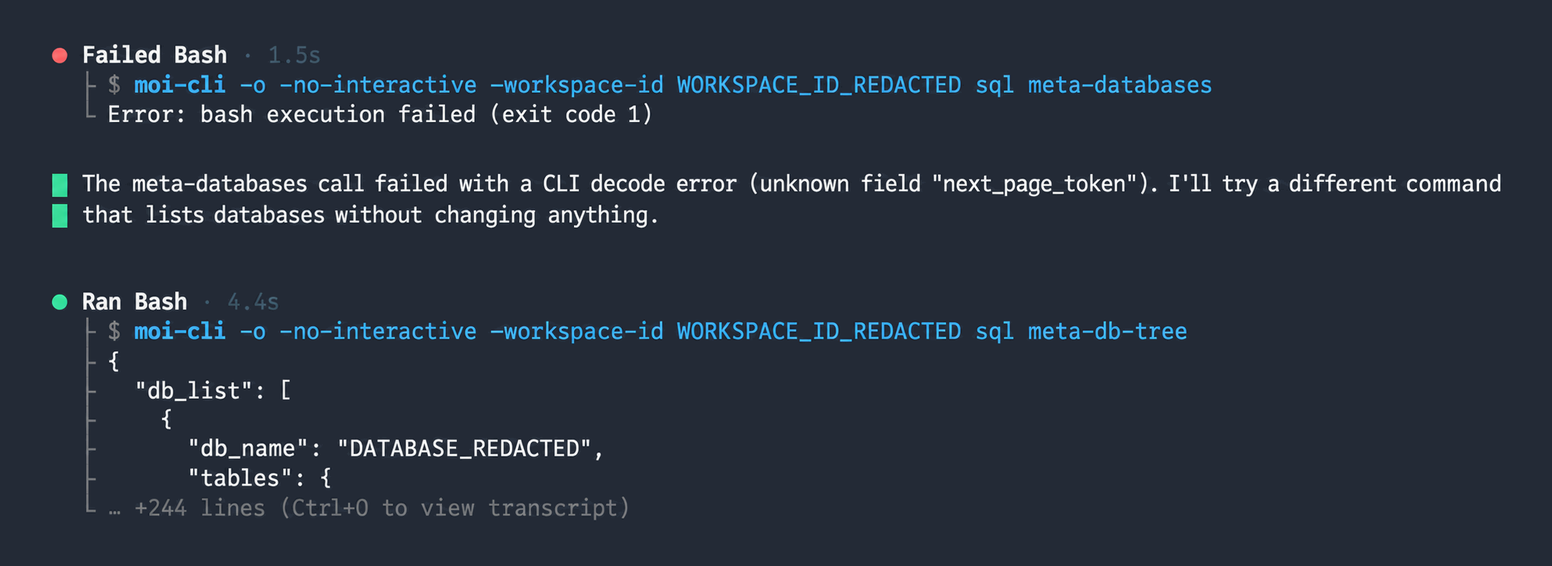
During this run, sql meta-databases failed with unknown field "next_page_token". Astra then used the read-only sql meta-db-tree command to get the result. This compatibility issue still needs a fix; it does not mean every query will fail first. If your query does not recover, keep the error for troubleshooting rather than treating a missing response as an empty database.
See the error and fallback query from this run
You have now completed a first read-only MOI query from Astra. CSV import and data changes belong to a separate workflow.