
Use Genesis models in WorkBuddy
To use a Genesis model in WorkBuddy, add a custom model with its URL, API key, and model ID, then select it for a task. This tutorial connects the WorkBuddy desktop app to Kimi K3 (kimi-k3) and checks a conversation.
Before starting, install and sign in to WorkBuddy and prepare an MOI account with access to Genesis.
1. Create an API token in MOI
Click your avatar in MOI and select Access Credentials.
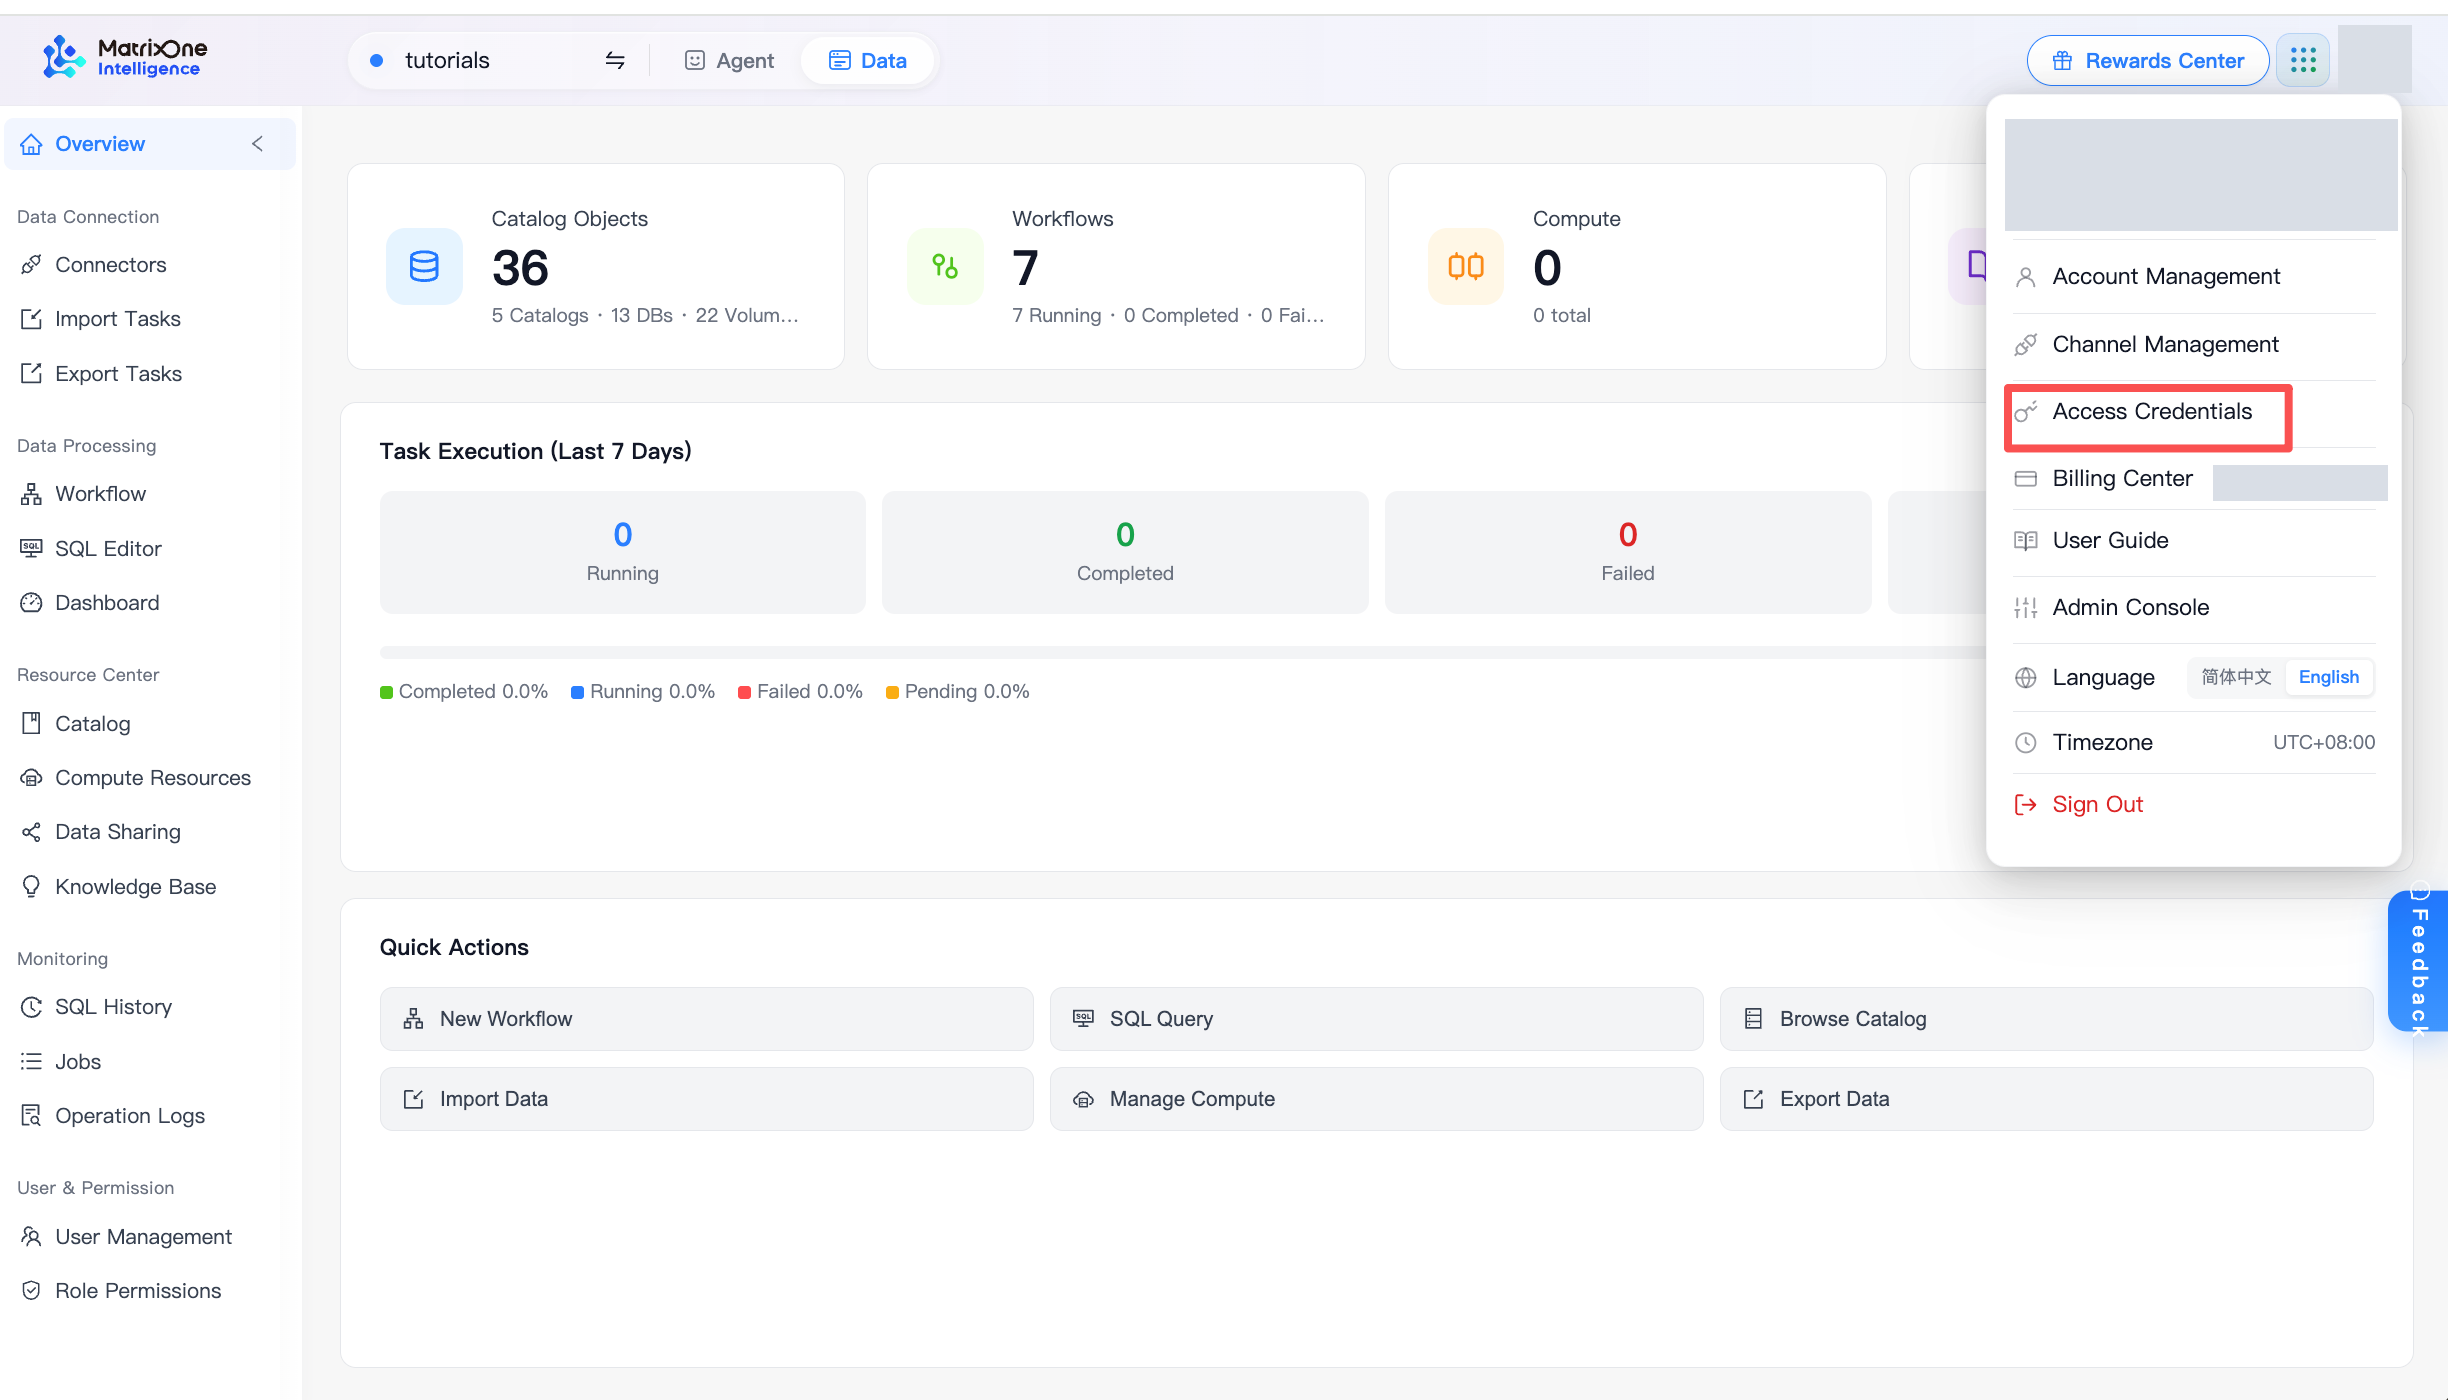
Choose Personal access tokens, then Create token. Use a name such as
genesis-workbuddy, select an expiration, and create it.Copy and save the full token. This is the API key you will enter later.
You can also use an existing valid personal access token.
2. Copy the model ID and connection URL from Genesis
In Genesis, open Models, search for
kimi-k3, and open Kimi K3’s details.Click Copy Model ID. This example uses
kimi-k3; keep the lowercase letters and hyphen.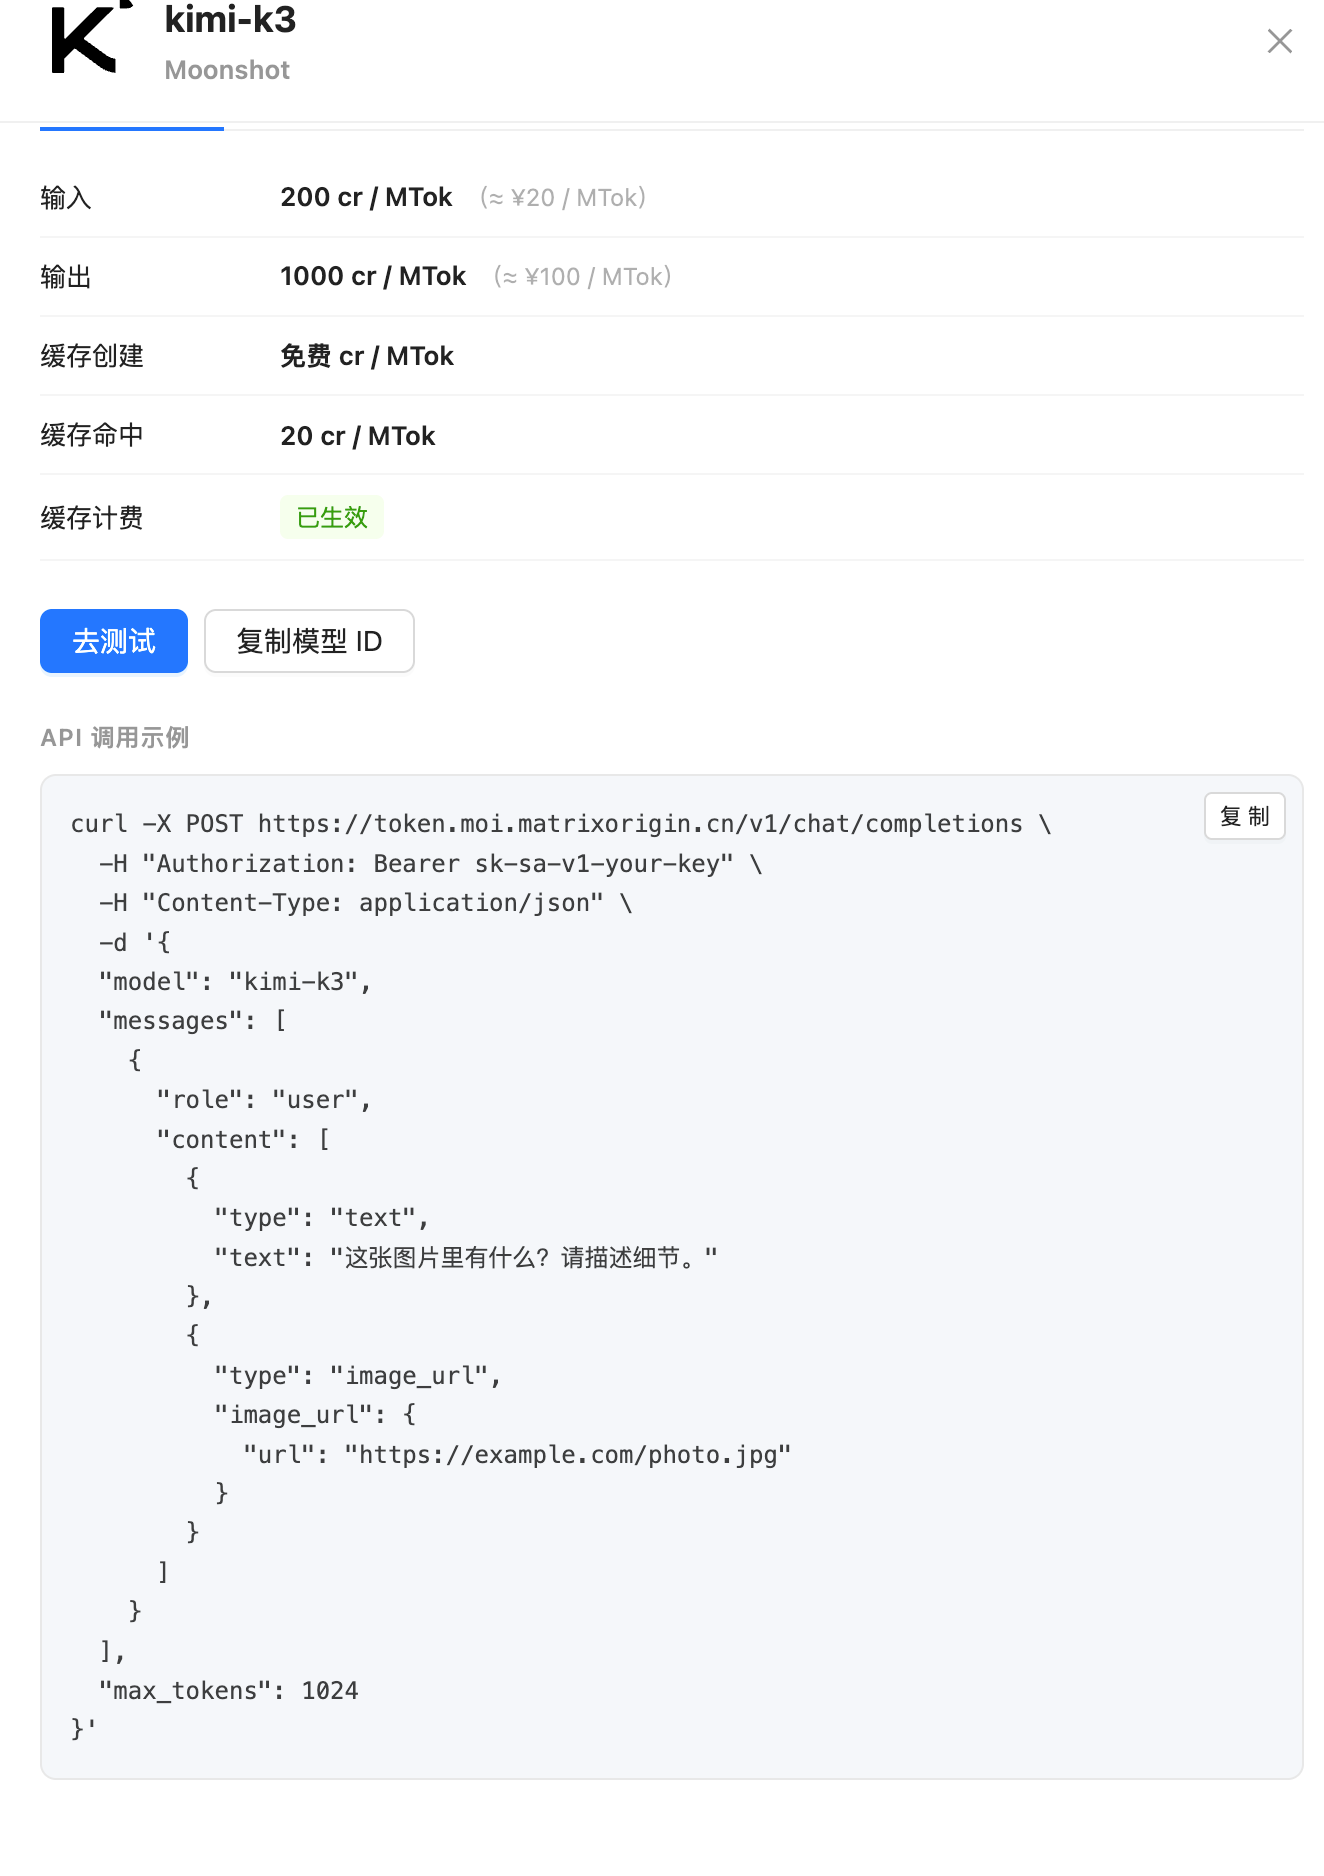
Open Usage and copy the Base URL under Connection information. This example uses:
https://token.moi.matrixorigin.cn/v1
Under API usage, check the Chat Completions example for this model. The complete request URL is
https://token.moi.matrixorigin.cn/v1/chat/completions.
You now have the API key, Base URL, and model ID. WorkBuddy’s custom integration uses Chat Completions. Enter these values as shown below.
3. Add a custom model in WorkBuddy
Open WorkBuddy, click your avatar, and go to System settings → Models.
Under Custom models, click Add model and choose Custom as the provider.
Fill in:
Field
Value
Provider
Custom
Endpoint
https://token.moi.matrixorigin.cn/v1API Key
The full token from step 1
Model Name
kimi-k3Advanced Settings
Select Tool Calling; leave Image Input, Reasoning, and Custom Protocol cleared
Click Test connection. After Connection succeeded appears, click Save.
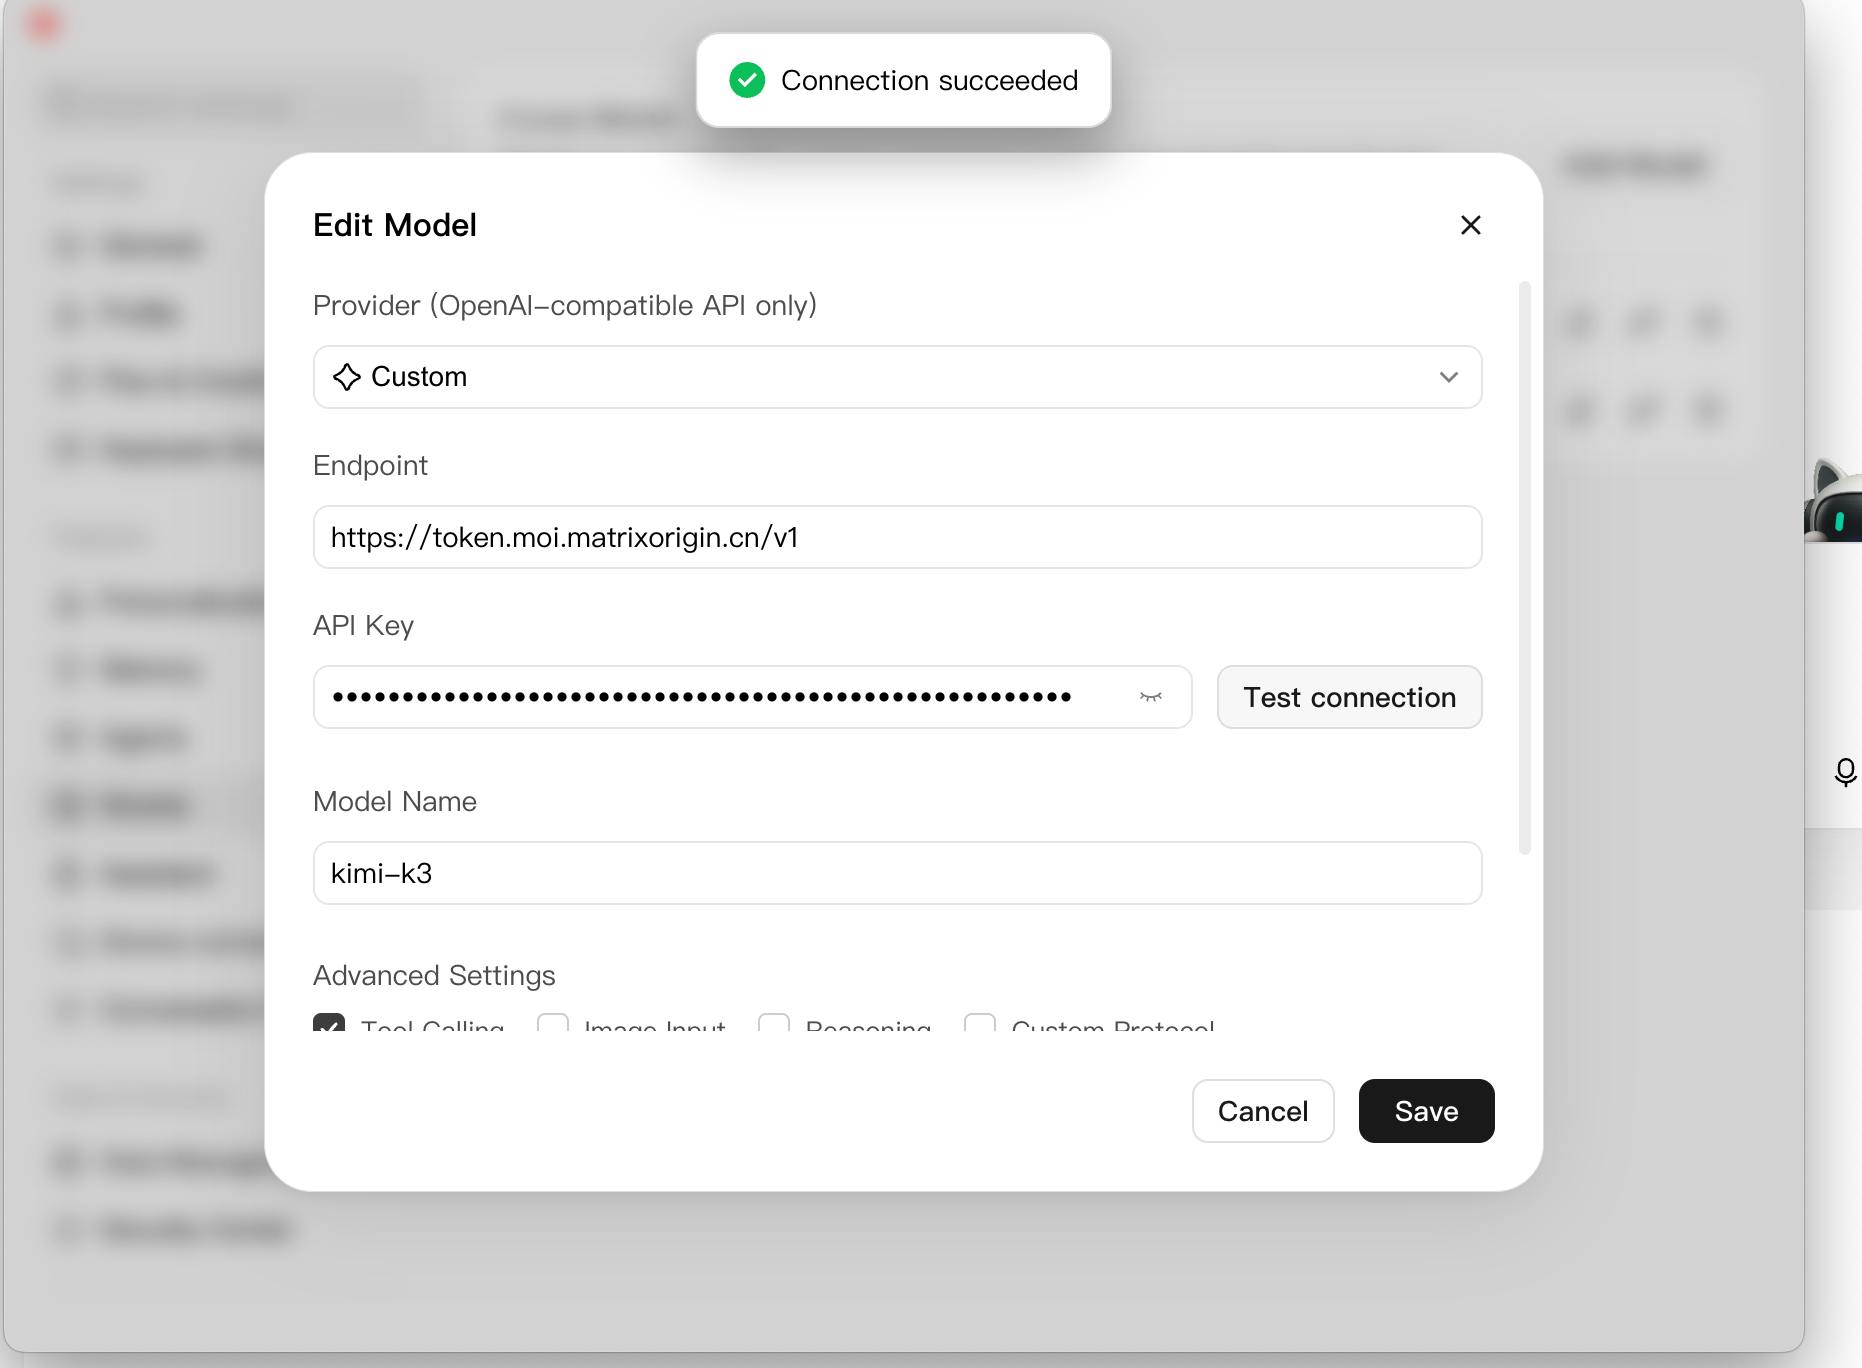
WorkBuddy appends /chat/completions to the Endpoint, so do not enter the full request URL here.
Labels may vary by version. The conversation model picker also links to custom model settings. See WorkBuddy’s model configuration guide.
4. Start a task with Kimi K3
Create a new task and open the model picker in the input area.
Under Custom models, choose the
kimi-k3entry you added. If a built-in Kimi model is also listed, choose your custom entry.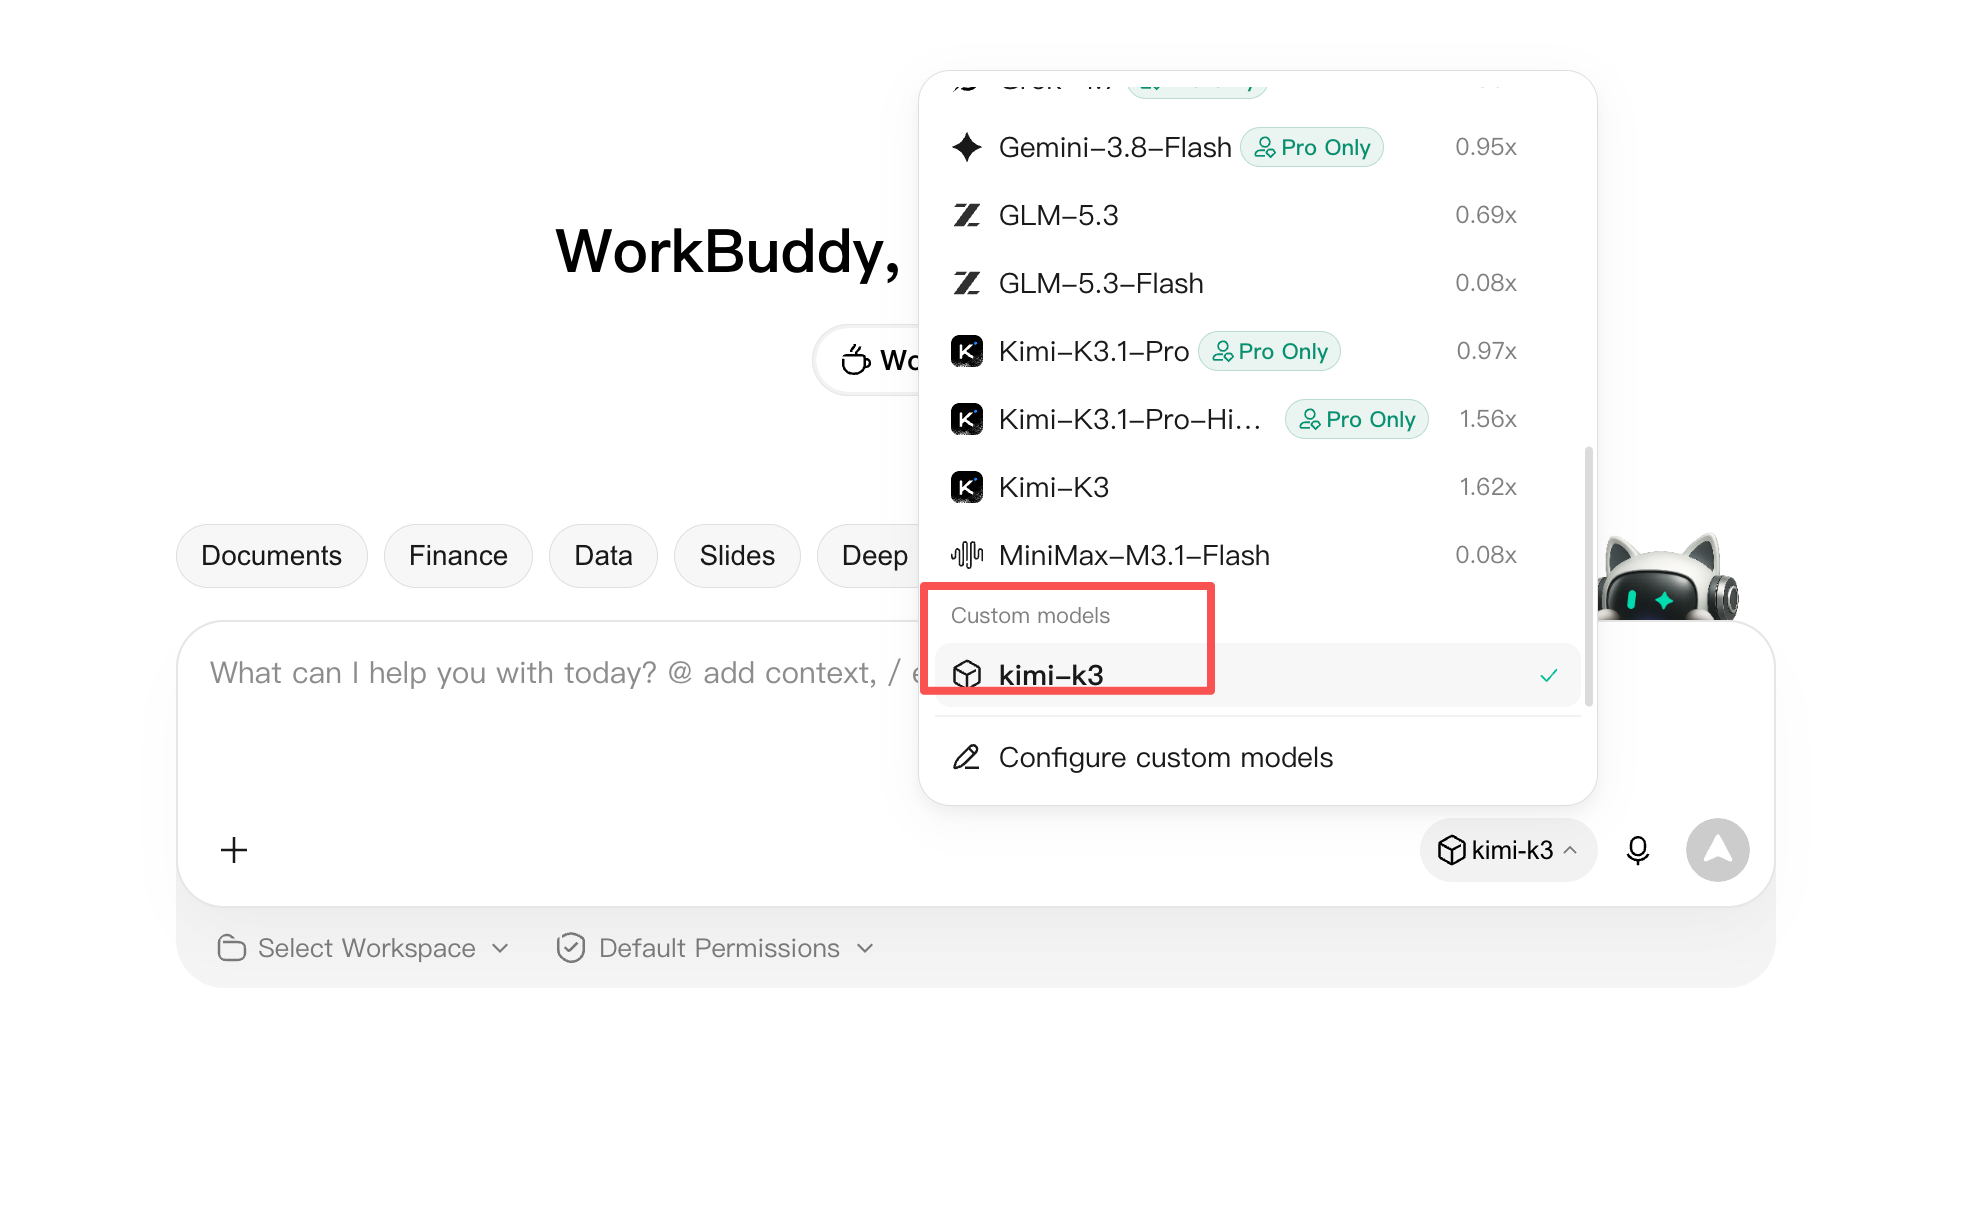
Send:
Turn these project updates into three short weekly-report bullets:
The sign-in page design is complete. Data import integration is complete,
but large file uploads occasionally time out. Next week we will investigate
the timeouts and need the backend team to provide request logs.
Send the prompt and confirm that WorkBuddy returns the weekly report.
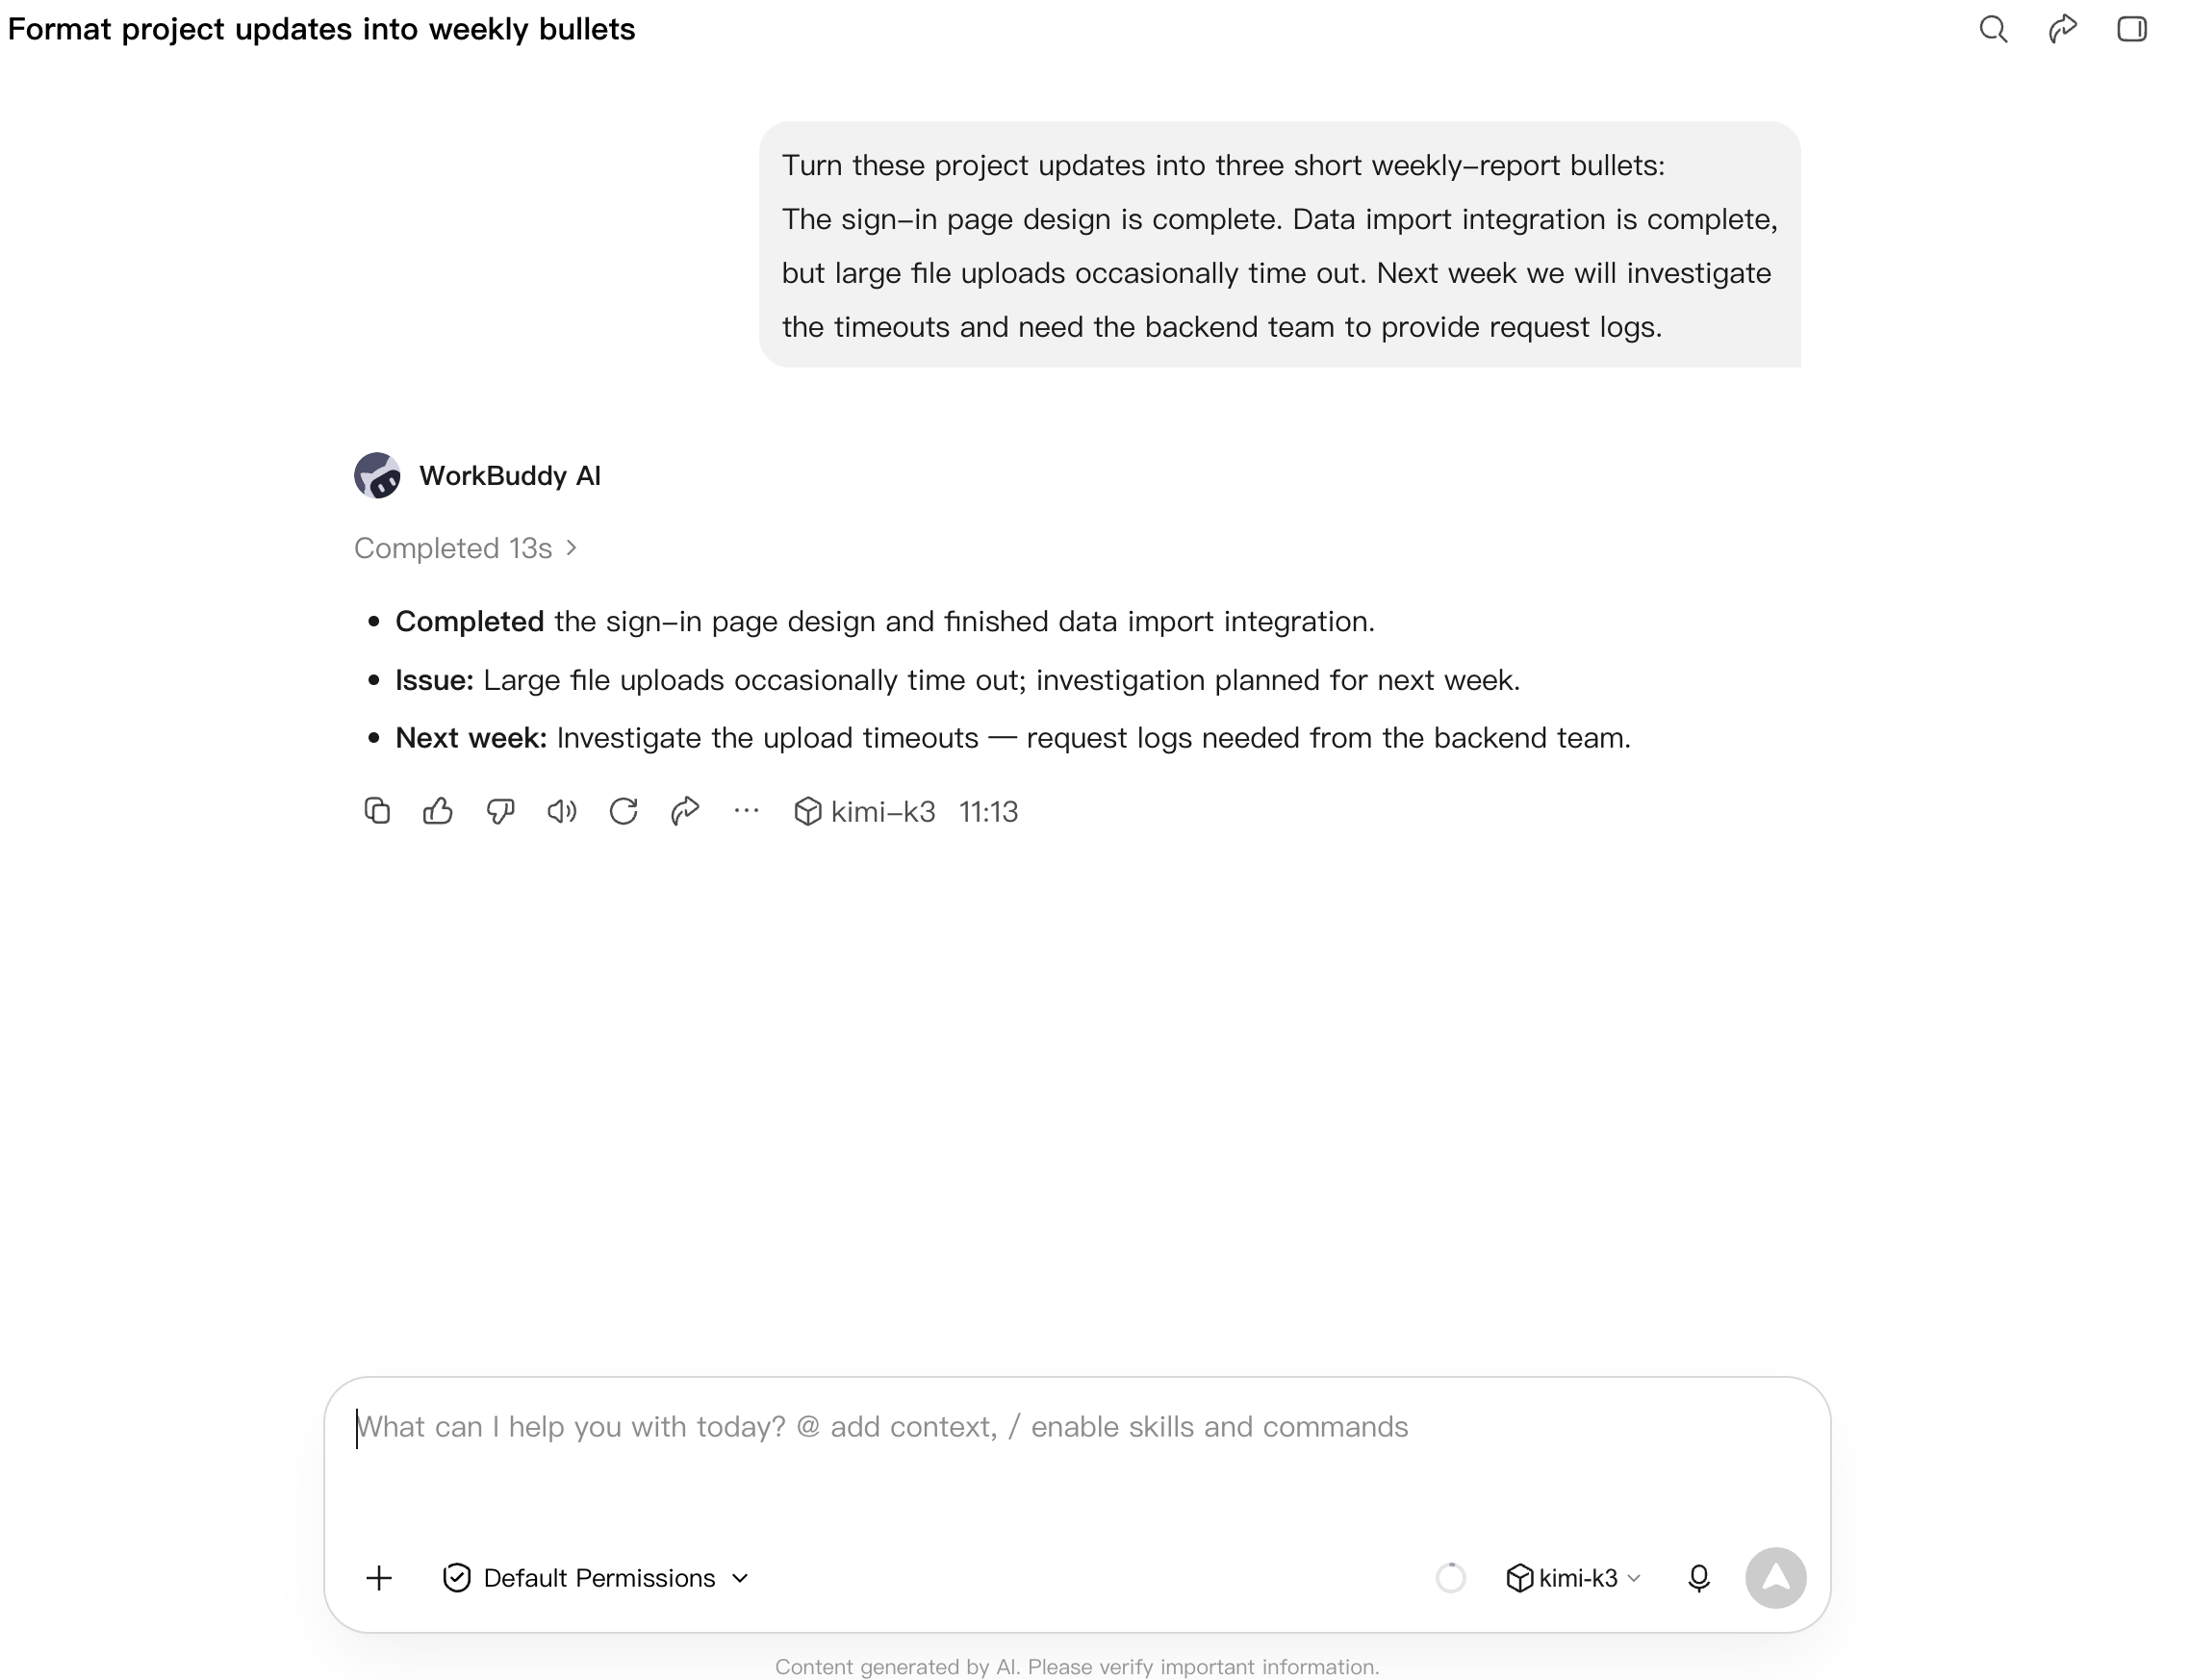
Kimi K3 returns the formatted weekly report in WorkBuddy.
In Genesis, open Logs and confirm that the request used
kimi-k3.
You have connected WorkBuddy to Genesis and completed a conversation with Kimi K3.
For later tasks, select this custom model in the picker. To use a built-in WorkBuddy model, select its built-in entry instead.