

Create and run a workflow with natural language
In addition to starting from system templates or dragging nodes onto the canvas manually, MOI lets you describe a workflow goal in plain language through Workflow Copilot. Copilot proposes a step-by-step plan for confirmation, generates the workflow nodes, runs built-in test cases, and lets you configure runtime parameters to process real files into a target Catalog volume.
This tutorial demonstrates building and running a PDF-to-Markdown conversion workflow: describing the goal in natural language, confirming Copilot’s four-step plan, reviewing passing test cases, setting runtime parameters, and previewing the resulting .md file in Catalog.
What you will do
Choose Describe with natural language in the workflow editor and describe the processing goal;
Review and confirm the four-step build plan generated by Workflow Copilot;
Inspect the generated workflow graph and passing test cases;
Fill in Run configuration parameters and trigger a live run;
Preview the generated
.mdfile inside your target Catalog volume.
Before you begin
A signed-in MOI account with permission to create/run workflows and read/write Catalog volumes in your workspace;
At least one source PDF uploaded to a Catalog volume (see Import data or step 1 of Create Your First Knowledge Base from a PDF, such as
qjaa004.pdf), plus a destination Catalog volume (for exampledefault / output / 111) for storing.mdoutputs.
Steps
1. Open the workflow editor and describe your goal
Switch to Data at the top, open Data Processing → Workflows in the left navigation, and click Create Workflow.
Rename the workflow (for example
文档提取) and click Describe with natural language on the center Create Workflow card—or type directly in the bottom prompt box and confirm the selected model (such asglm-5.3).
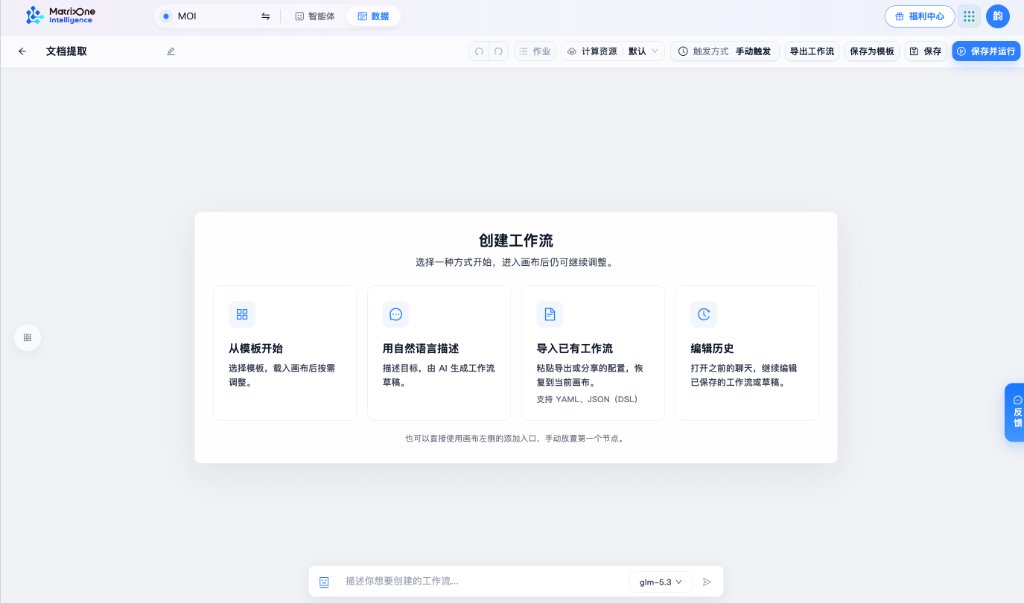
Select Describe with natural language or enter your workflow goal directly in the bottom input bar.
Send a clear prompt describing the input source, processing steps, output format, and runtime parameters, for example:
Create a workflow that converts PDF files to Markdown documents:
let users choose a PDF file or a Catalog volume containing PDFs as the runtime data source,
parse and extract the text into clean Markdown, and write the .md files to a chosen target MOI volume.
Completion check: Workflow Copilot opens on the right and begins planning the workflow steps.
2. Review and confirm the build plan
Wait for Workflow Copilot to review workspace rules and propose a plan. The top bar reads 4-step plan awaiting confirmation, and the right panel lists the planned steps (Read PDF → Parse PDF content → Convert to Markdown → Write Markdown file).
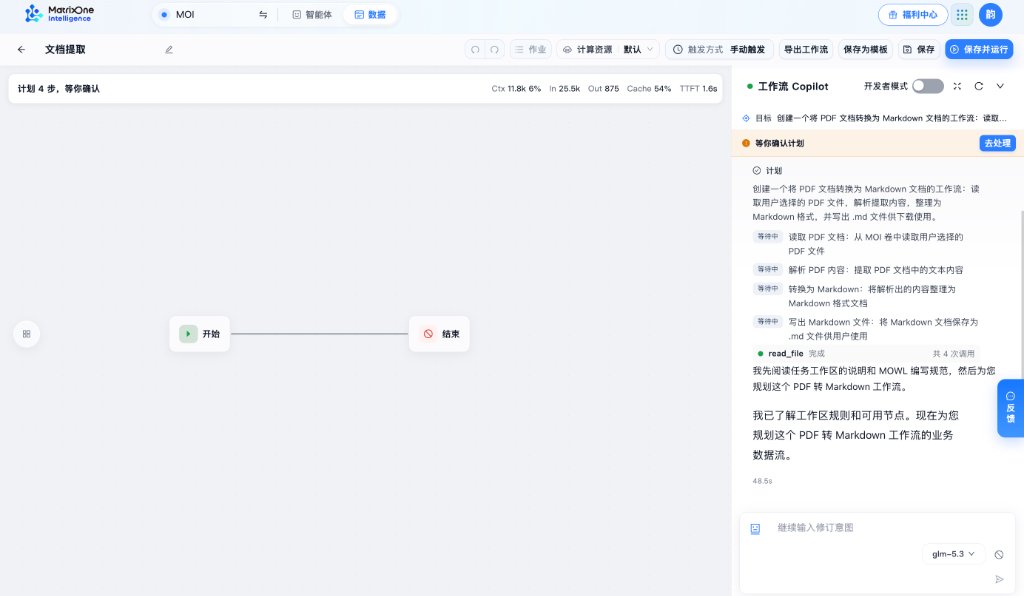
Copilot pauses for confirmation after outlining the four-step plan before creating nodes on the canvas.
Click Handle (or scroll down in the right panel) to open the Confirm workflow plan card. Once the source, steps, and destination match your goal, choose Confirm and execute and click Submit decision (select Reject with feedback if you want to revise any step first).
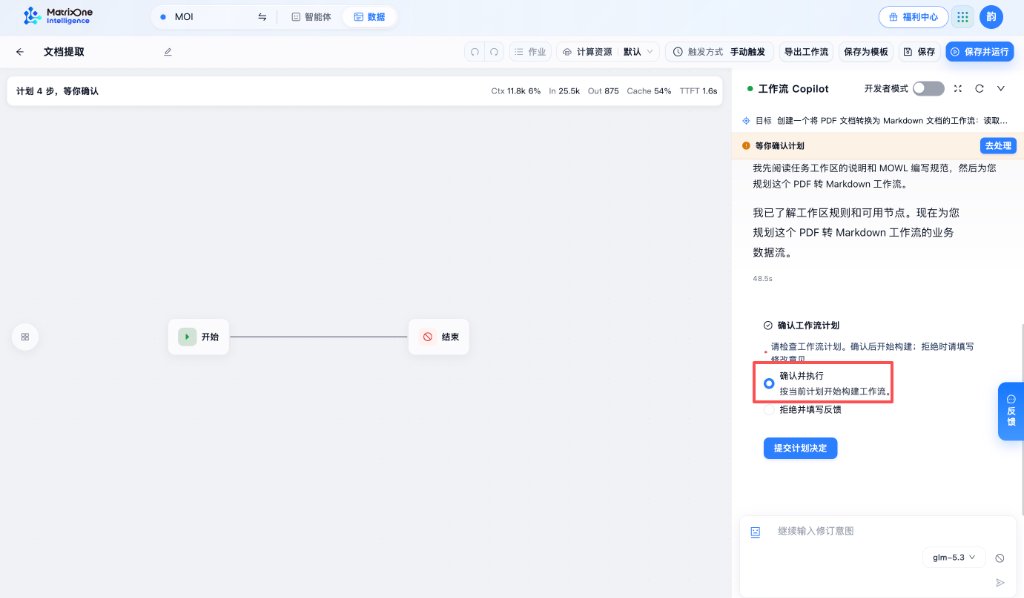
Select Confirm and execute and click Submit decision to let Copilot build the workflow.
Completion check: Copilot starts constructing nodes on the canvas and validating the workflow.
3. Check the generated graph and test cases
Once building finishes, the canvas contains the complete node pipeline ending with Save to MOI Volume, and the top bar shows 4-step plan completed alongside a green 2 test cases passed badge.
Click 2 test cases passed to inspect the Test cases popover (pdf-live.json for a real PDF run and pdf-mocked.json for fragment ordering and naming assertions), and verify node connections and target bindings on the canvas.
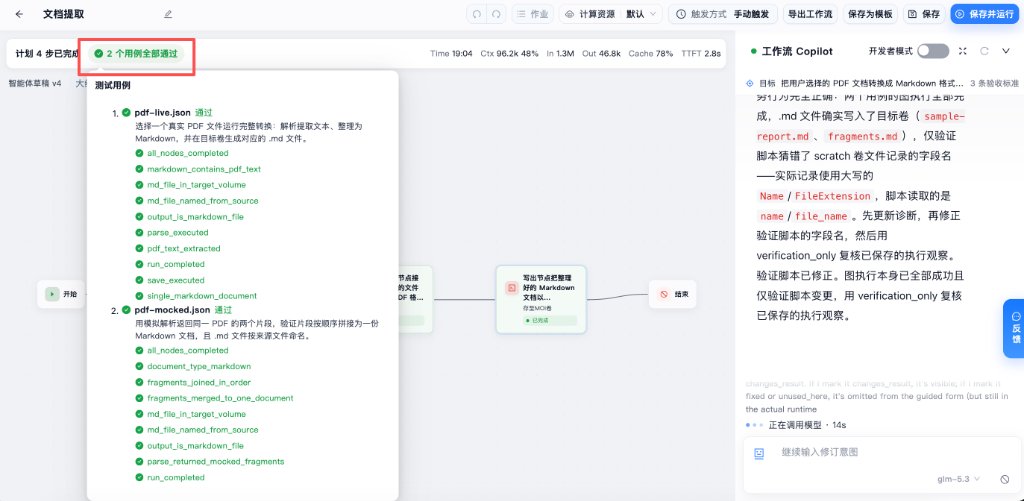
Expand 2 test cases passed to verify that both real-file and mocked validation checks succeeded.
Completion check: all workflow nodes are connected cleanly and every test case shows Passed.
4. Configure runtime parameters and run
Click Save and Run (or Run Parameters) at the upper right to open Run configuration.
Fill in Main parameters:
Data source: choose the source PDF file, folder, or Catalog volume;
Target location: choose the destination Catalog volume or folder for
.mdfiles (such asdefault / output / 111);Output format: keep
markdown(.mdoutput).
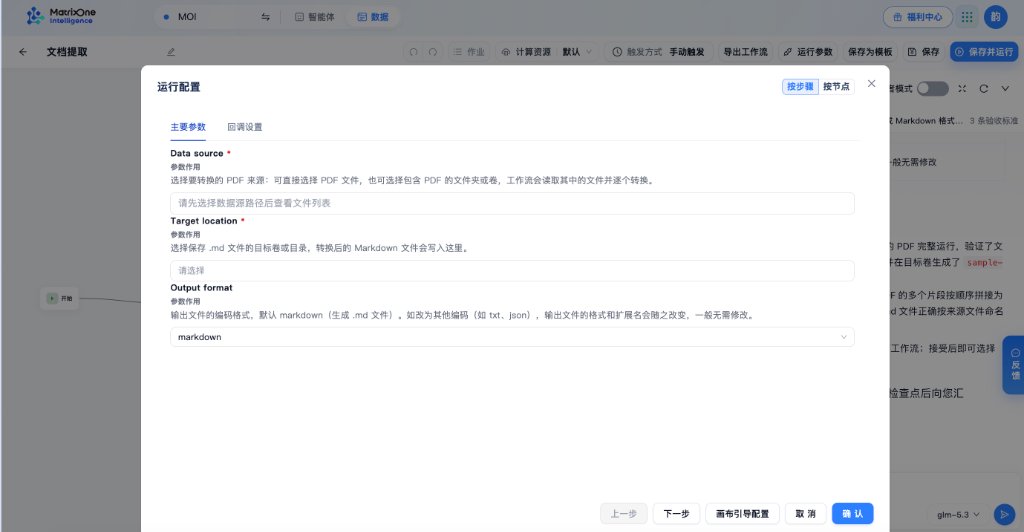
Specify the source PDFs and destination Catalog volume in Run configuration.
Click Confirm to trigger the run, and monitor progress in Jobs at the top until the run finishes (for details, see Run and debug).
Completion check: the run record appears as completed in Jobs.
5. Verify the output Markdown file in Catalog
Open Resource Center → Catalog in the left navigation (see Catalog) and navigate to your target catalog, database, and output volume (for example
default → output → 111).Locate the generated
.mdfile matching your input PDF (such asqjaa004.md) and click Preview to inspect the extracted Markdown text (or switch to Source / download it locally).
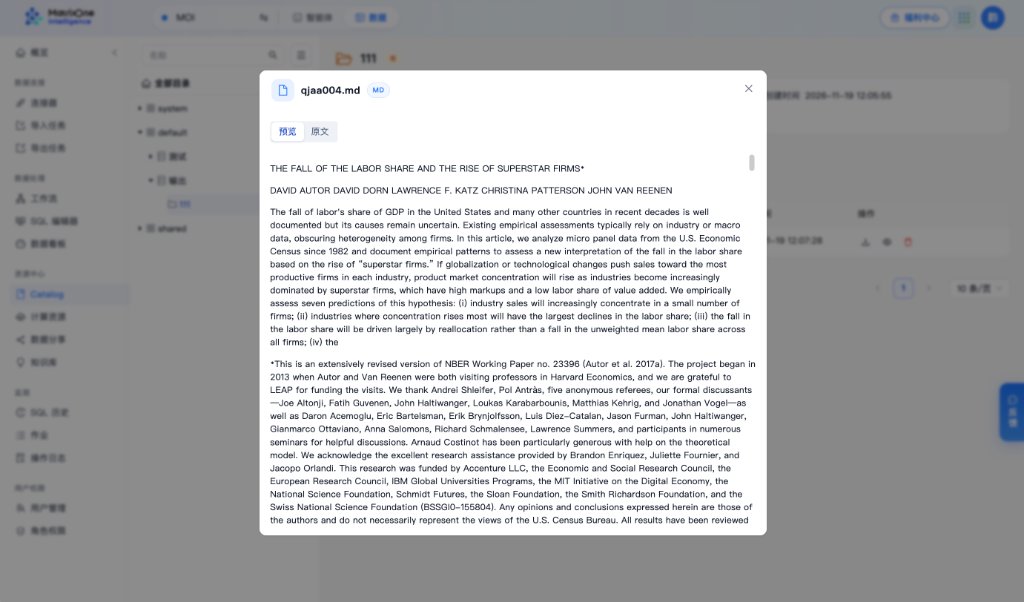
Open qjaa004.md in the target Catalog volume to verify the converted Markdown text.
Completion check: the expected .md file appears in the destination volume with readable Markdown content.
Common issues
Symptom |
What to check |
|---|---|
Test cases fail after confirming the plan |
Expand the Workflow Copilot pane to inspect node error messages and reply with corrections so Copilot updates bindings and re-runs verification. |
Save and Run reports missing required inputs |
Verify that required Data source and Target location fields point to accessible files, folders, or volumes in the current workspace. |
Job completes but output |
Refresh the target volume under Resource Center → Catalog, verify the Target location chosen in Run configuration, and inspect the write node’s job logs. |
Want to customize parsing rules or switch models later |
Send revision instructions in the right Workflow Copilot panel (see Create workflows with an agent), then verify and save again. |
Tutorial complete
You have used natural language in Workflow Copilot to plan, confirm, test, configure, and run a workflow end-to-end and verified the output Markdown file in Catalog. You can apply the same conversational workflow creation pattern to document extraction, summarization, or scheduled batch pipelines.