

Workspaces
A workspace is the top-level resource isolation unit in AI Studio. Knowledge bases, workflows, connectors, compute instances, Catalog objects, and other resources all belong to a workspace, and data is isolated between workspaces. Data mode, Agent mode, and other views all switch within the same workspace.
Entry point: the workspace switcher on the left side of the top bar, which displays the current workspace name.
Owned and joined workspaces
Type |
Meaning |
|---|---|
My workspace |
Workspaces you created and own |
Joined workspaces |
Workspaces created by others that you were invited to join |
You can switch among workspaces that you have permission to access. Account-level pages, such as the billing center and personal account settings, generally do not display the workspace switcher.
Switch workspaces
Click the workspace switcher in the top bar.
Select a target under My Workspaces or Joined Workspaces.
The UI switches to the resources and data in that workspace.
After switching, you see a different isolated set of resources. Content in the current workspace does not appear in other workspaces.
Create a workspace
At the bottom of the workspace panel, click Add Workspace. The exact label may vary by UI.
Enter a name. We recommend naming it after its project or purpose; observe the length limit shown in the UI.
After creation, the UI generally switches to the new workspace automatically.
Rename a workspace
In the panel, hover over a workspace that you own.
Use the rename action, change the name, and save.
Workspaces that you joined are generally managed by their owners and cannot be renamed here.
Delete a workspace
Use the delete action on a workspace that you own.
Confirm deletion. If you delete the current workspace, the UI switches to another available workspace.
Deletion removes resources in that workspace and is generally irreversible. The default workspace usually cannot be deleted. Before deletion, confirm that data and tasks have been backed up or are no longer needed.
Copy the workspace ID
For cross-account data sharing, the recipient often needs to provide this ID.
Click the current workspace name in the top-left bar to open the workspace panel.
Hover over the workspace row to find the copy icon beside its name. Hovering over the icon displays Copy workspace ID.
Click the copy icon to copy the workspace ID to the clipboard.
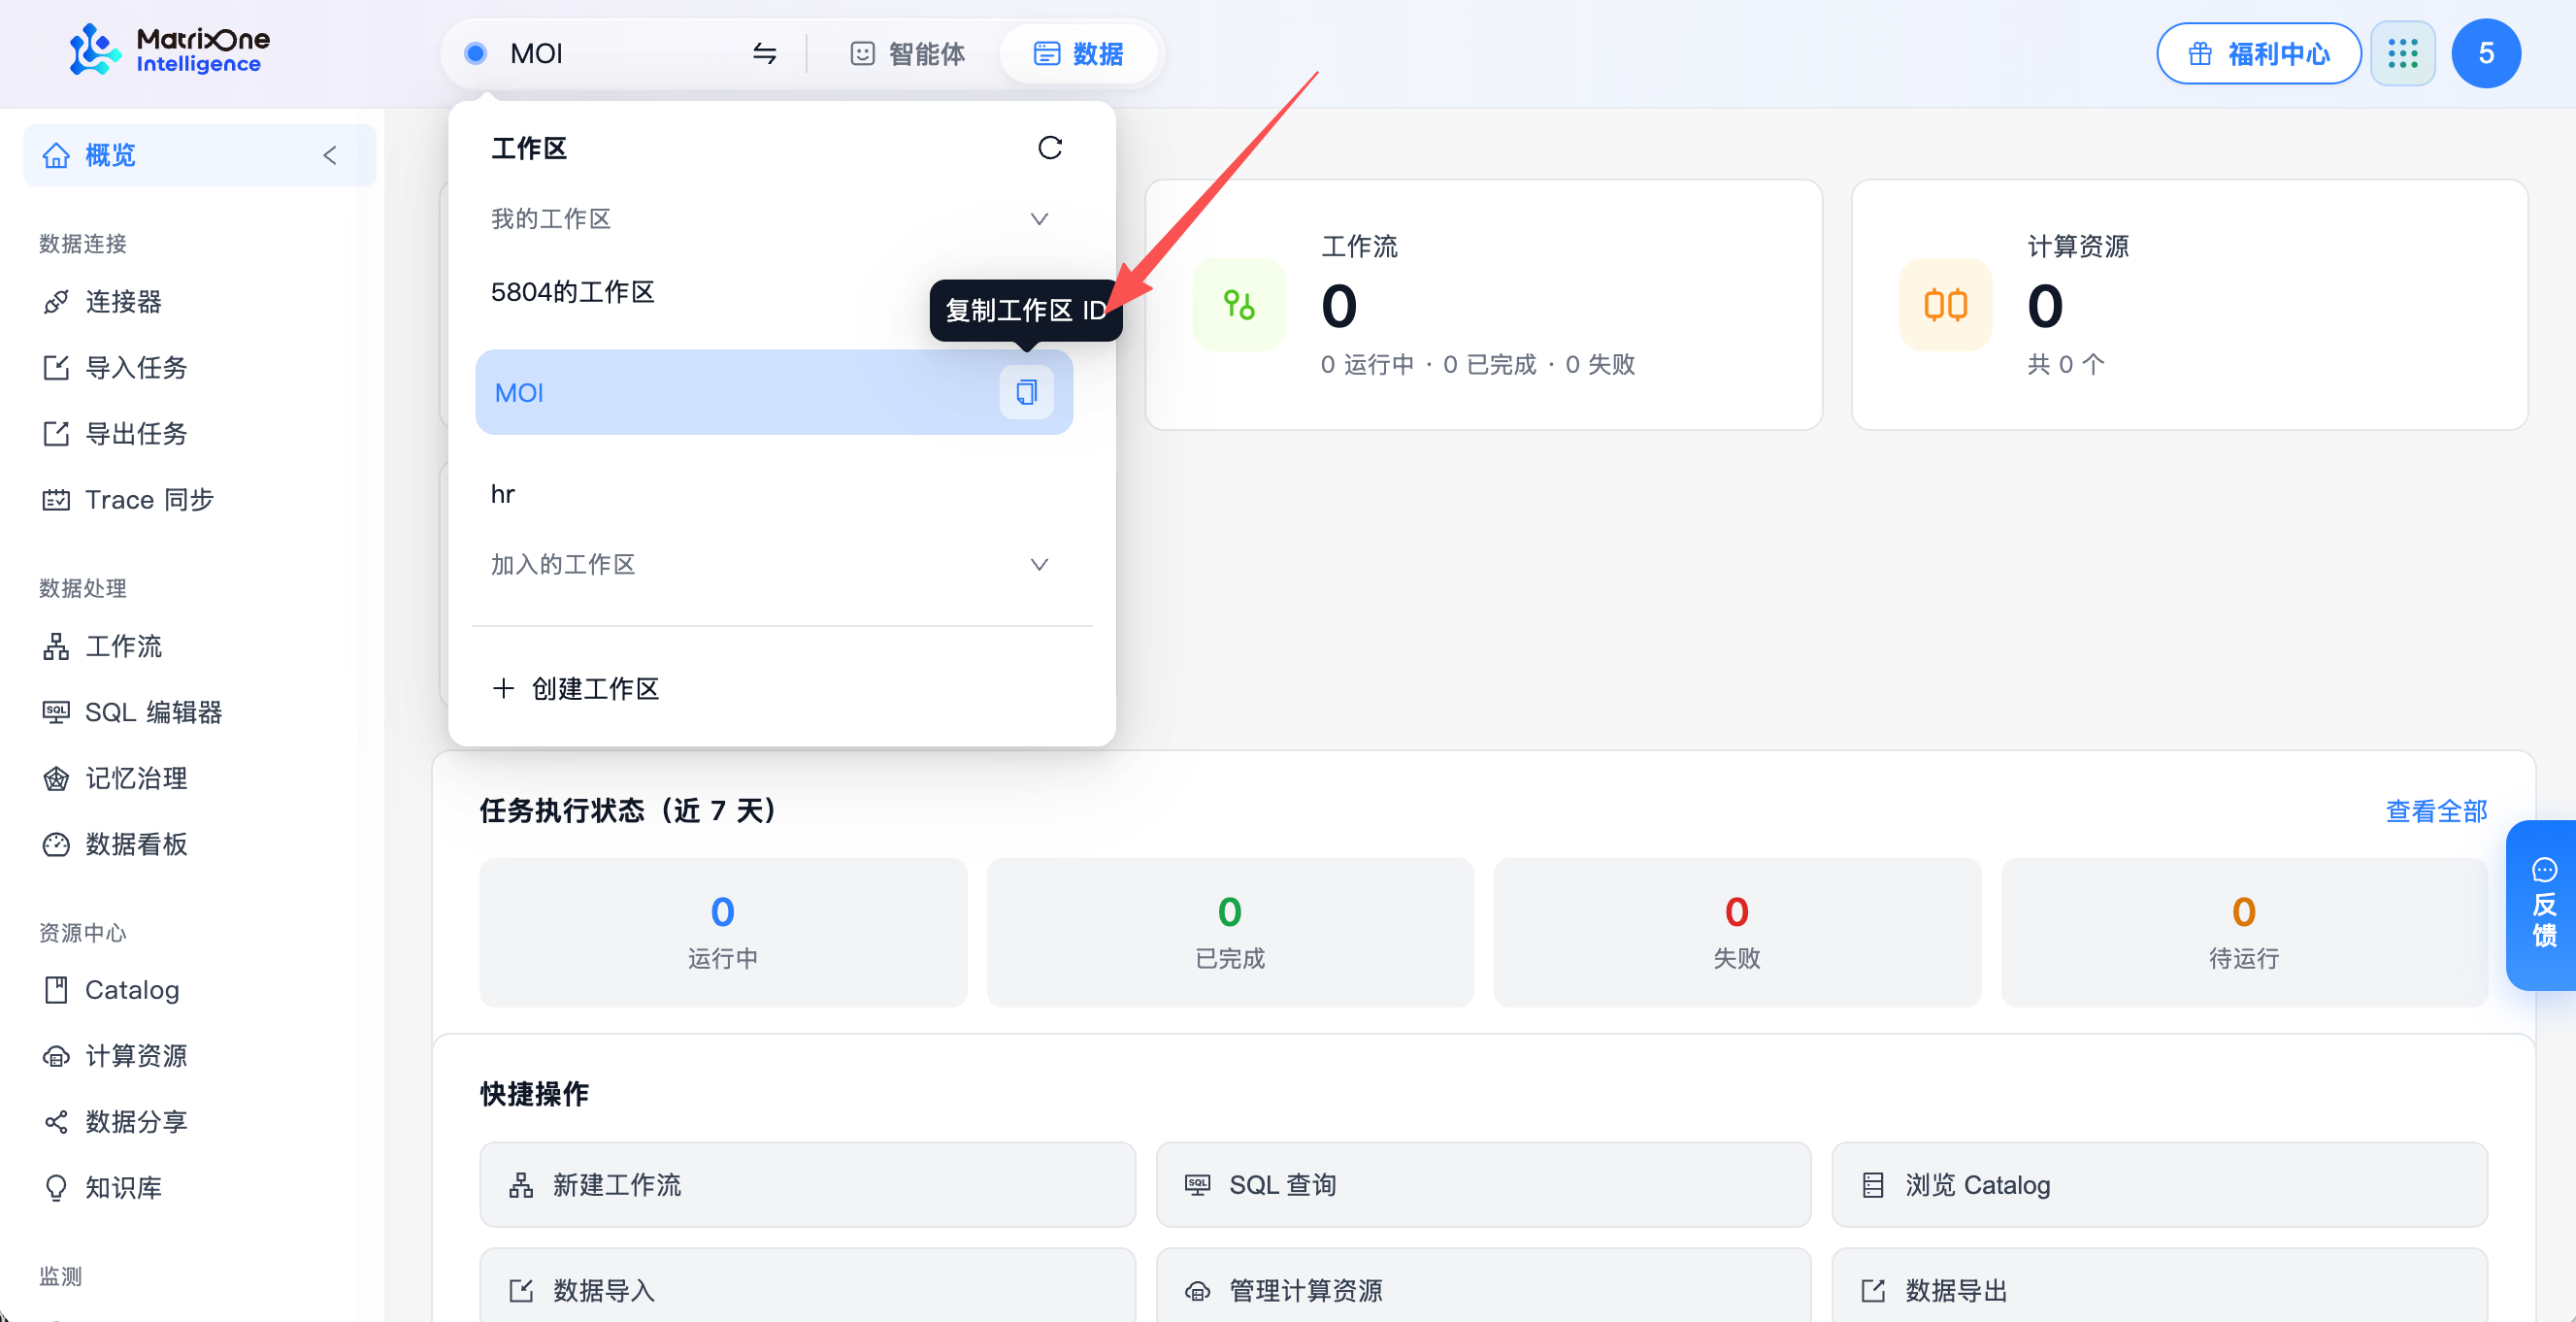
Click the copy icon beside a workspace name to copy its ID.
Operations
Task |
Scope |
Description |
|---|---|---|
Switch |
All accessible workspaces |
Complete data isolation |
Create |
— |
You can create multiple workspaces |
Rename |
Only my workspaces |
— |
Delete |
Only my workspaces |
The default workspace usually cannot be deleted; irreversible |
Copy ID |
Accessible workspaces |
— |
Home page and resource overview
When you open a Data workspace’s Overview page, MOI summarizes active resources according to your role permissions and enabled features:
Summary cards: Show total counts and breakdowns for Catalog Objects (catalogs, databases, volumes, tables), Workflows (running, completed, failed), Compute, and Knowledge bases.
Task Execution (Last 7 Days): Shows status counts and percentages for Completed, Running, Failed, and Pending tasks over the past 7 days, with View All linking to workflows.
Quick Actions: Shows role- and feature-gated shortcuts including New Workflow, SQL Query, Browse Catalog, Import Data, Manage Compute, and Export Data.
Recent Activity and Alerts & Notifications cards on Workspace Home are currently hidden. For run history and audit logs, see Monitoring and alerts.
Members and permissions
For inviting members and assigning roles within a workspace, see Member management. For complete user and role configuration, see User permissions.
Resolve name validation failures
Workspace names cannot be blank. Follow the current form’s length and format feedback; do not copy knowledge-base or database naming rules. After a failed response, check whether the workspace already exists before retrying creation.
If creation fails, check whether the new object already exists in the list before retrying, to avoid duplicates after an interrupted response.