

Manage Genesis access credentials
Before calling Genesis, create a personal access token under Access credentials, or create a service account and configure its Genesis permission. This page explains how to create and manage both in the console. For request authentication, see Prepare to call an API.
Choose a credential type
Credential type |
Use it for |
Permission scope |
|---|---|---|
Personal access token |
Local development, command-line validation, and scripts running as you. |
Uses the current user’s permissions. |
Service account |
Applications, machine identities, CI/CD, and production automation. |
Independent of a personal account; configure product permissions separately. |
Use a personal access token to act as yourself. A service account does not inherit its creator’s personal permissions; grant it Genesis product permission separately.
Open Access credentials
Open the account menu at the top right of the console.
Select Access credentials.
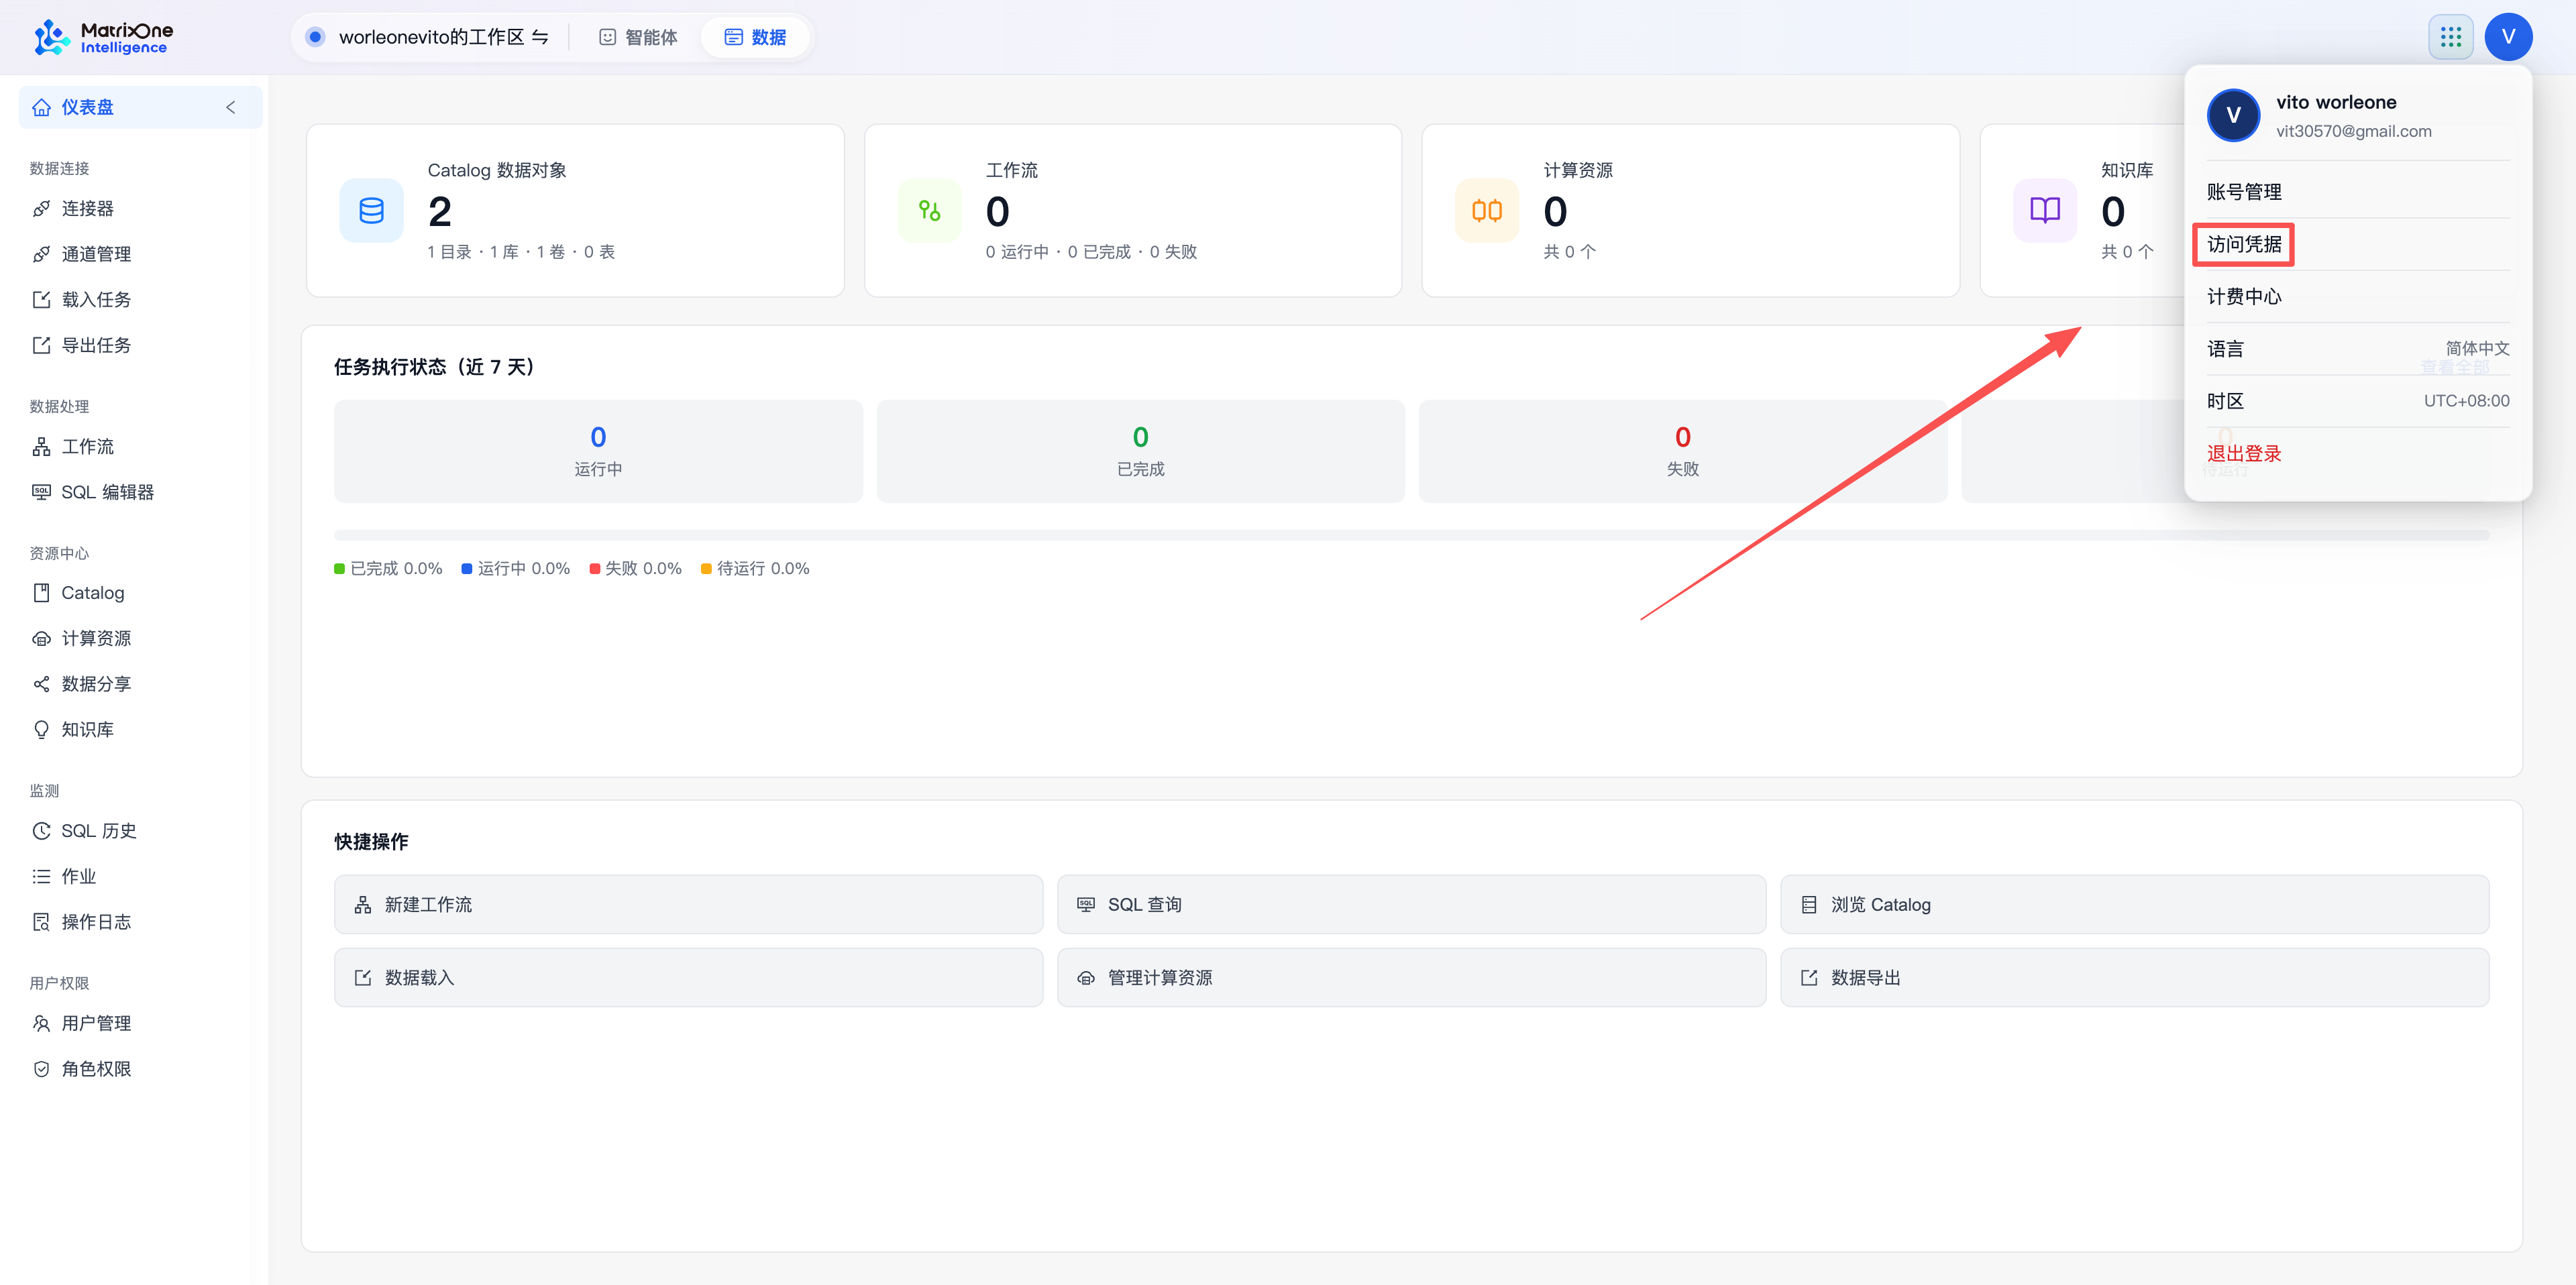
The page provides Personal access tokens and Service accounts. Select the card for the identity making the calls.
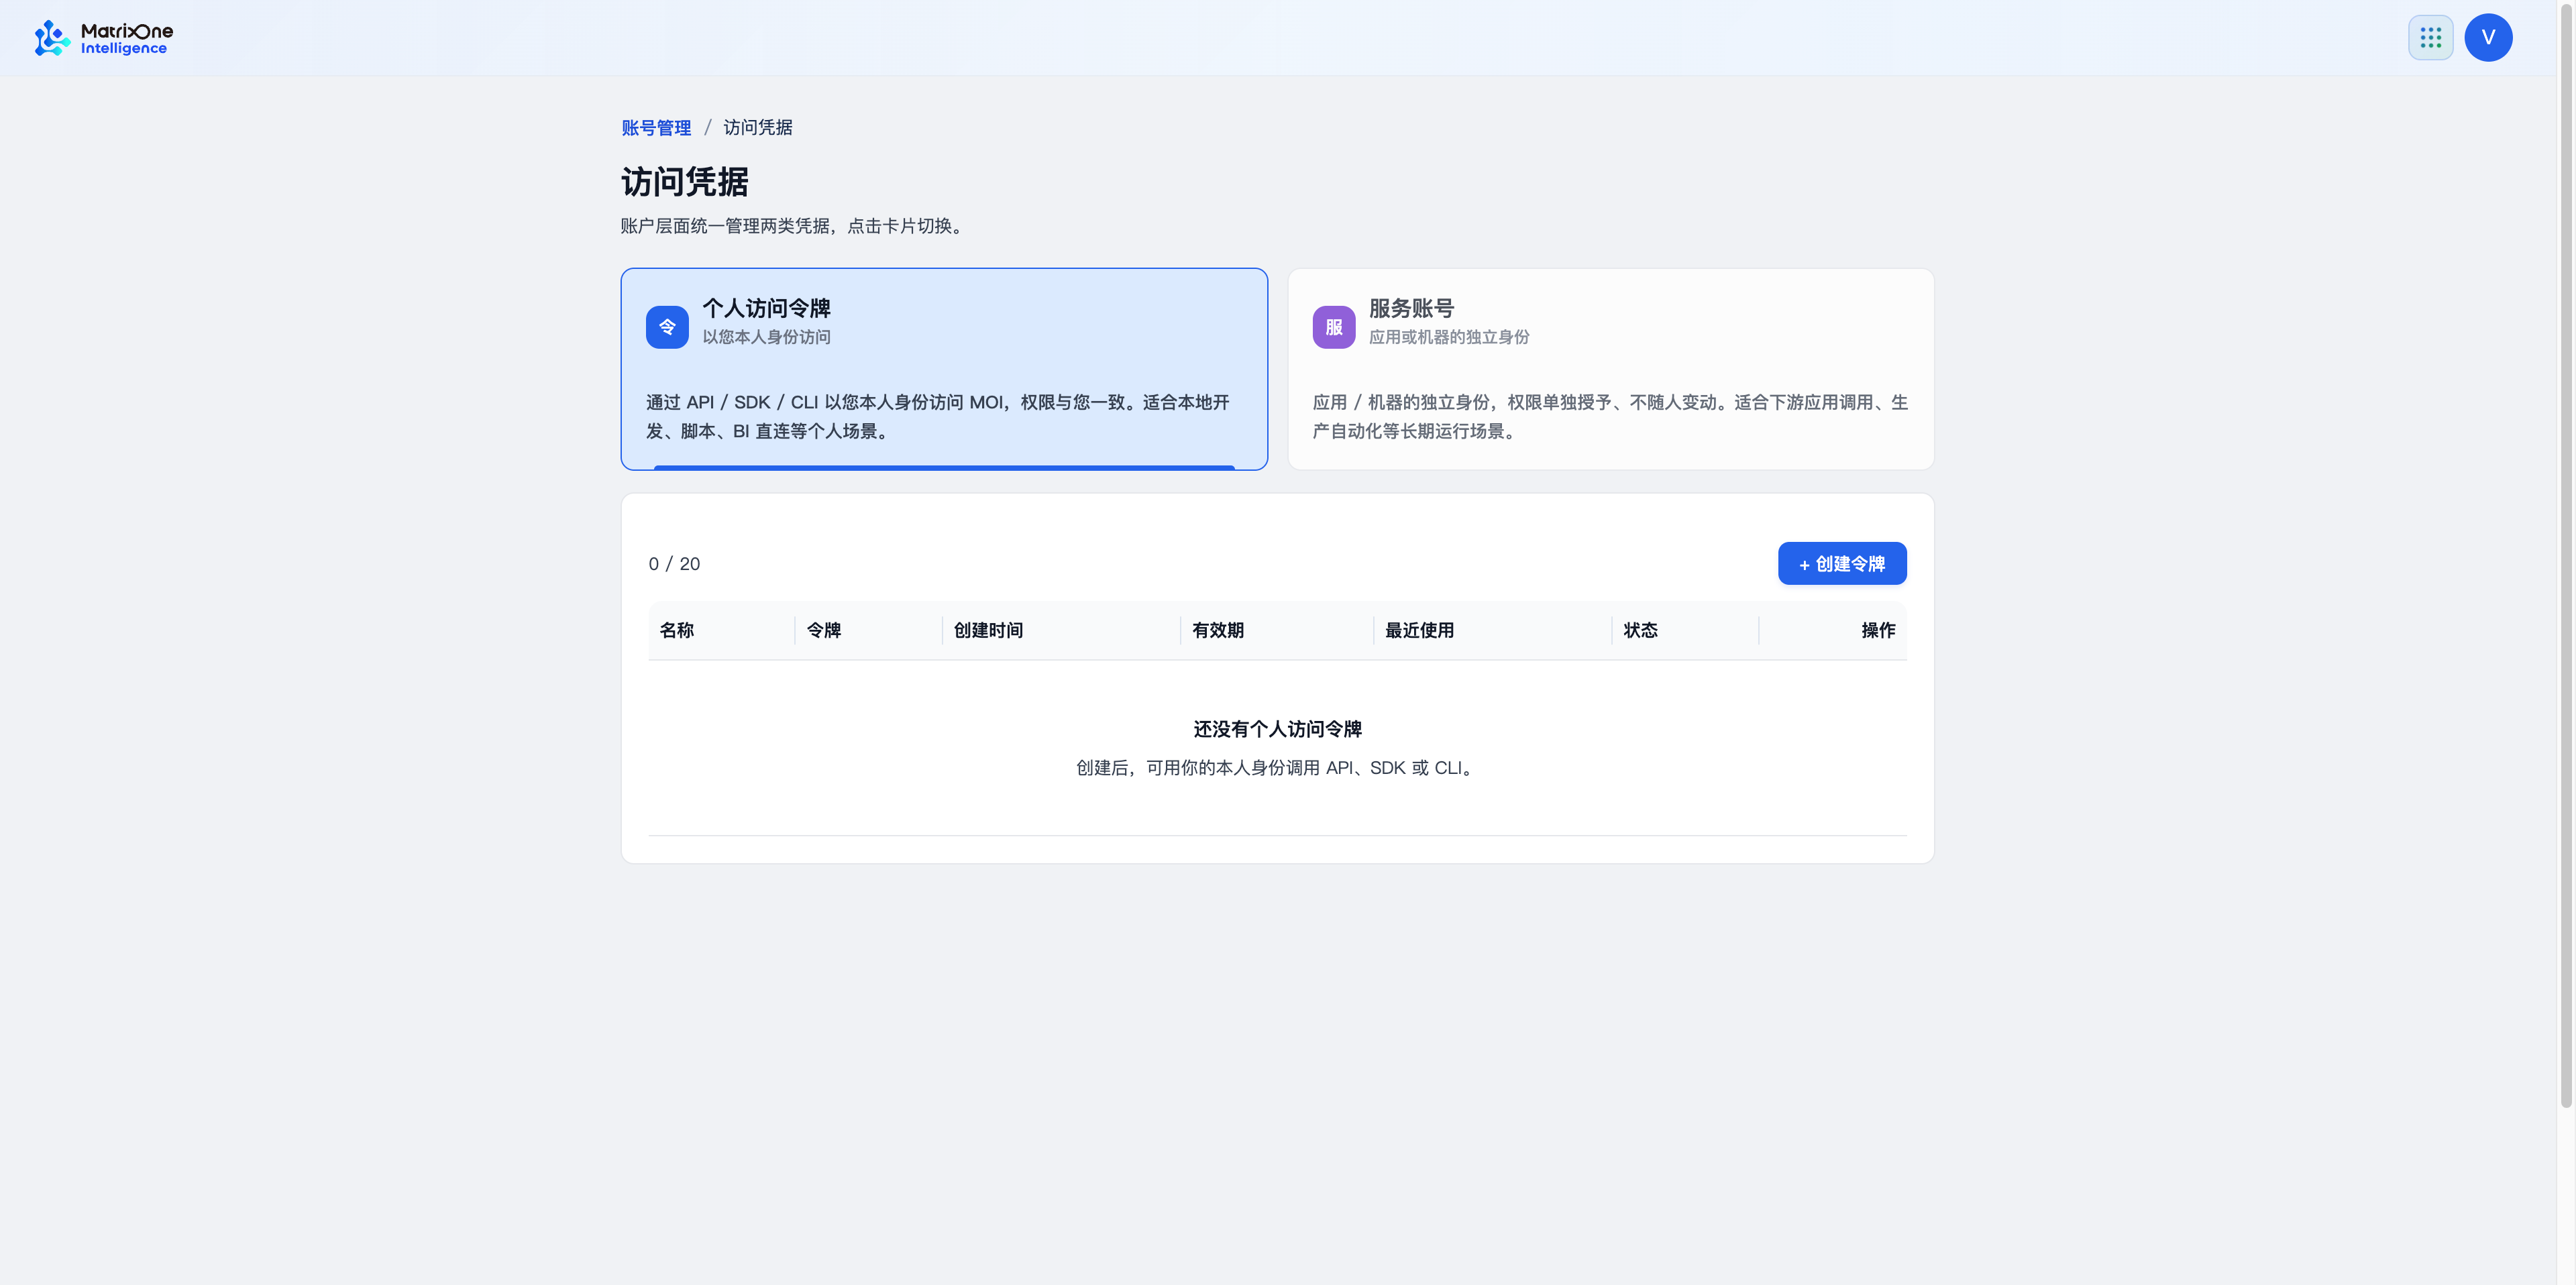
Creating and managing personal access tokens
Select Personal access tokens, then click Create token.
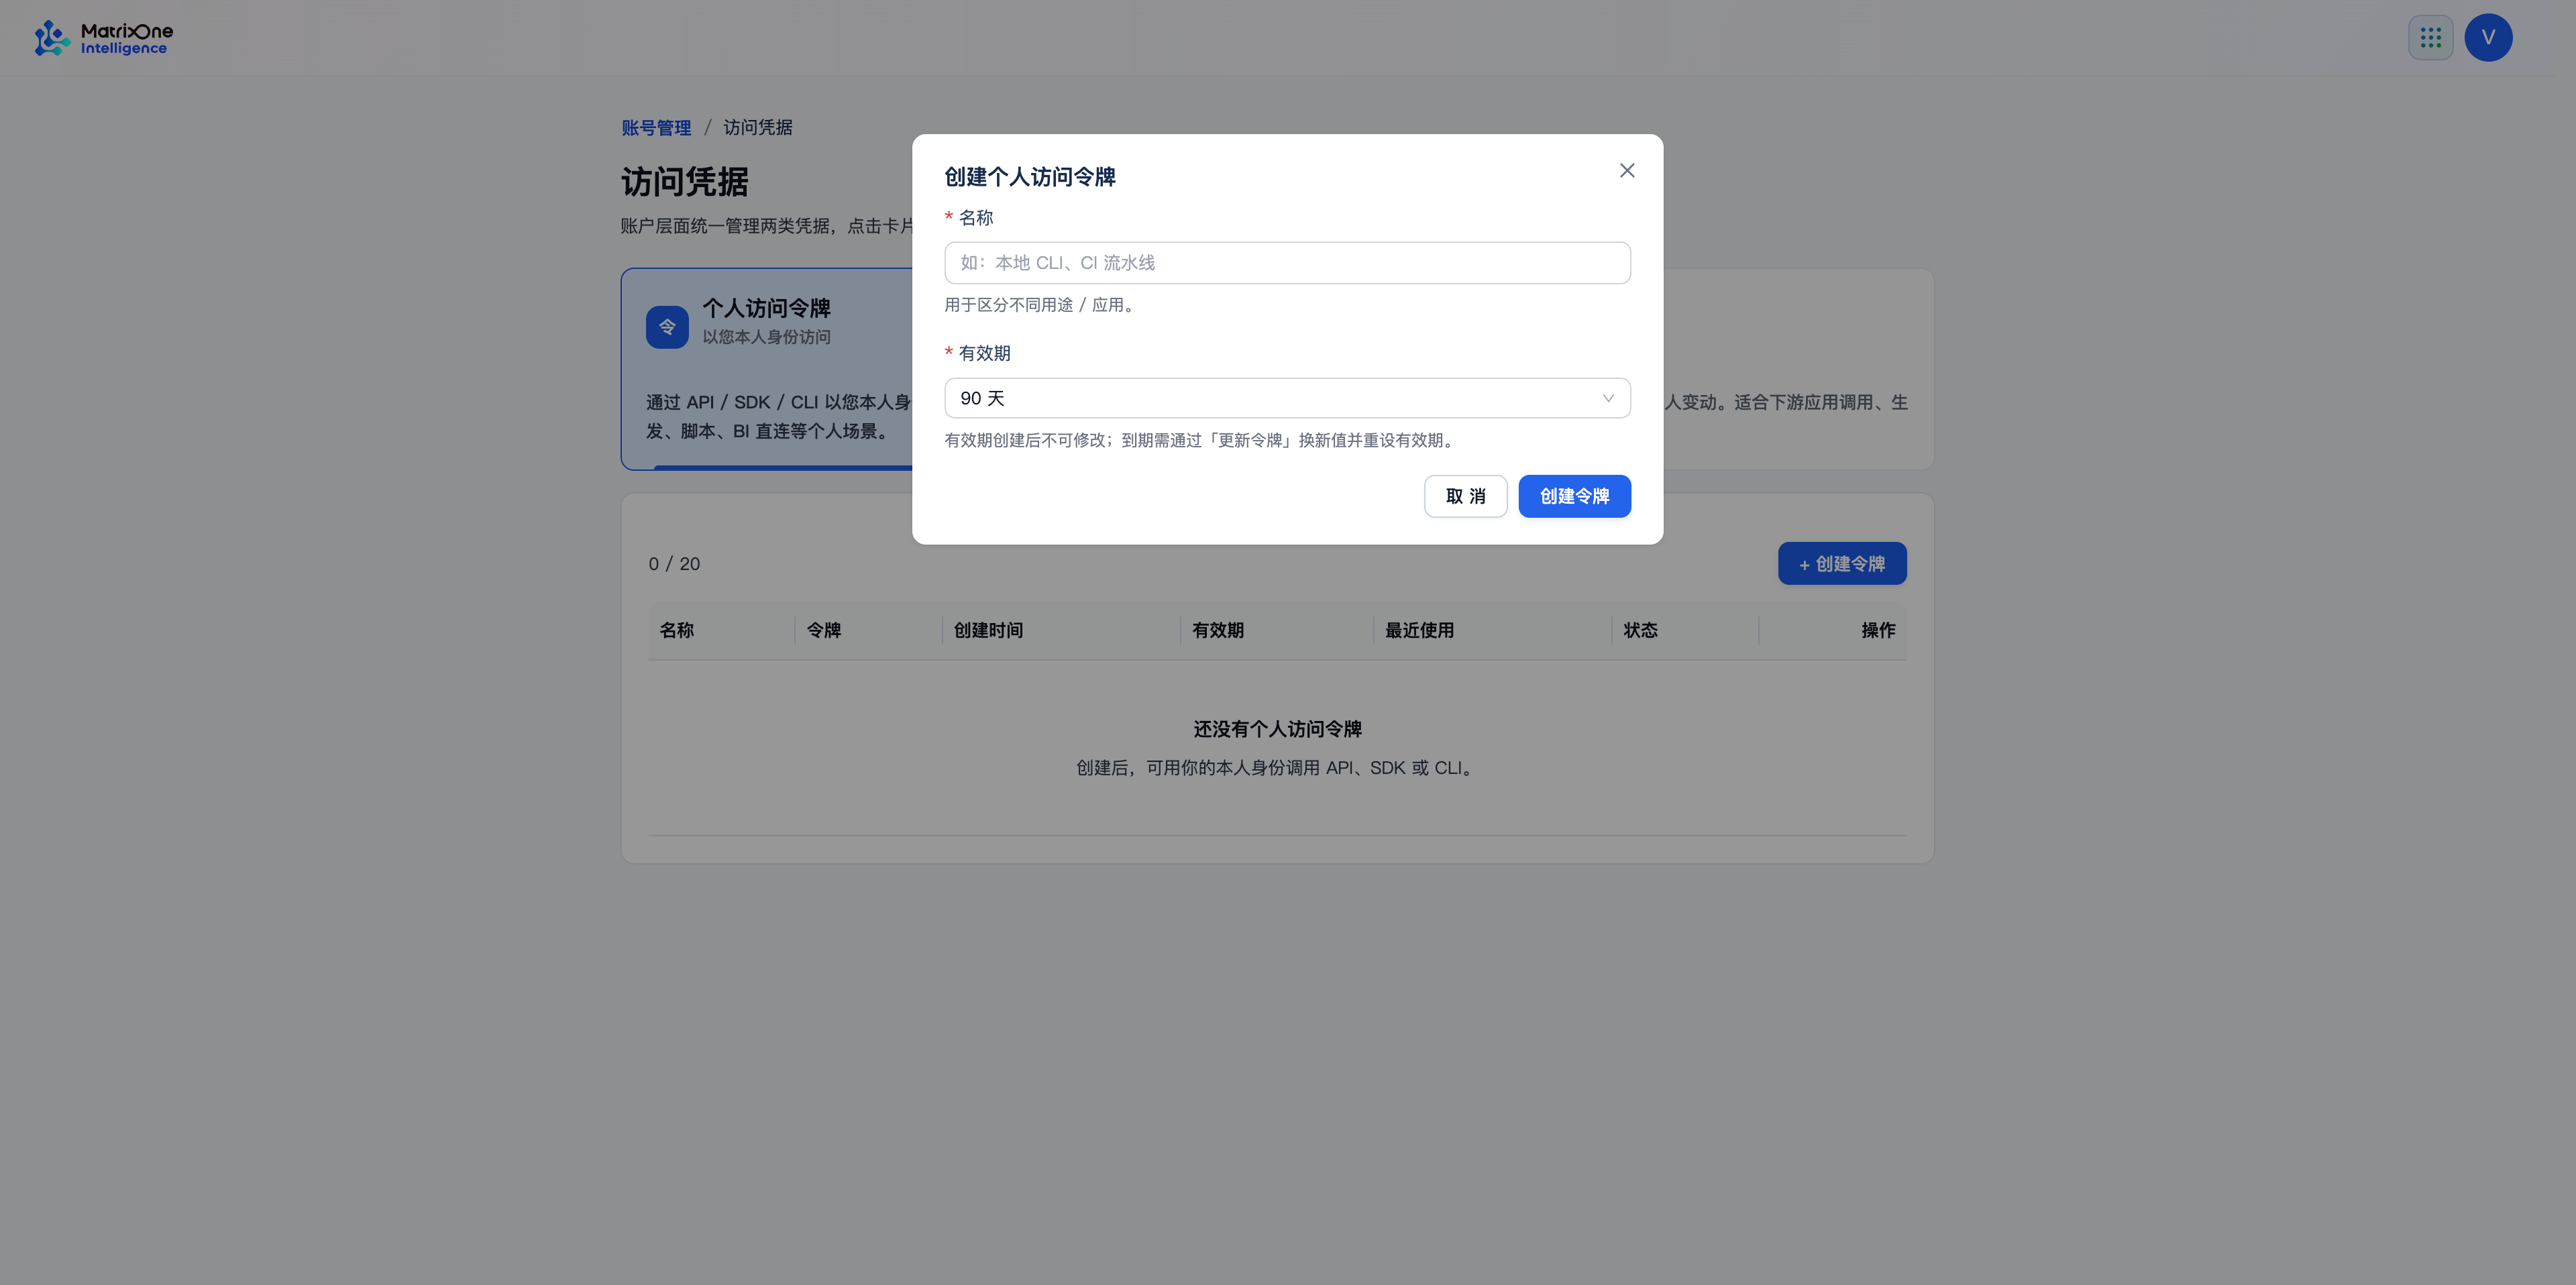
Enter a name that identifies its purpose, such as Local CLI or Integration test.
Select its validity period and create the token.
Save the token value as directed by the page. Keep it out of source repositories, images, and logs.
A token’s validity period cannot be edited directly after creation. To extend access or replace a leaked token, create or update the token and replace the old value in its callers.
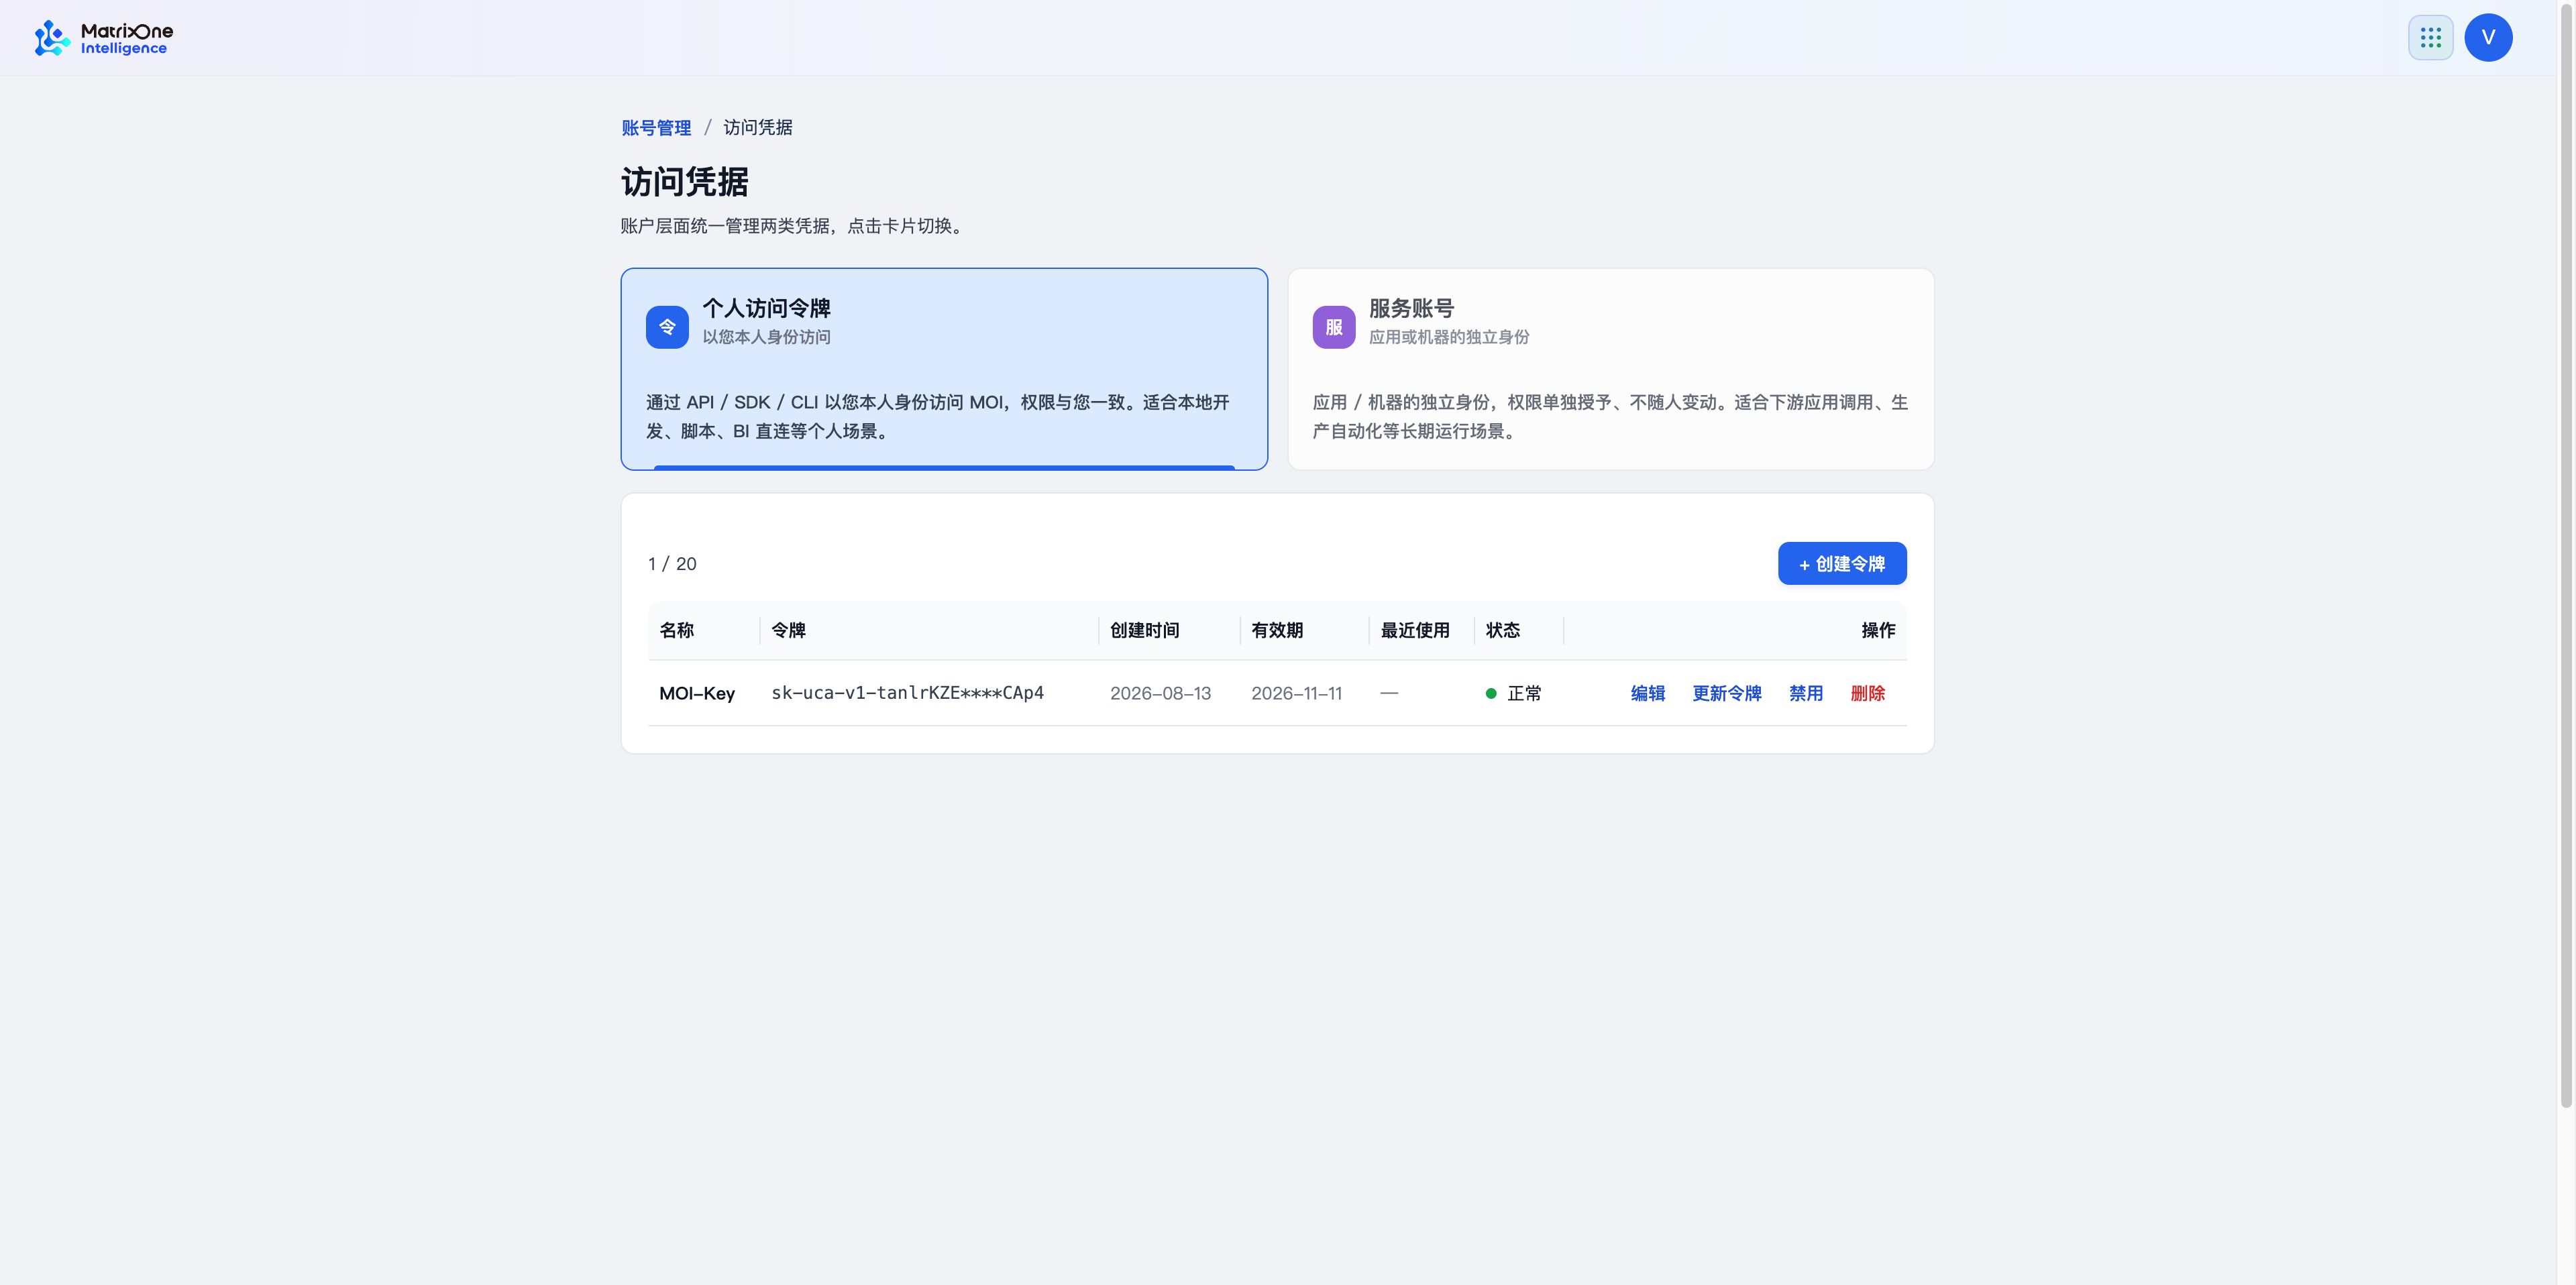
The token list shows the name, creation time, validity period, last-used time, and status. You can edit the name, update the token, disable it, or delete it. Before updating, disabling, or deleting, check whether callers still use the token.
Create a service account
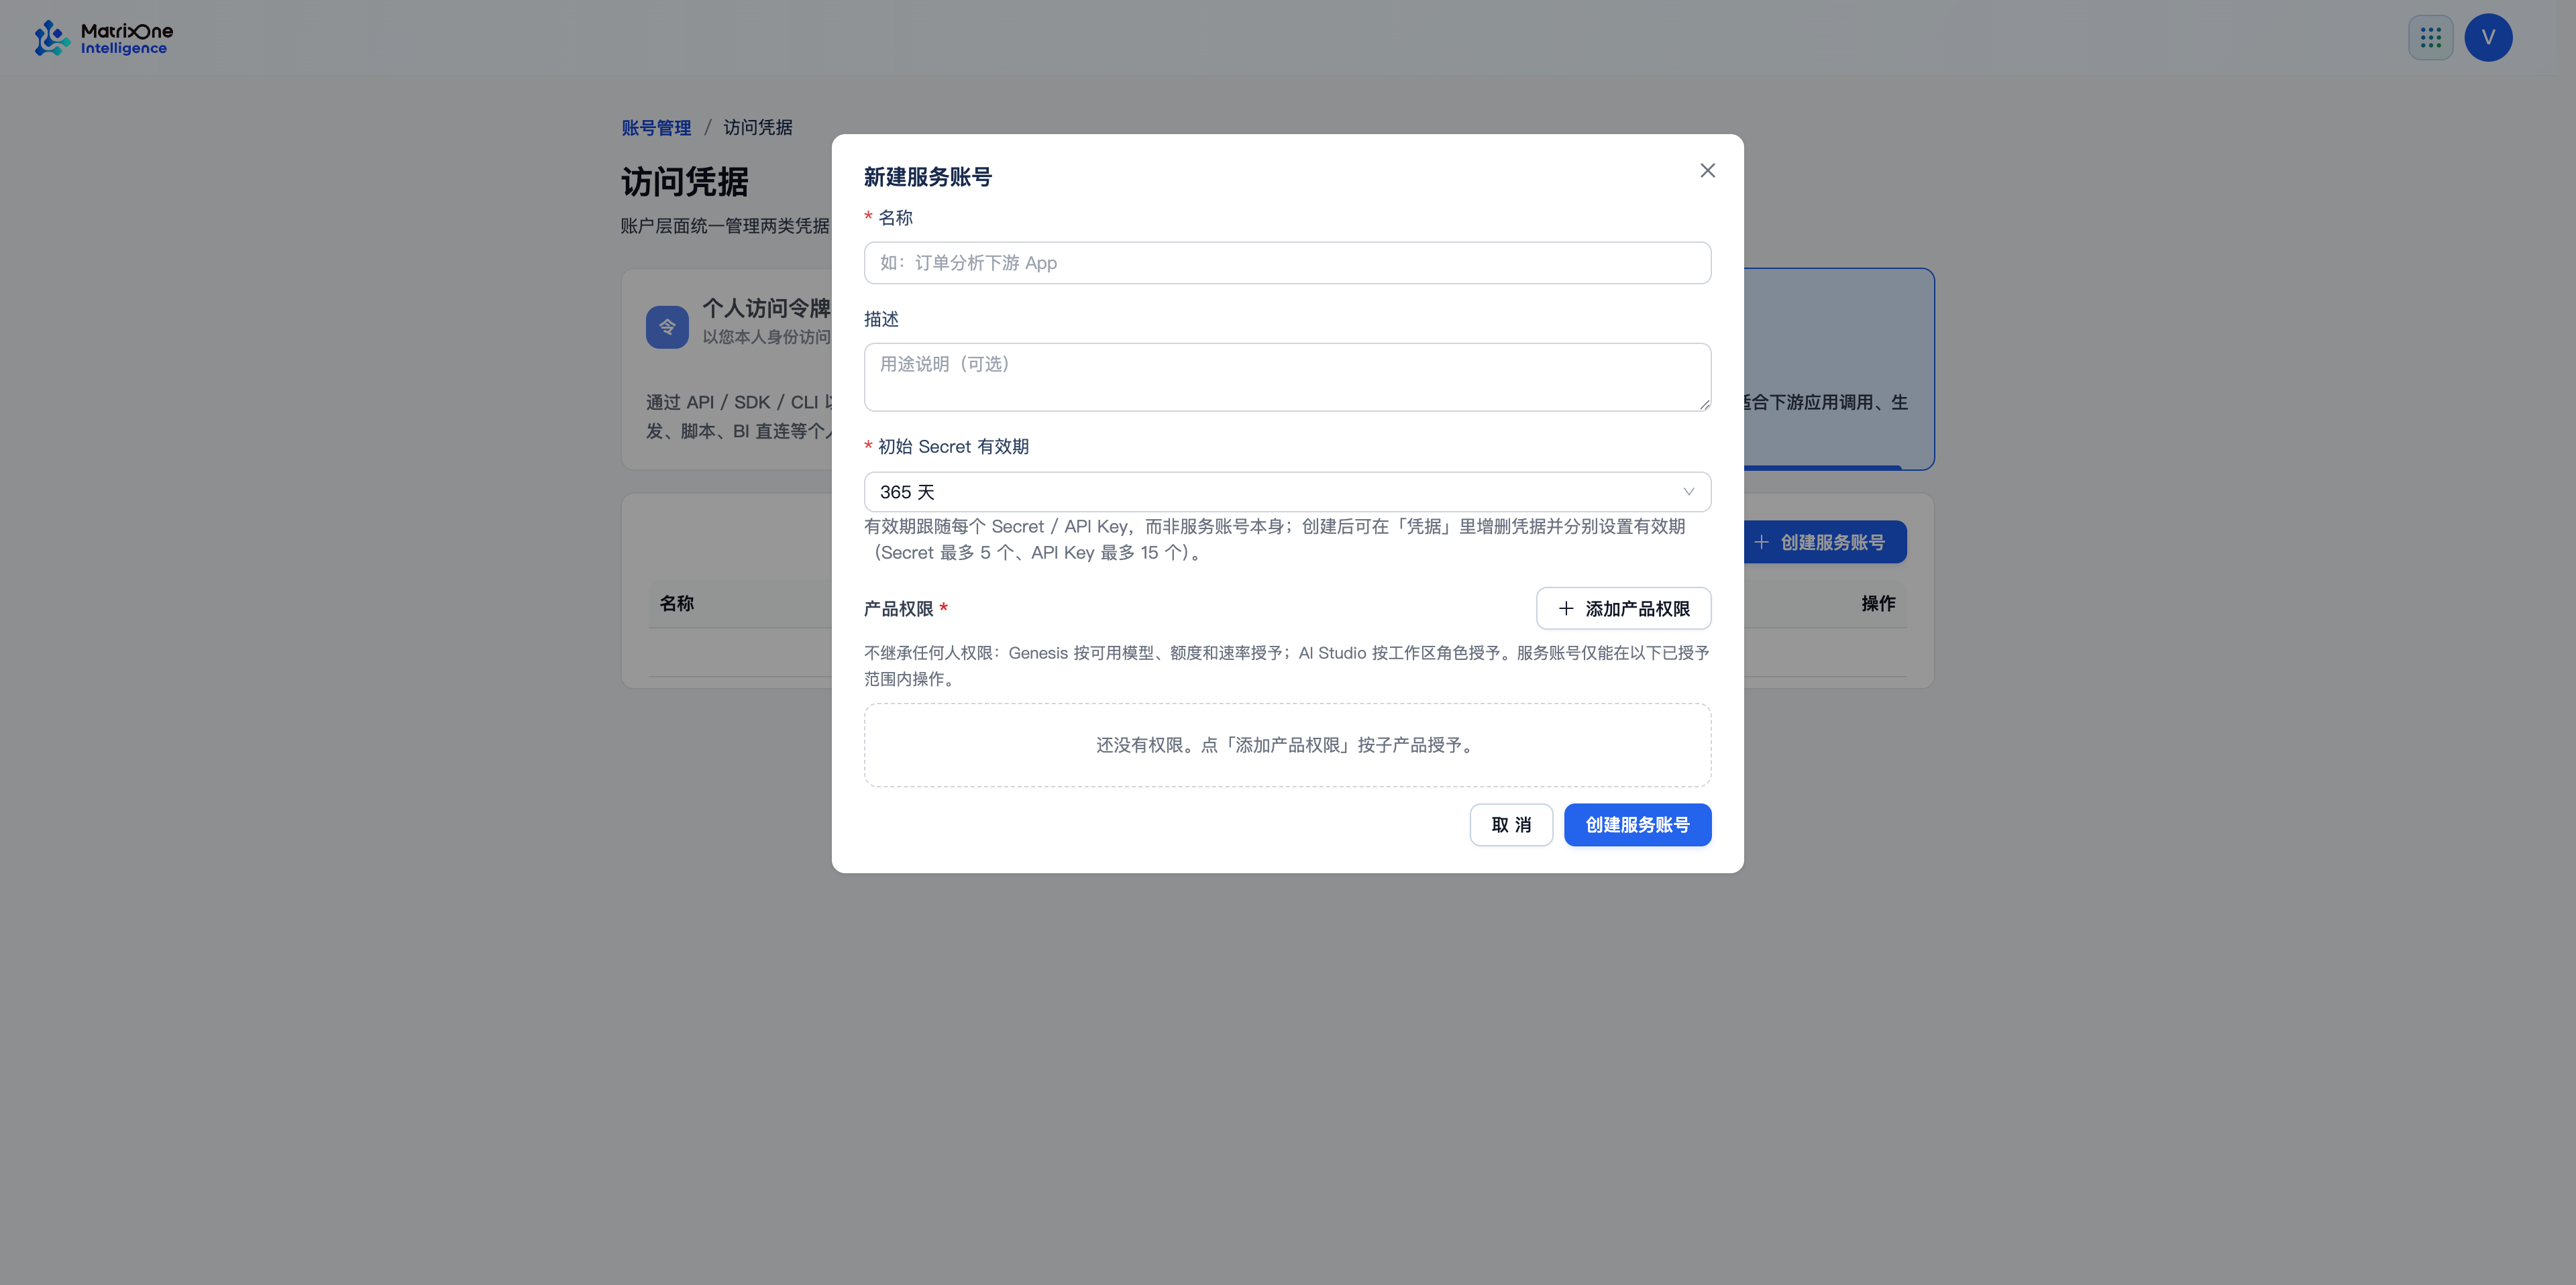
Select Service accounts, then click Create service account.
Enter a name and, optionally, a description of the application or environment.
Select the validity period for the initial Secret.
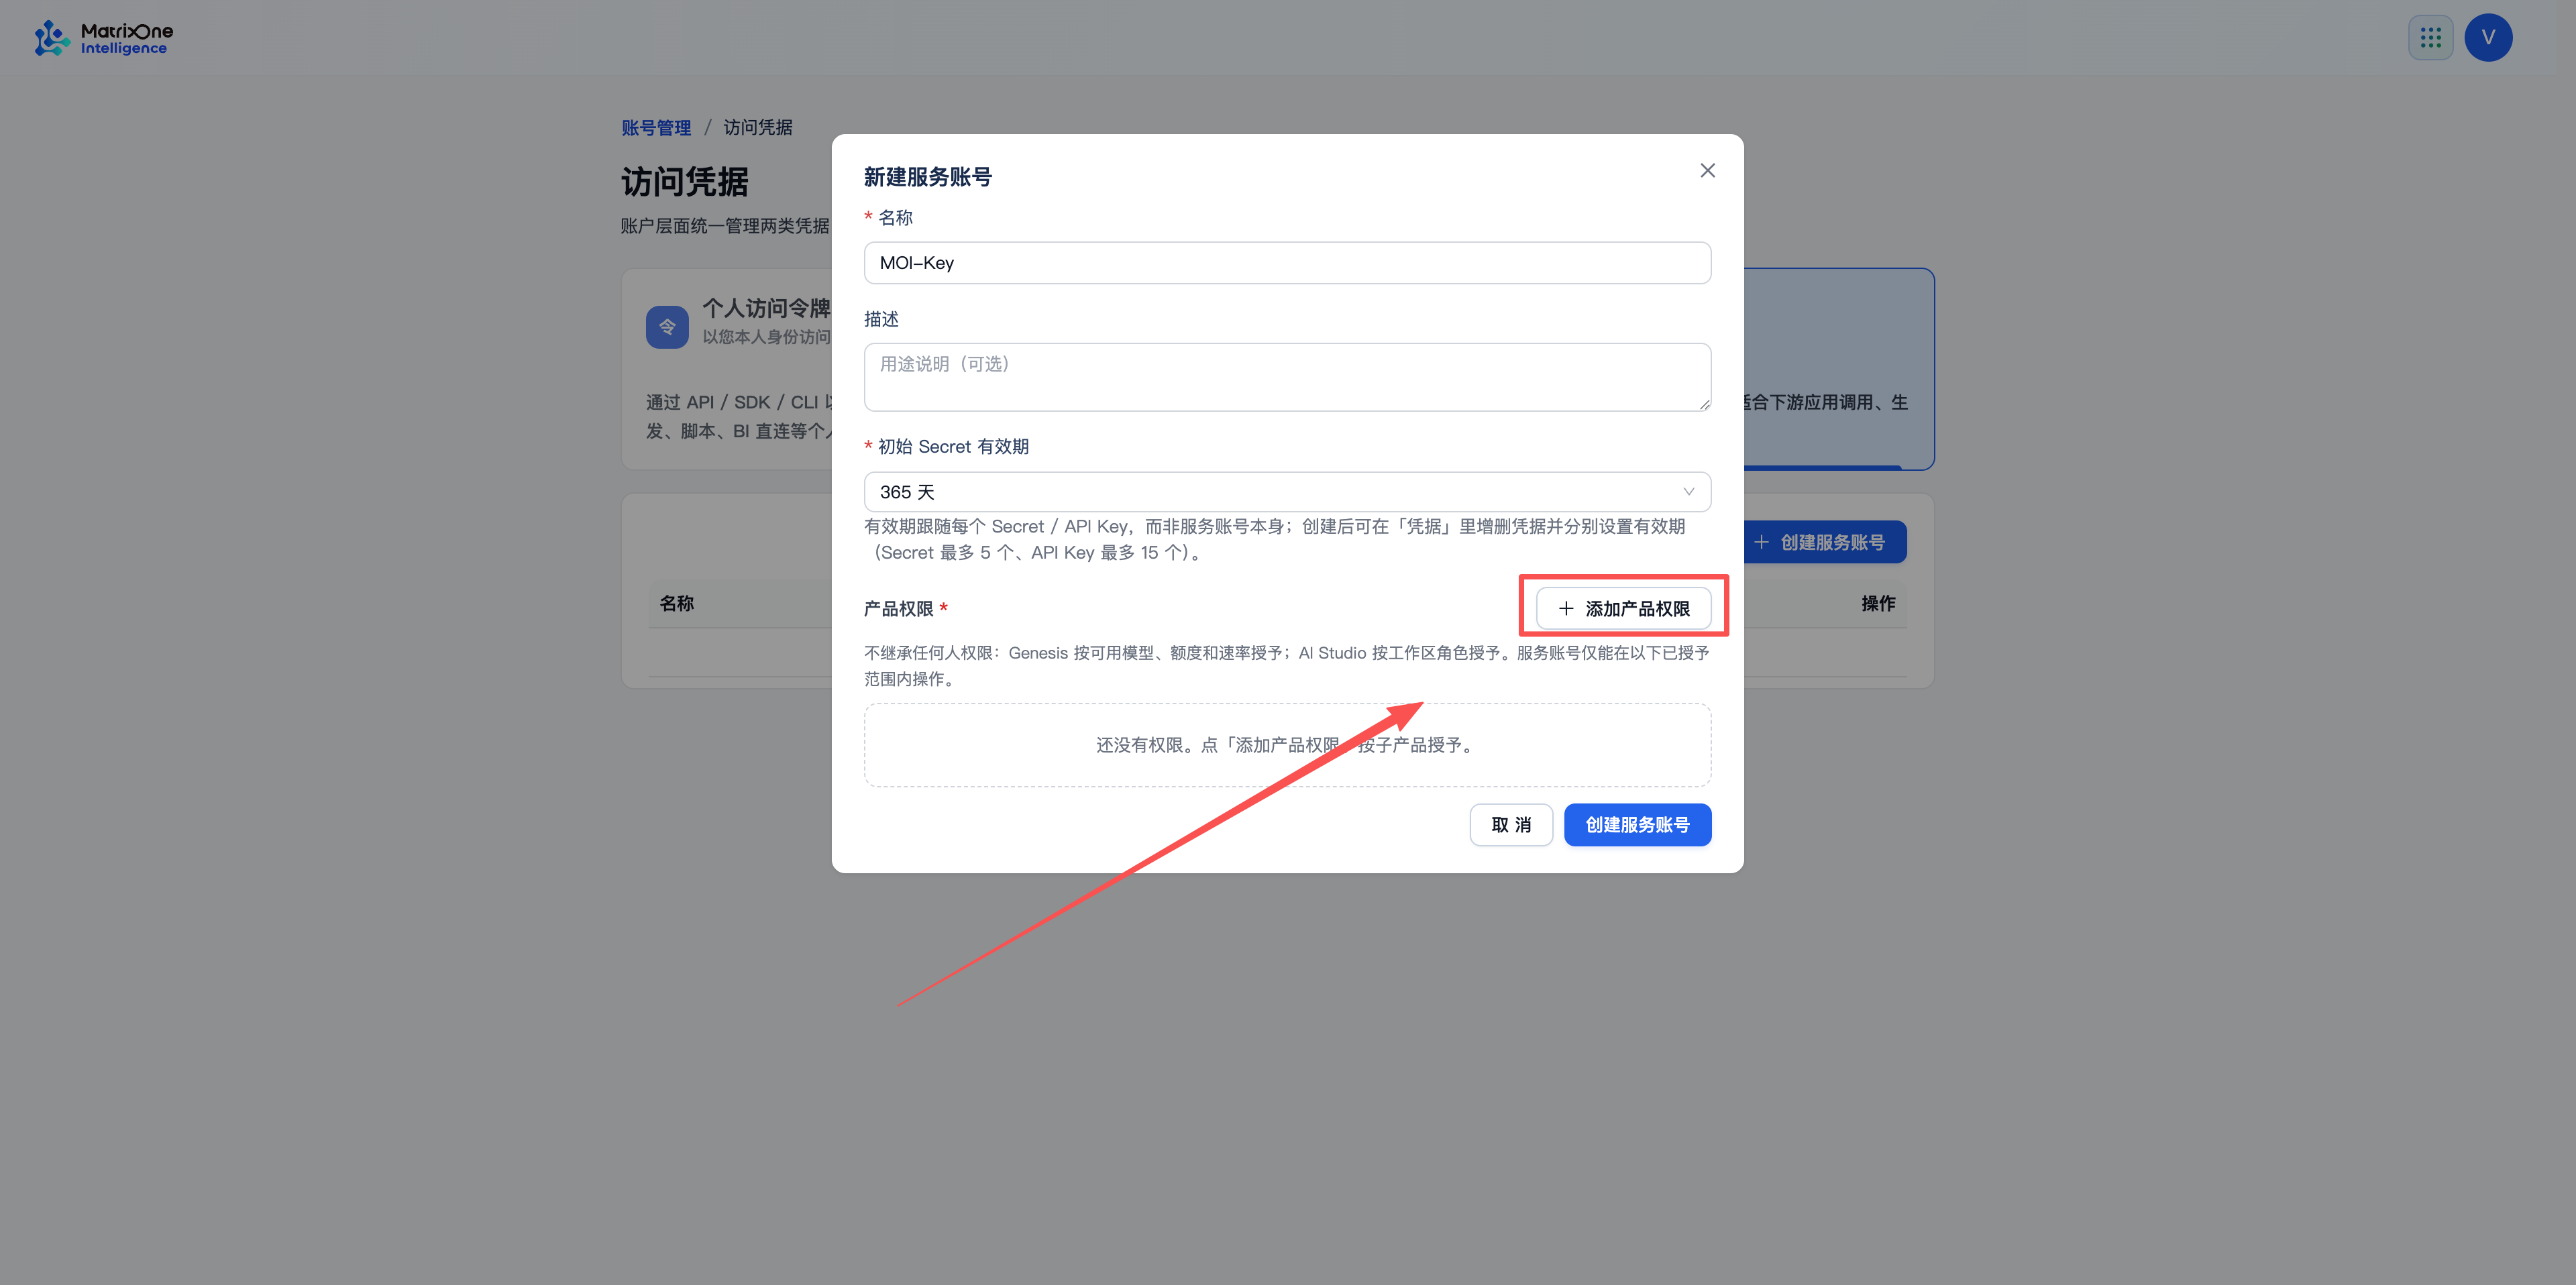
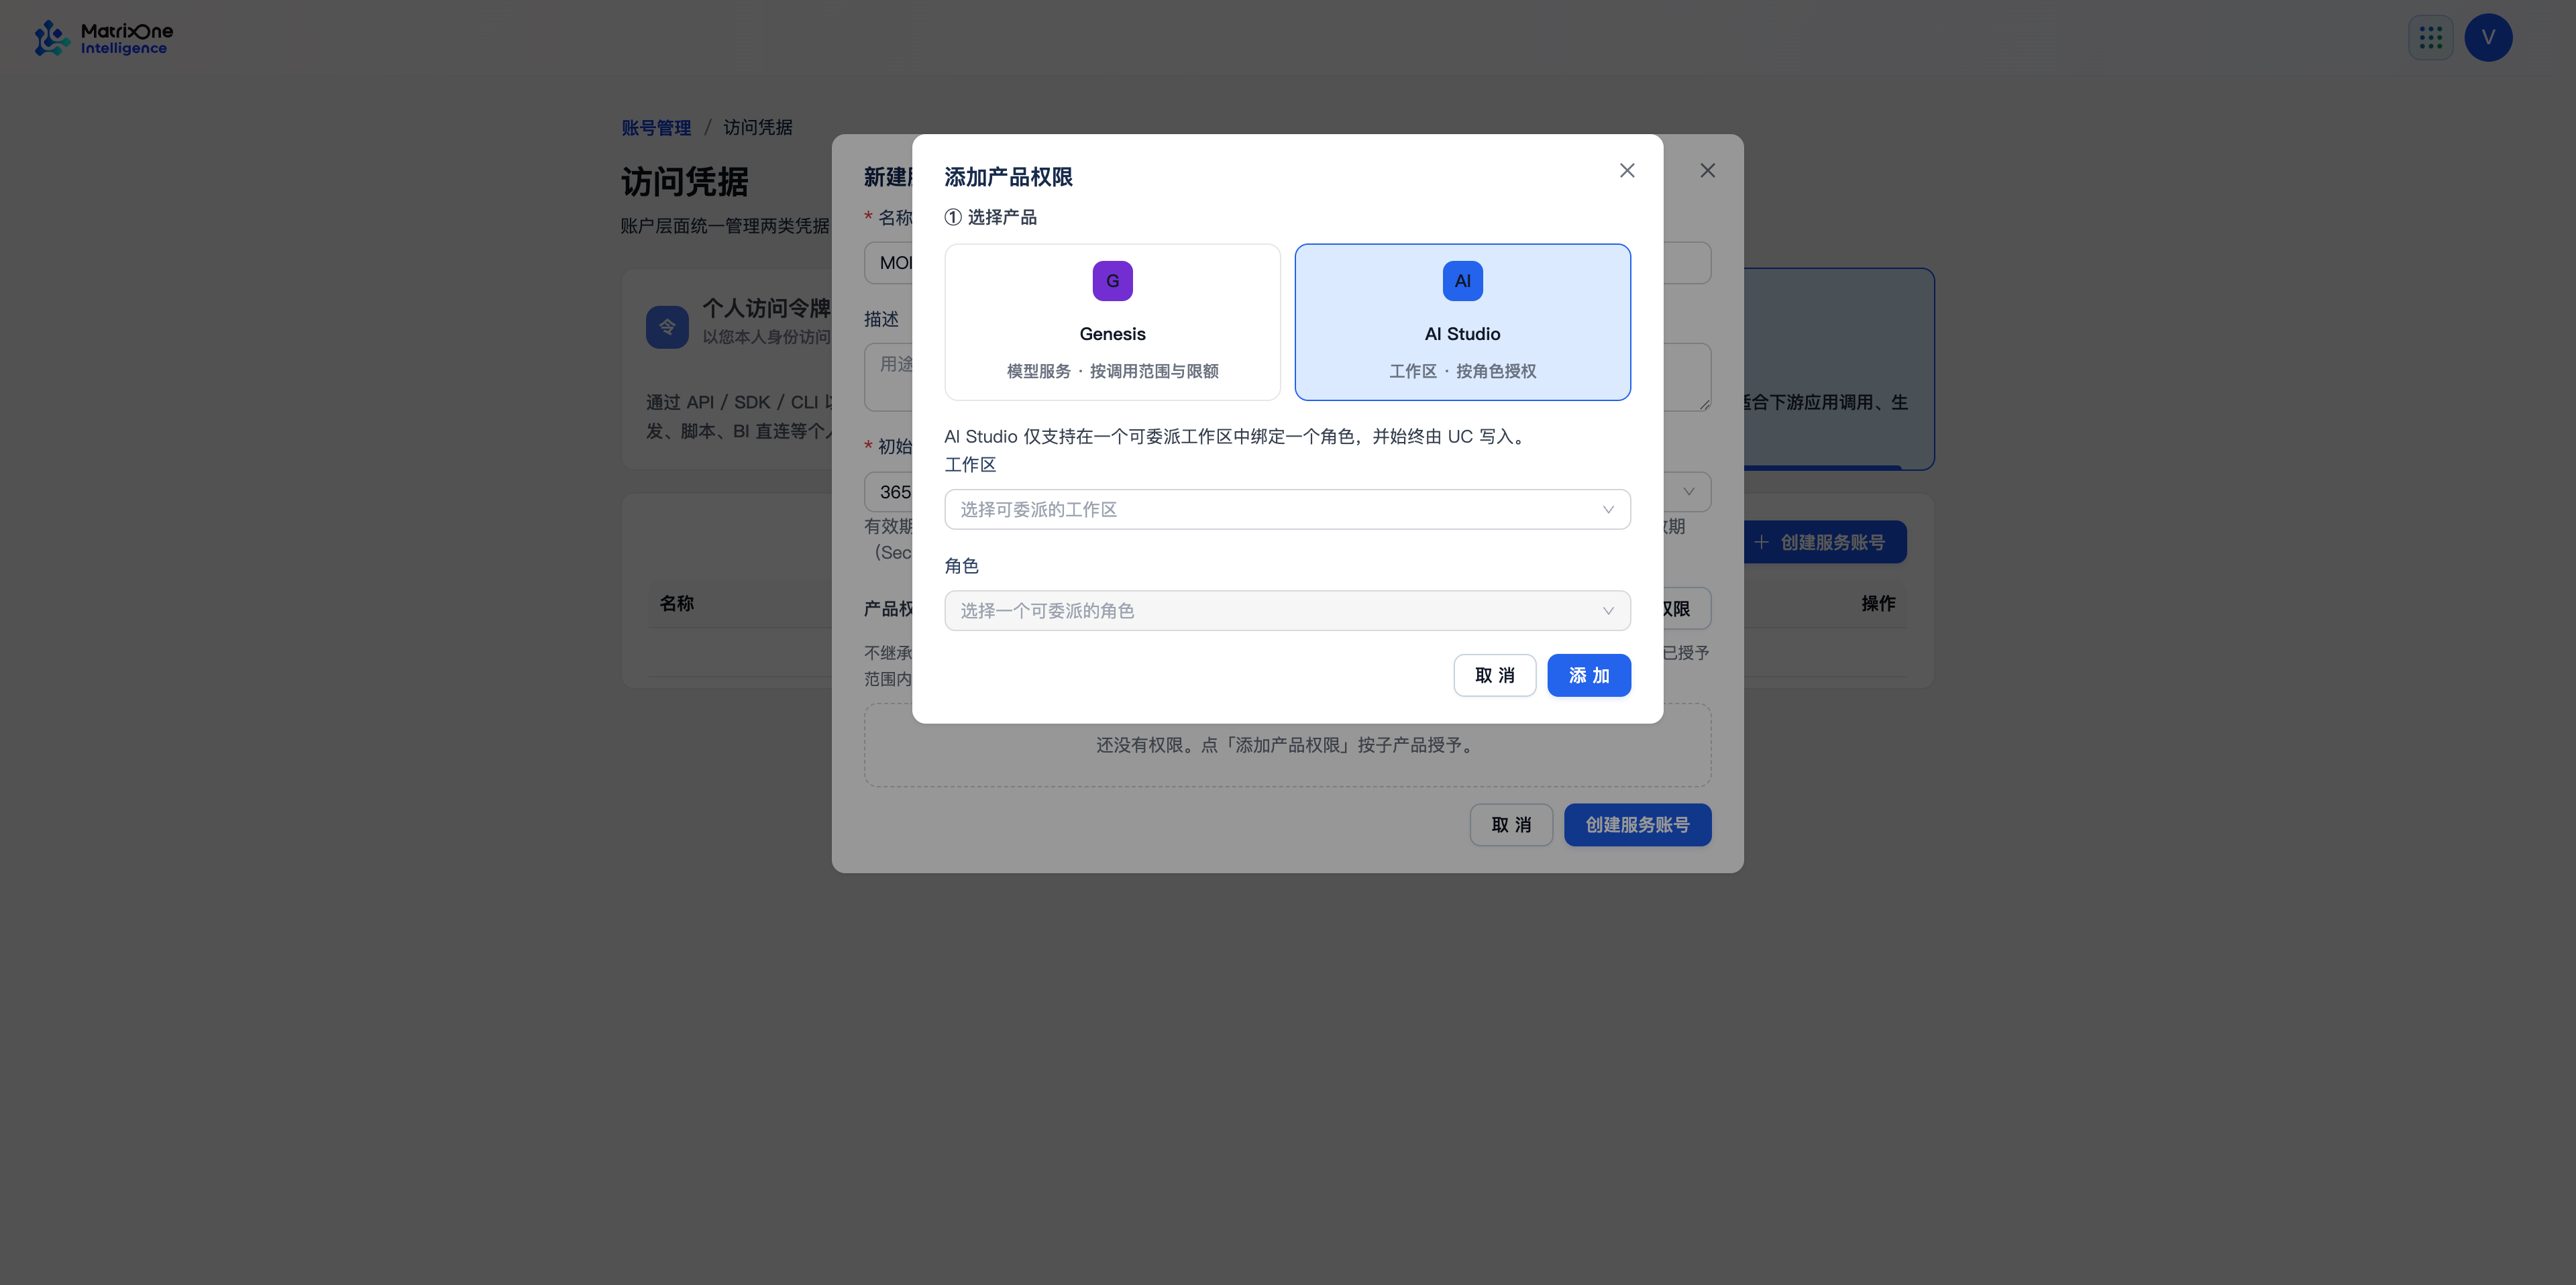
Click Add product permission.
Select Genesis in the product selection window, then click Add.
Select the models the service account can call. Configure quota and rate limits if needed.
Complete the product permission configuration, create the account, and save its Genesis API key as directed by the page.
The validity period belongs to each Secret or API key, independently of the service account’s lifecycle. Separate service accounts for applications, environments, or automation tasks make permissions, rotation, and disabling easier to manage.
Configure Genesis permission
Select Genesis for model-service authorization, then configure callable models, quotas, and rate limits.
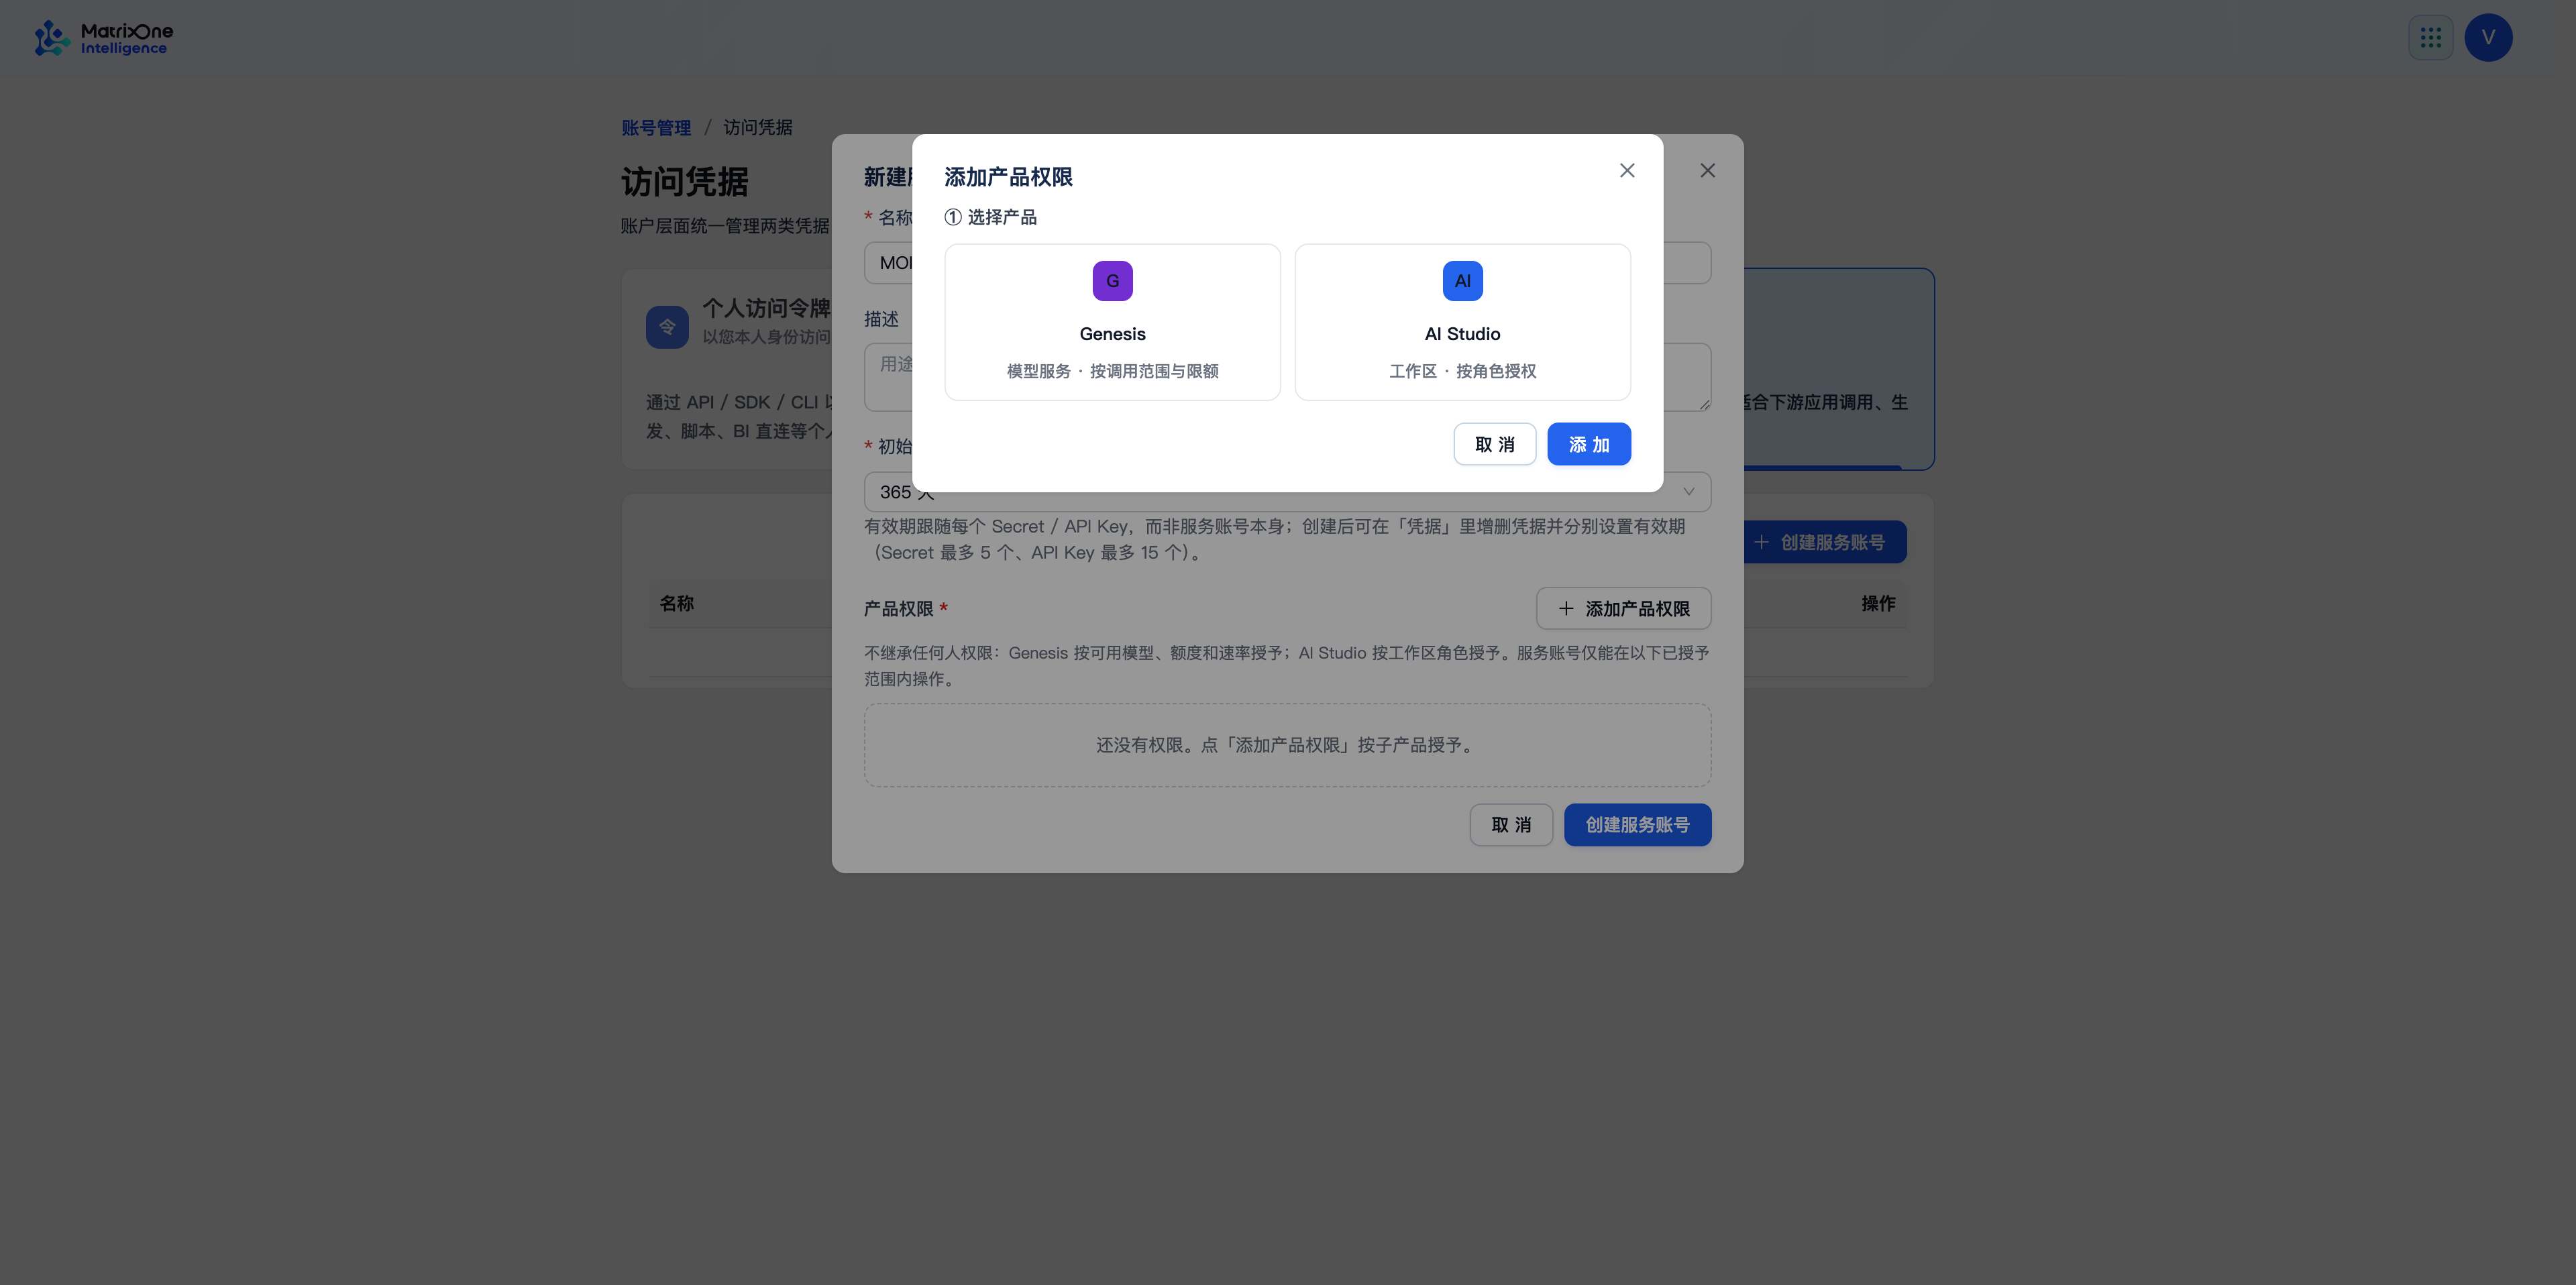
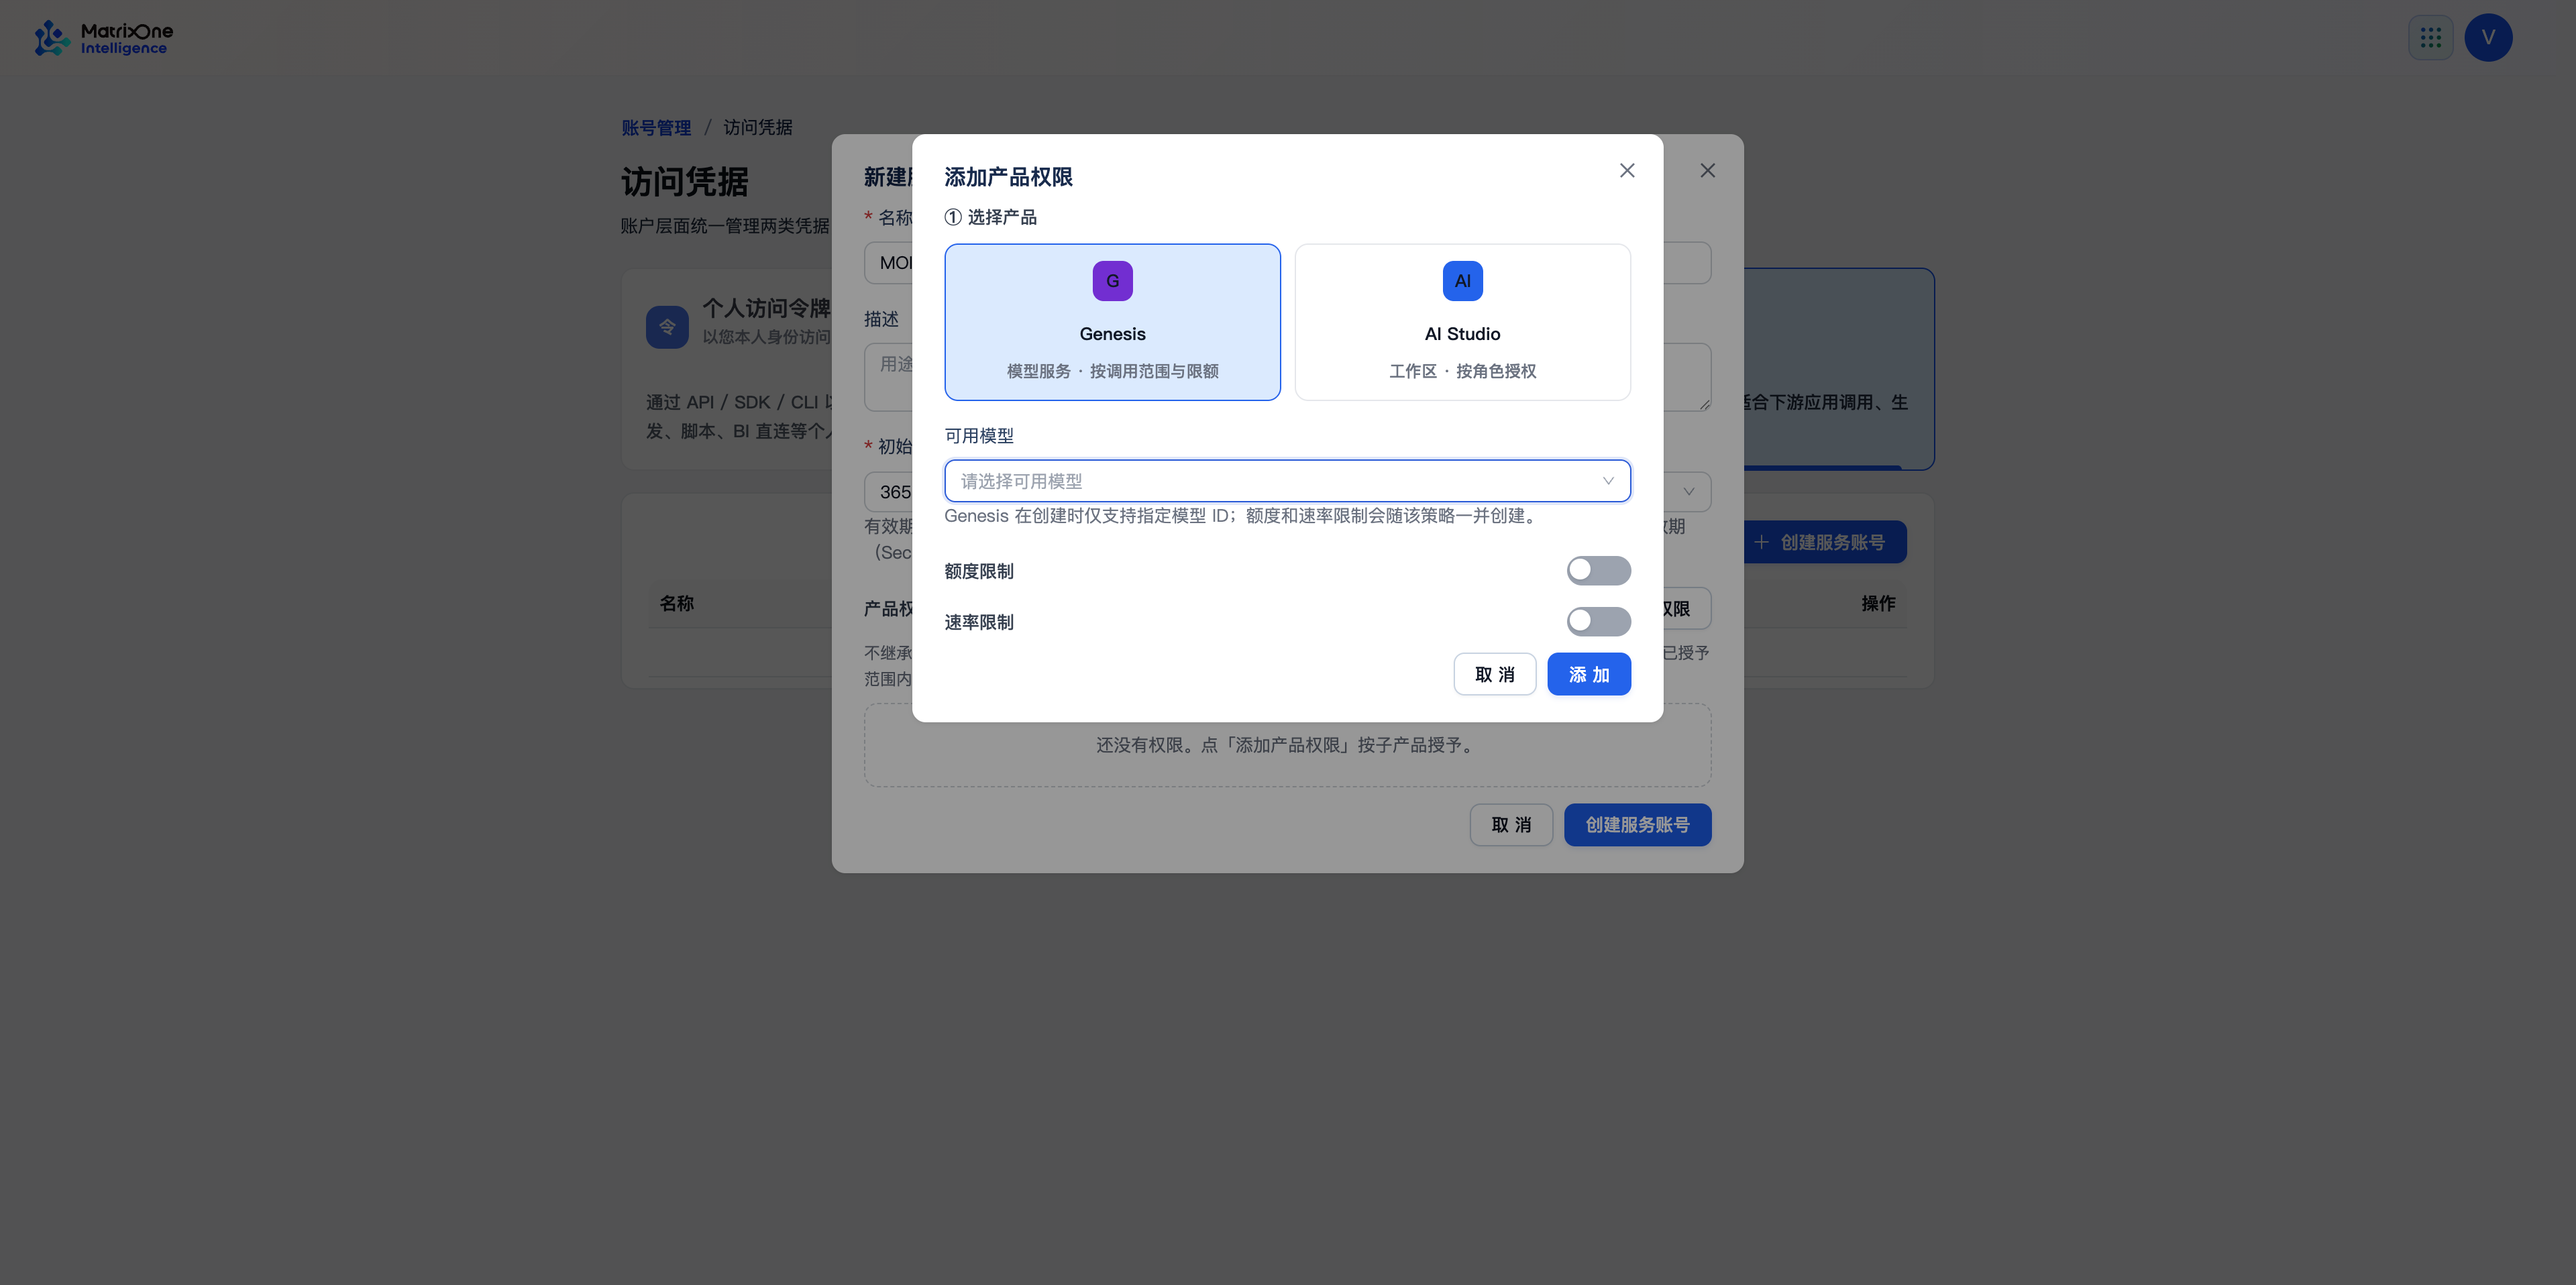
Select Genesis.
Under Available models, select the models this service account can call.
If needed, enable Quota limits or Rate limits and set their values.
Click Add, then return to the creation window and finish creating the account.
Note
AI Studio authorization assigns workspaces and roles. Select Genesis when configuring a service account’s model-call permissions.
Create a local key on the Genesis Keys page
If the Keys page shows + Create key, use the following steps:
Open Keys and click + Create key.
Enter a key name and, optionally, a note.
Under Available models, select All models or Specified models.
If needed, enable quota limits and set total and daily limits.
If needed, enable rate limits and set concurrency, RPM, and TPM.
Select the expiration: never, one day, one month, or a custom time.
Click Create and copy the complete key from the success dialog.
The success dialog provides a copy button for newly created or updated keys. If plaintext was not saved, the list’s copy button is unavailable; update the key and copy its new value.
Manage existing keys
The Keys list shows names, allowed models, quotas, rates, expiration, and status. It provides these actions:
Edit: Change the name, note, model scope, or limits.
Enable/disable: Change the key’s status. Disabling affects calls made with that key.
Update: Generate a new key value. The old value becomes invalid immediately; replace it in applications.
Delete: Remove the key record after confirming that applications no longer use it.
Next steps
After obtaining a credential, follow Integrate with apps to confirm the model and endpoint before sending an application request.