Quick Start with GenAI Workspace
In this document, we will guide you through the quick creation and usage of a GenAI workspace.
Step 1: Create a MatrixOne Intelligence Account
1. Register for MatrixOne Intelligence
- Visit the MatrixOne Intelligence registration page.
- Fill in your registration details and click Register.
Note: The email address you provide during registration will automatically become your MatrixOne Intelligence account.
2. Activate Your MatrixOne Intelligence Account
After clicking Register, we will send an activation email to the provided address. Follow the link in the email to complete the activation.
3. Log In to Your MatrixOne Intelligence Account
Once activated, you will be redirected to the login page. Enter your account credentials to log in to the MatrixOne Intelligence management platform.
Step 2: Create a GenAI Workspace
1. Open the Workspace Creation Page
On the GenAI Workspace page, click the Create Workspace button.
2. Configure Workspace Information
- Name: Assign a name to your workspace.
- Admin Name: Choose an admin name for your workspace or use the platform-generated default.
- Admin Password: Set an admin password.
3. Complete the Creation
Click Create to finish. After a few seconds, the status will change to Available, indicating the workspace has been successfully created.
Step 3: Access the Workspace
1. Open the Workspace Management Platform
Click the navigation icon next to the workspace list to open the login page for the workspace management platform.
2. Enter Admin Credentials
On the login page, provide the following details:
- Username: The admin name set during workspace creation (default:
admin). - Password: The admin password set during workspace creation.
Data Processing
1. Data Loading
- Navigate to the Data Loading page under the Data Access menu.
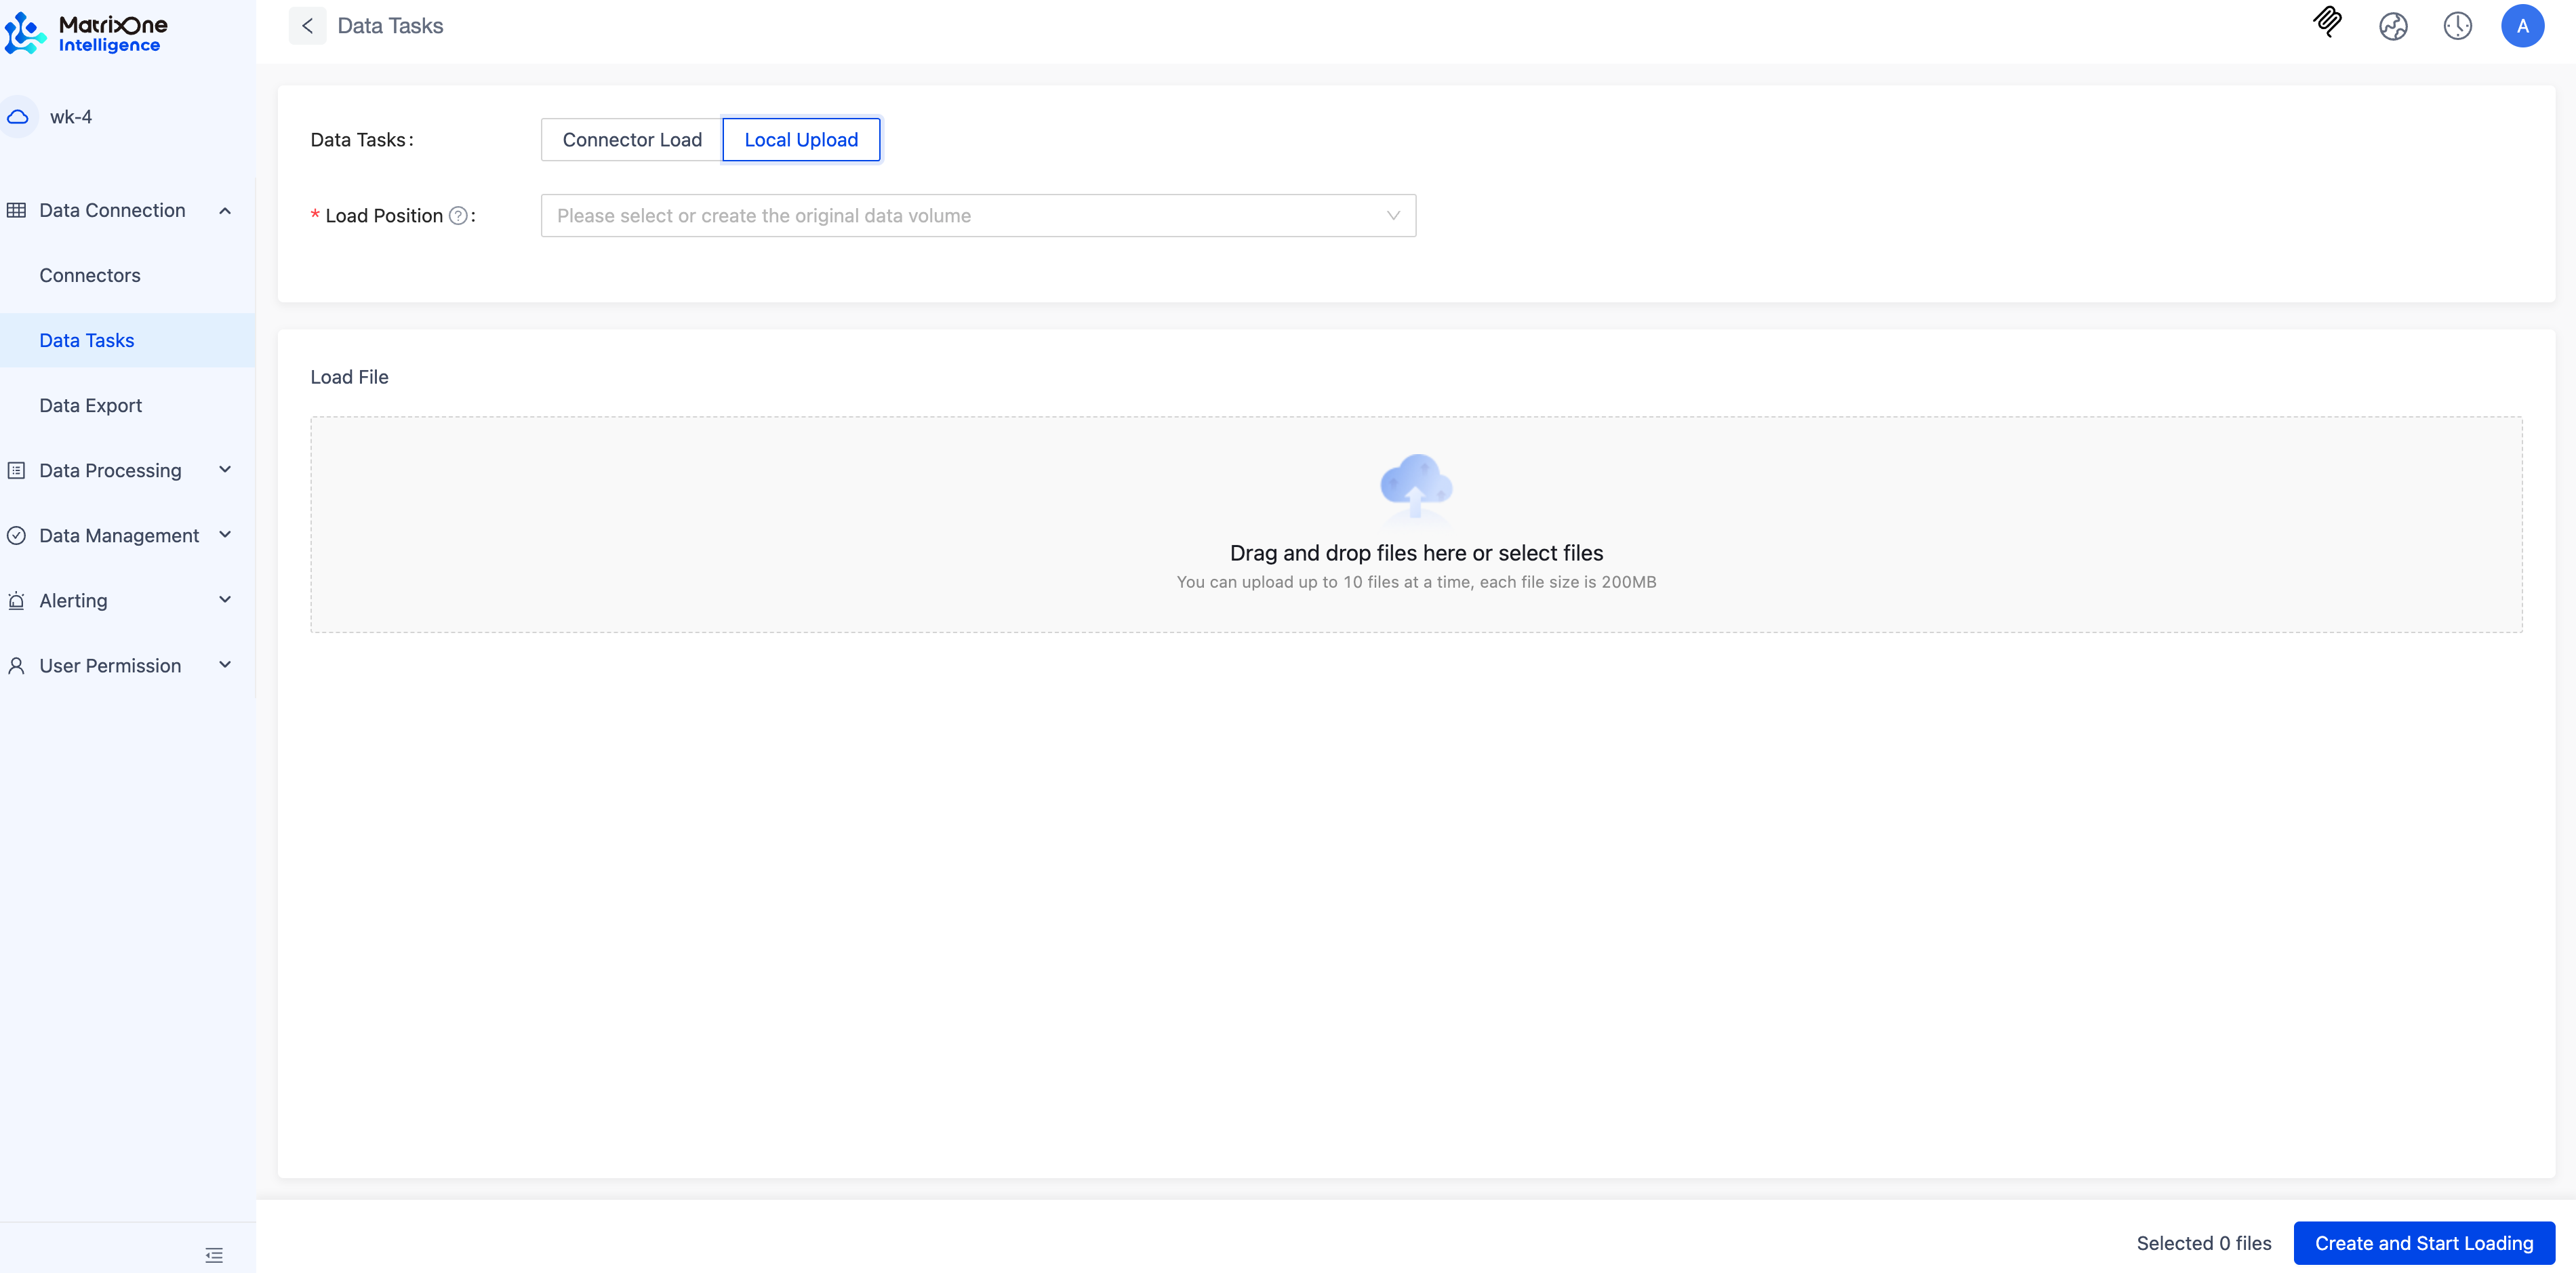
- Click Load Data in the upper-right corner of the Data Loading page.
- Select Local Upload and configure the following:
- Load Location: Add the raw data volume from the dropdown.
- Upload PDF File: Select the file to be loaded.
- Check the data loading list and wait for the status to change to Completed.
2. Create a Workflow
- Navigate to the Workflow page under the Data Processing menu.
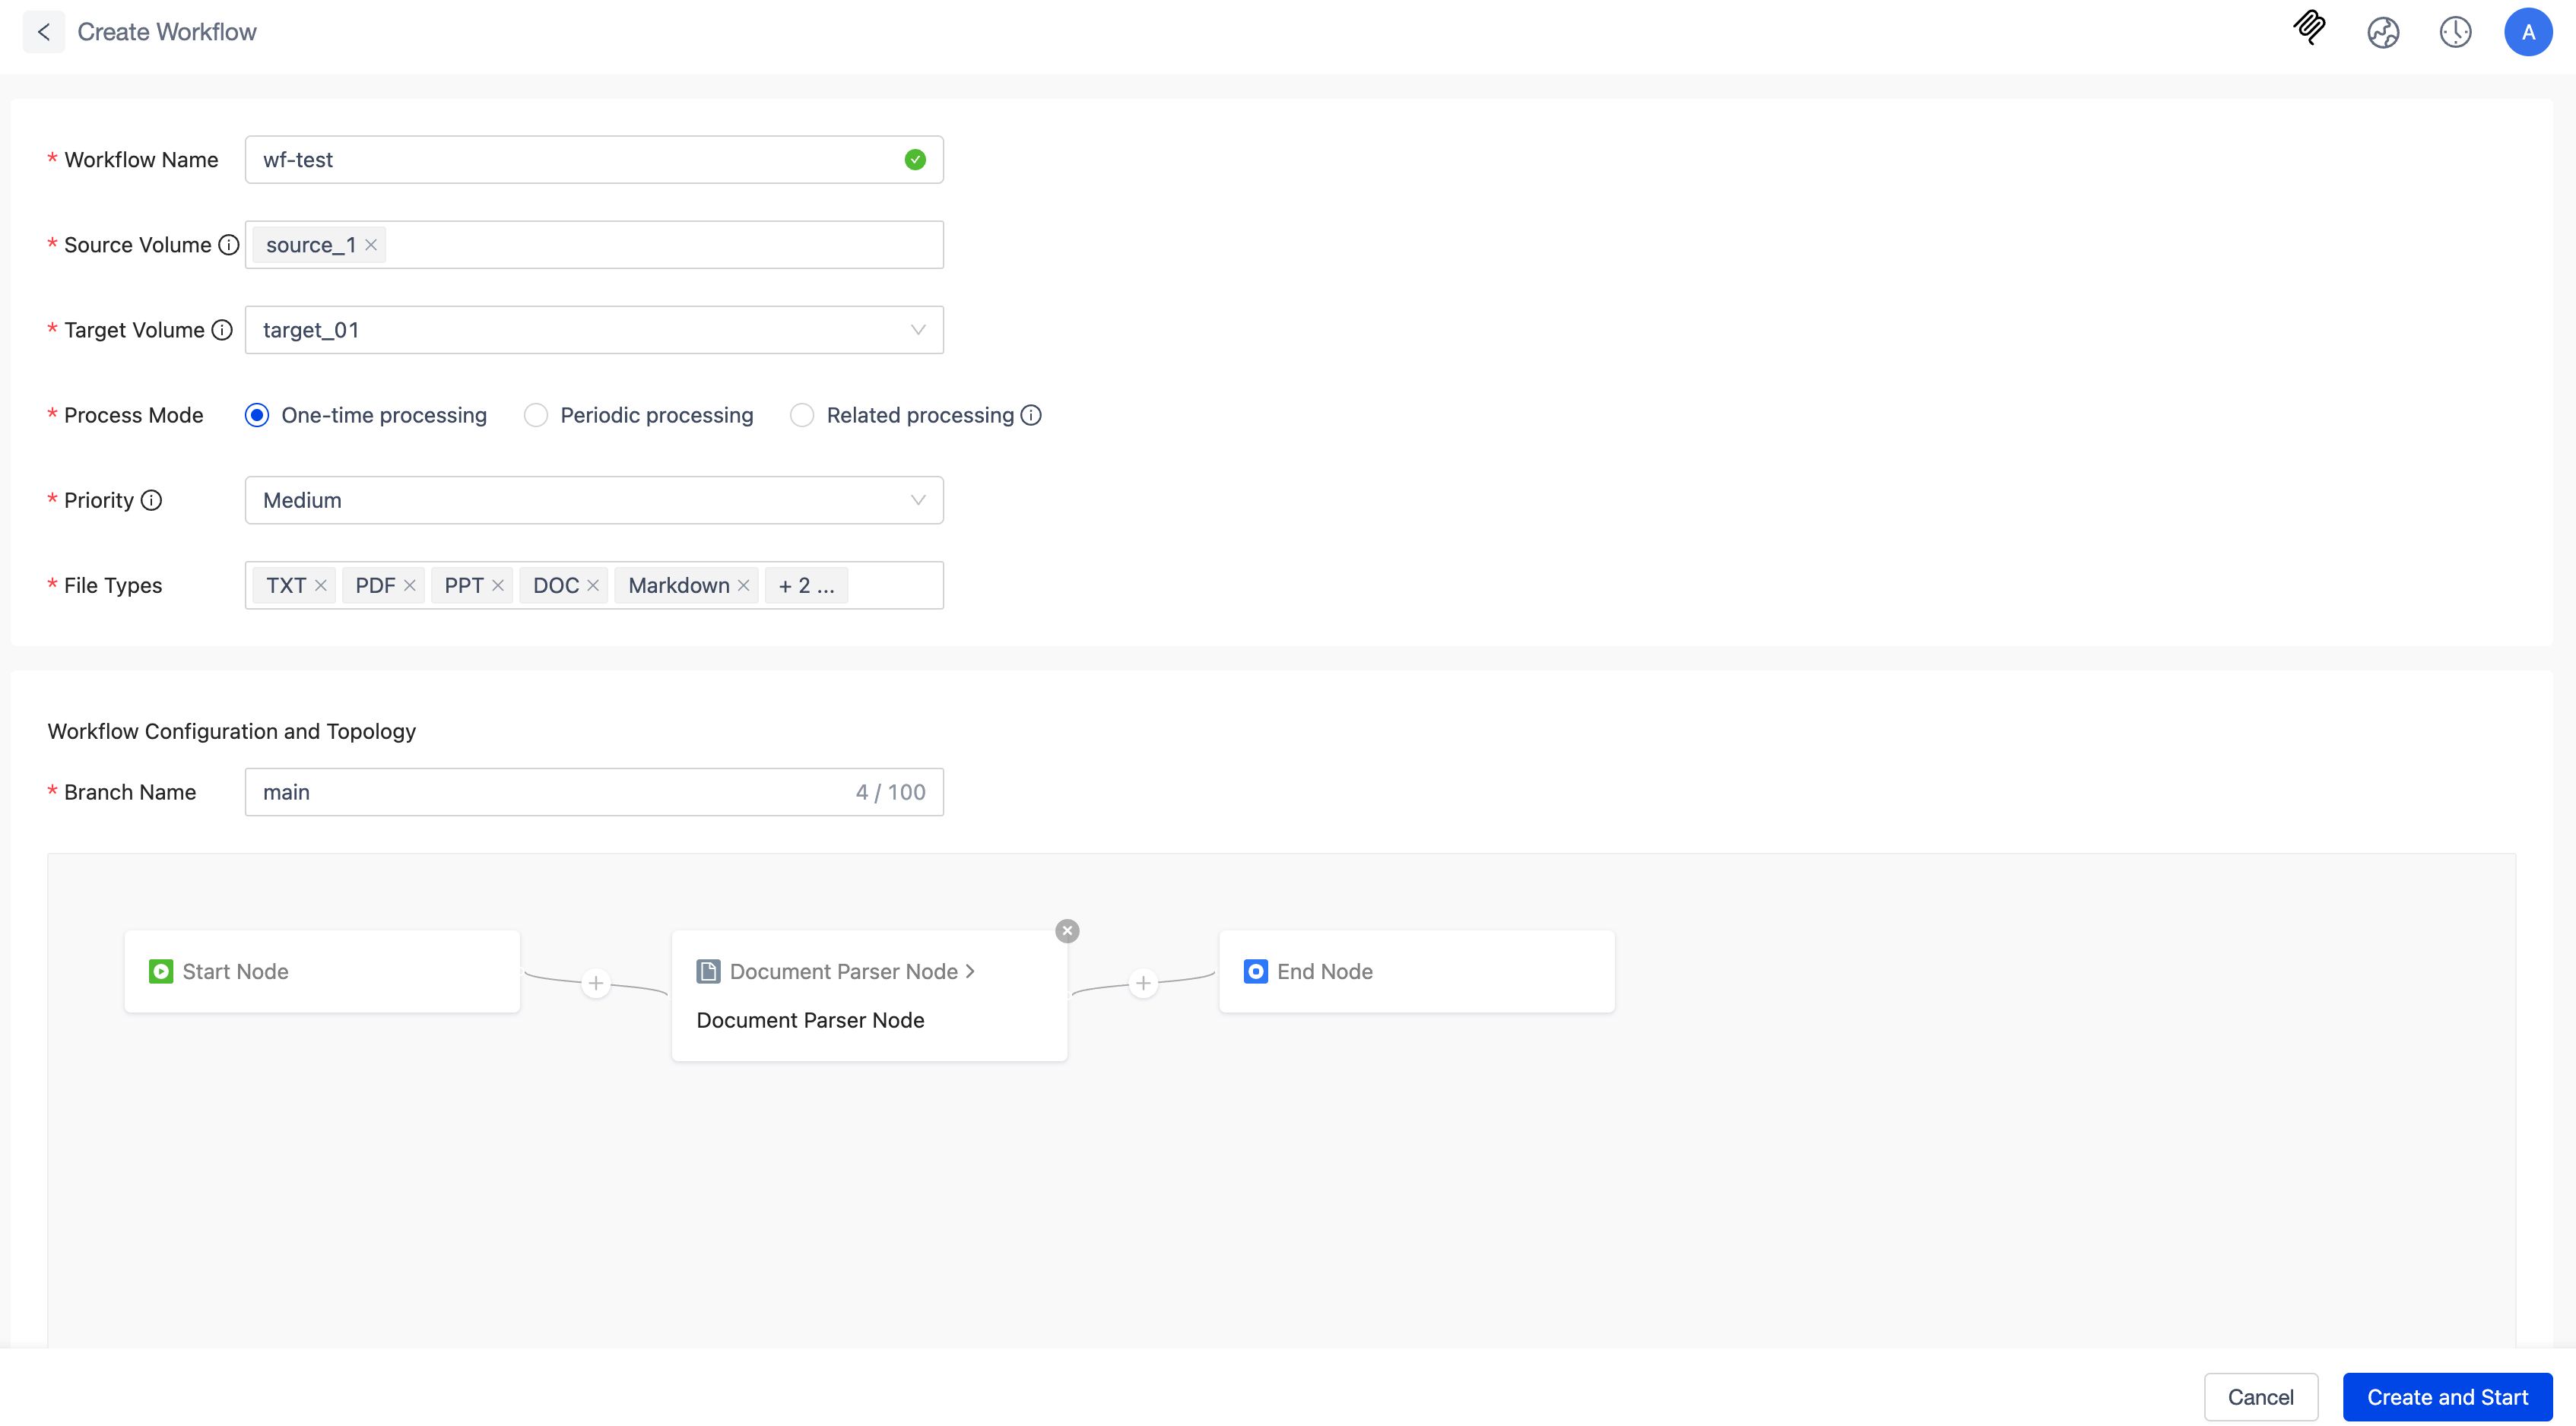
- Click Create Workflow in the upper-right corner of the Workflow page.
- Configure the workflow with the following details:
- Workflow Name
- Source Data Volume: Select the raw data volume created in the previous step.
- Target Data Volume: Add the target data volume from the dropdown.
- Processing Mode: Keep the default value.
- Priority: Keep the default value.
- File Type: Select Text.
- Branch Name: Keep the default value.
- Processing Flowchart: Retain only the text parsing node.
- Check the workflow list and wait for the status to change to Completed.
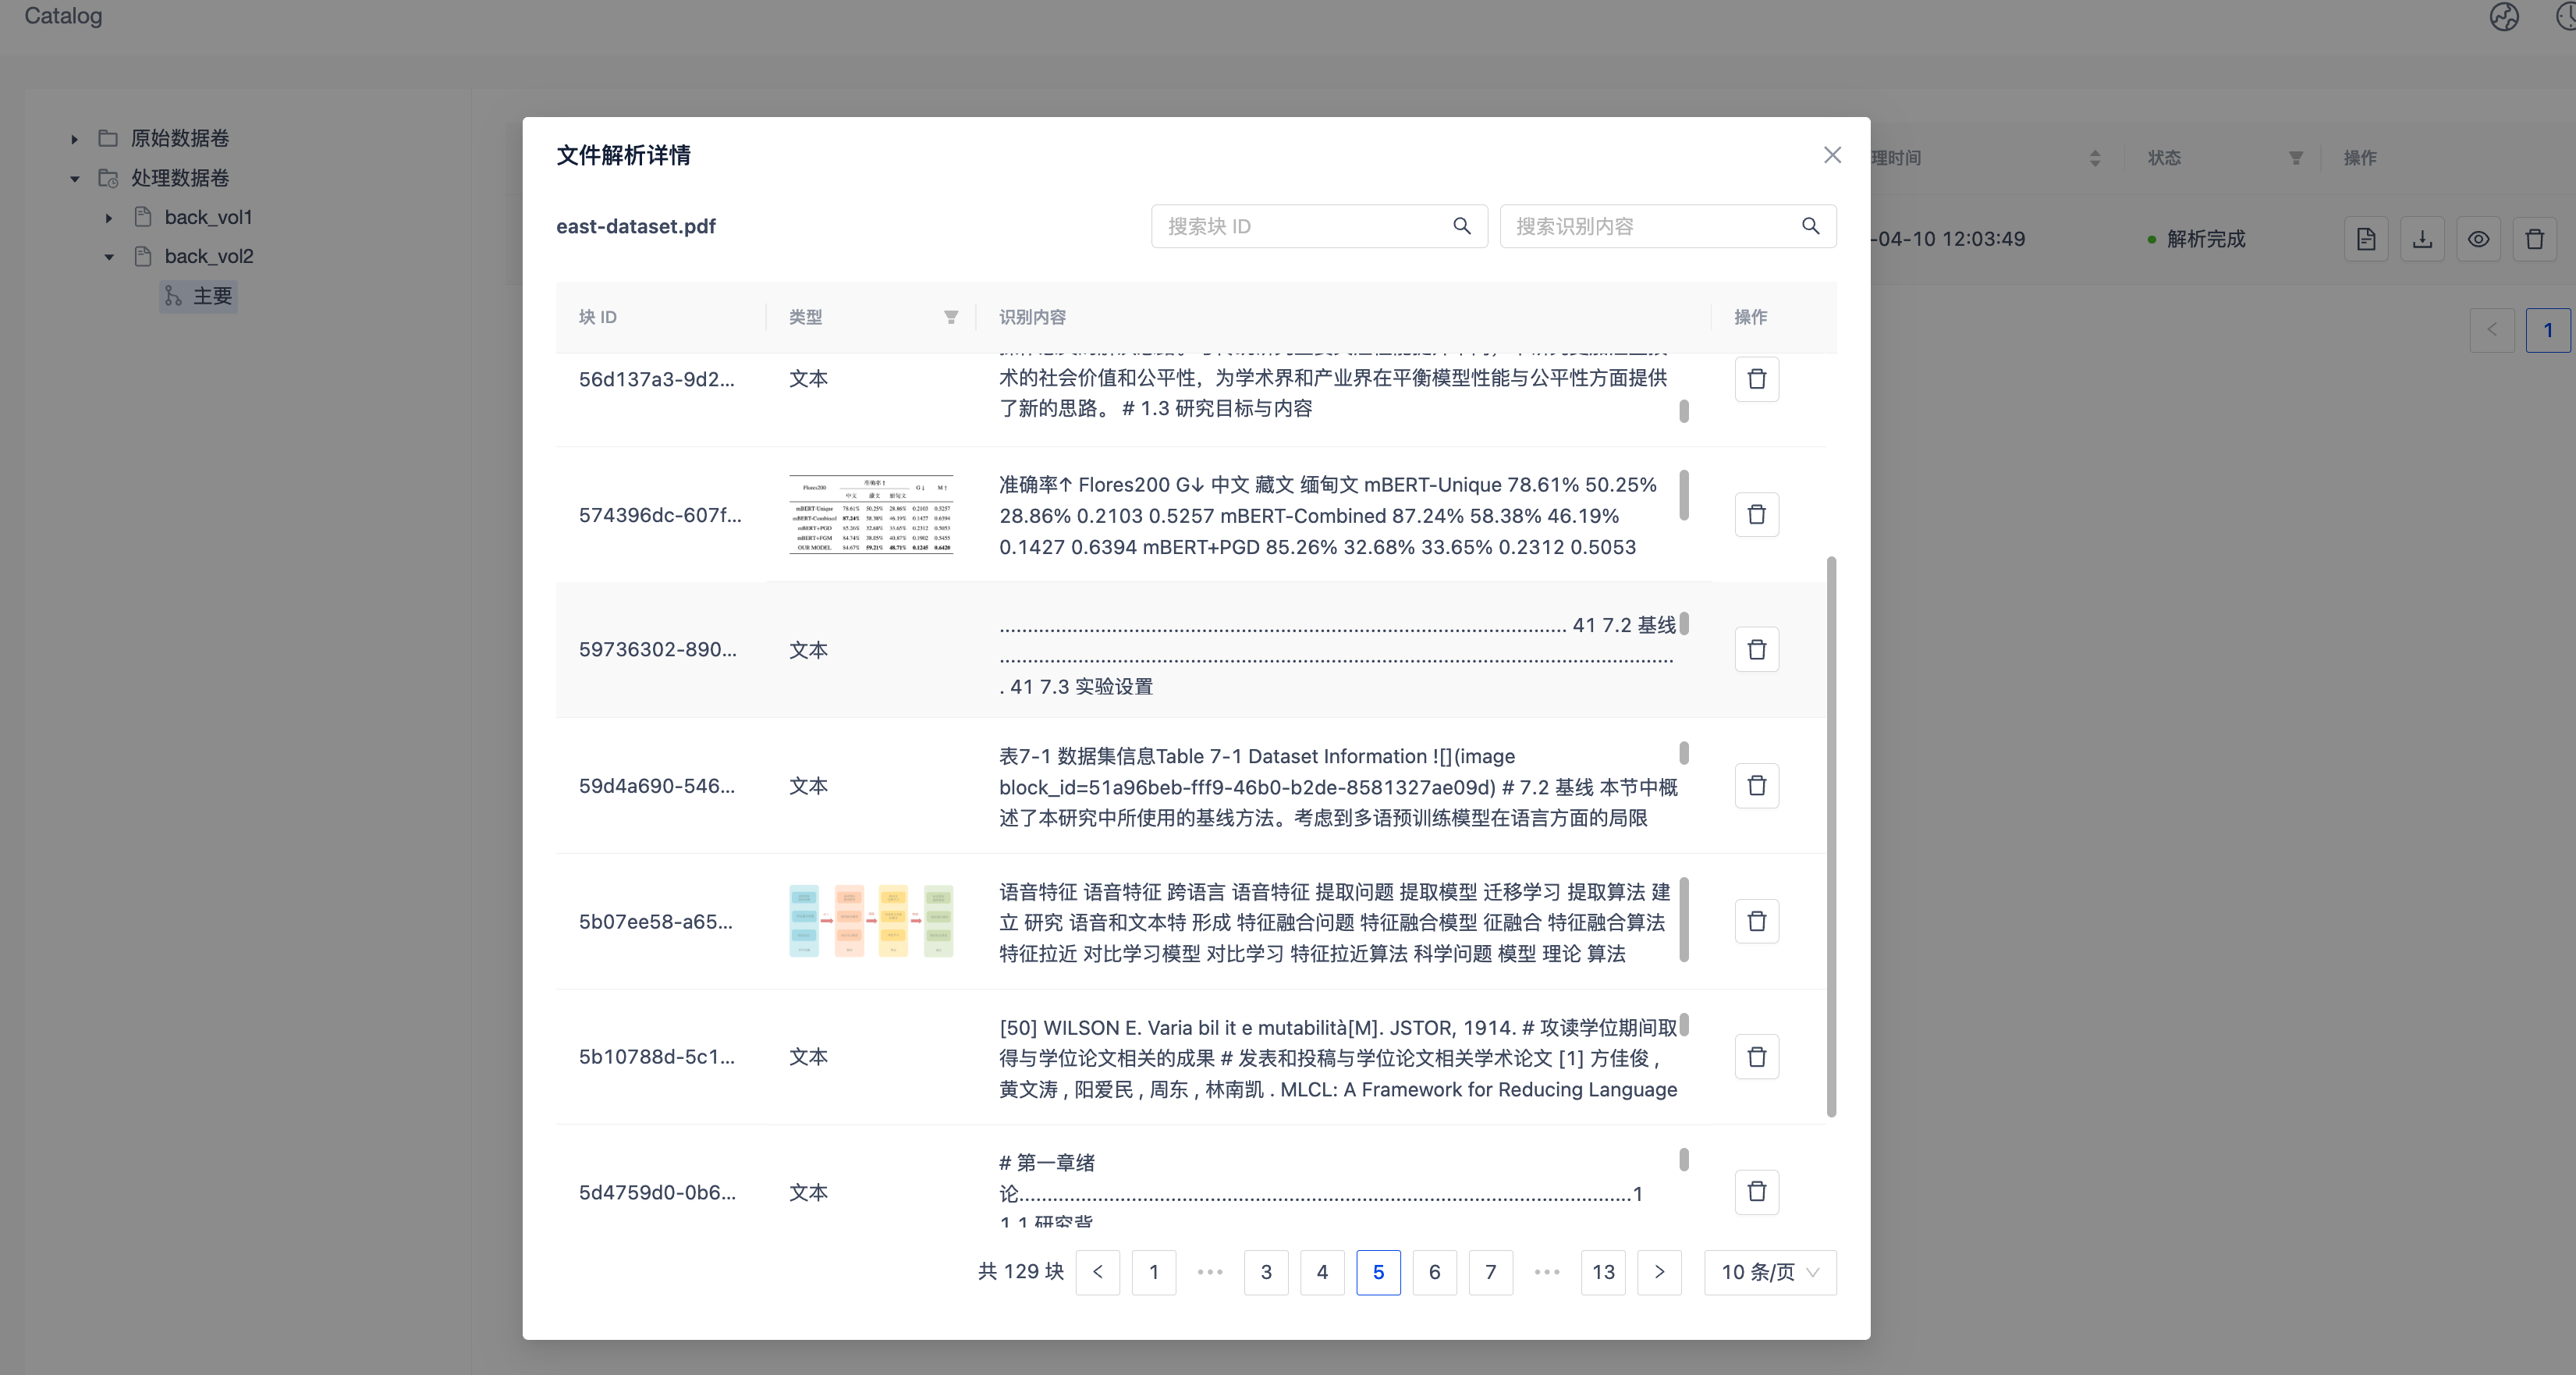
3. View File Parsing Results
- Navigate to the Catalog page under the Data Exploration menu.
- Locate the target data volume created in the previous step.
- Click the file name to view the parsing results.
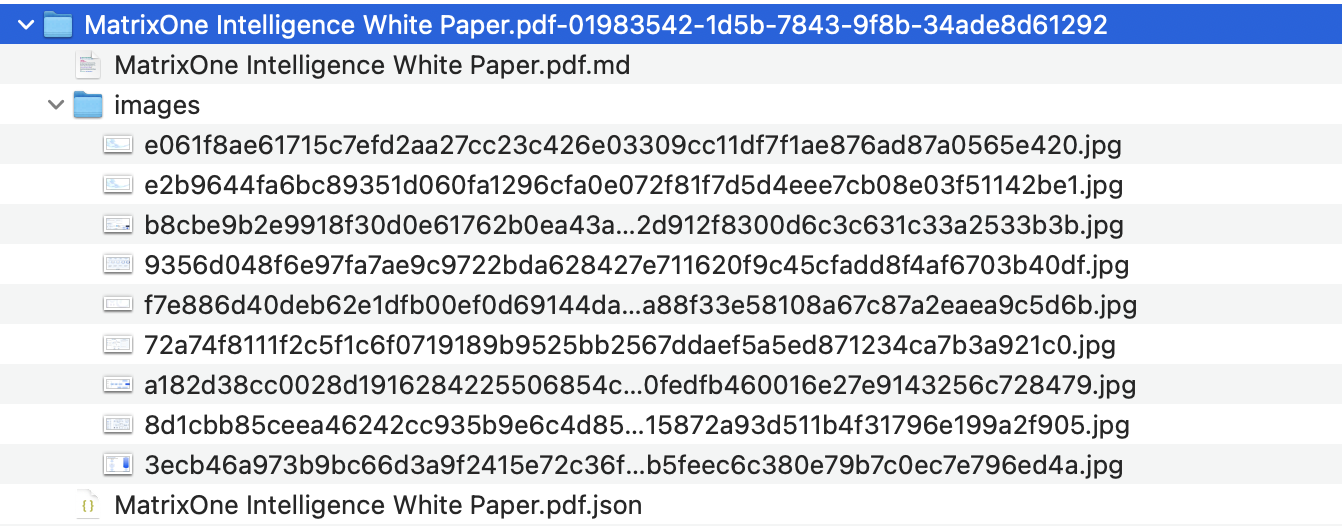
4. Download Parsed Data
Click the download button on the right to obtain a folder containing the parsed text and image resources. The folder includes:
- JSON File: Records the complete parsed text content, including file metadata, segment types, page numbers, and corresponding image metadata.
- Image Folder: Stores the parsed image resources for easy reference and use.
- full.md File: A complete Markdown file of the parsed content.
Congratulations! You have successfully created a GenAI workspace and completed the file processing workflow. For more details on GenAI workspace operations, refer to the GenAI Workspace section.
For additional support, consult our documentation or contact the support team.